
 ## Safety Attributes
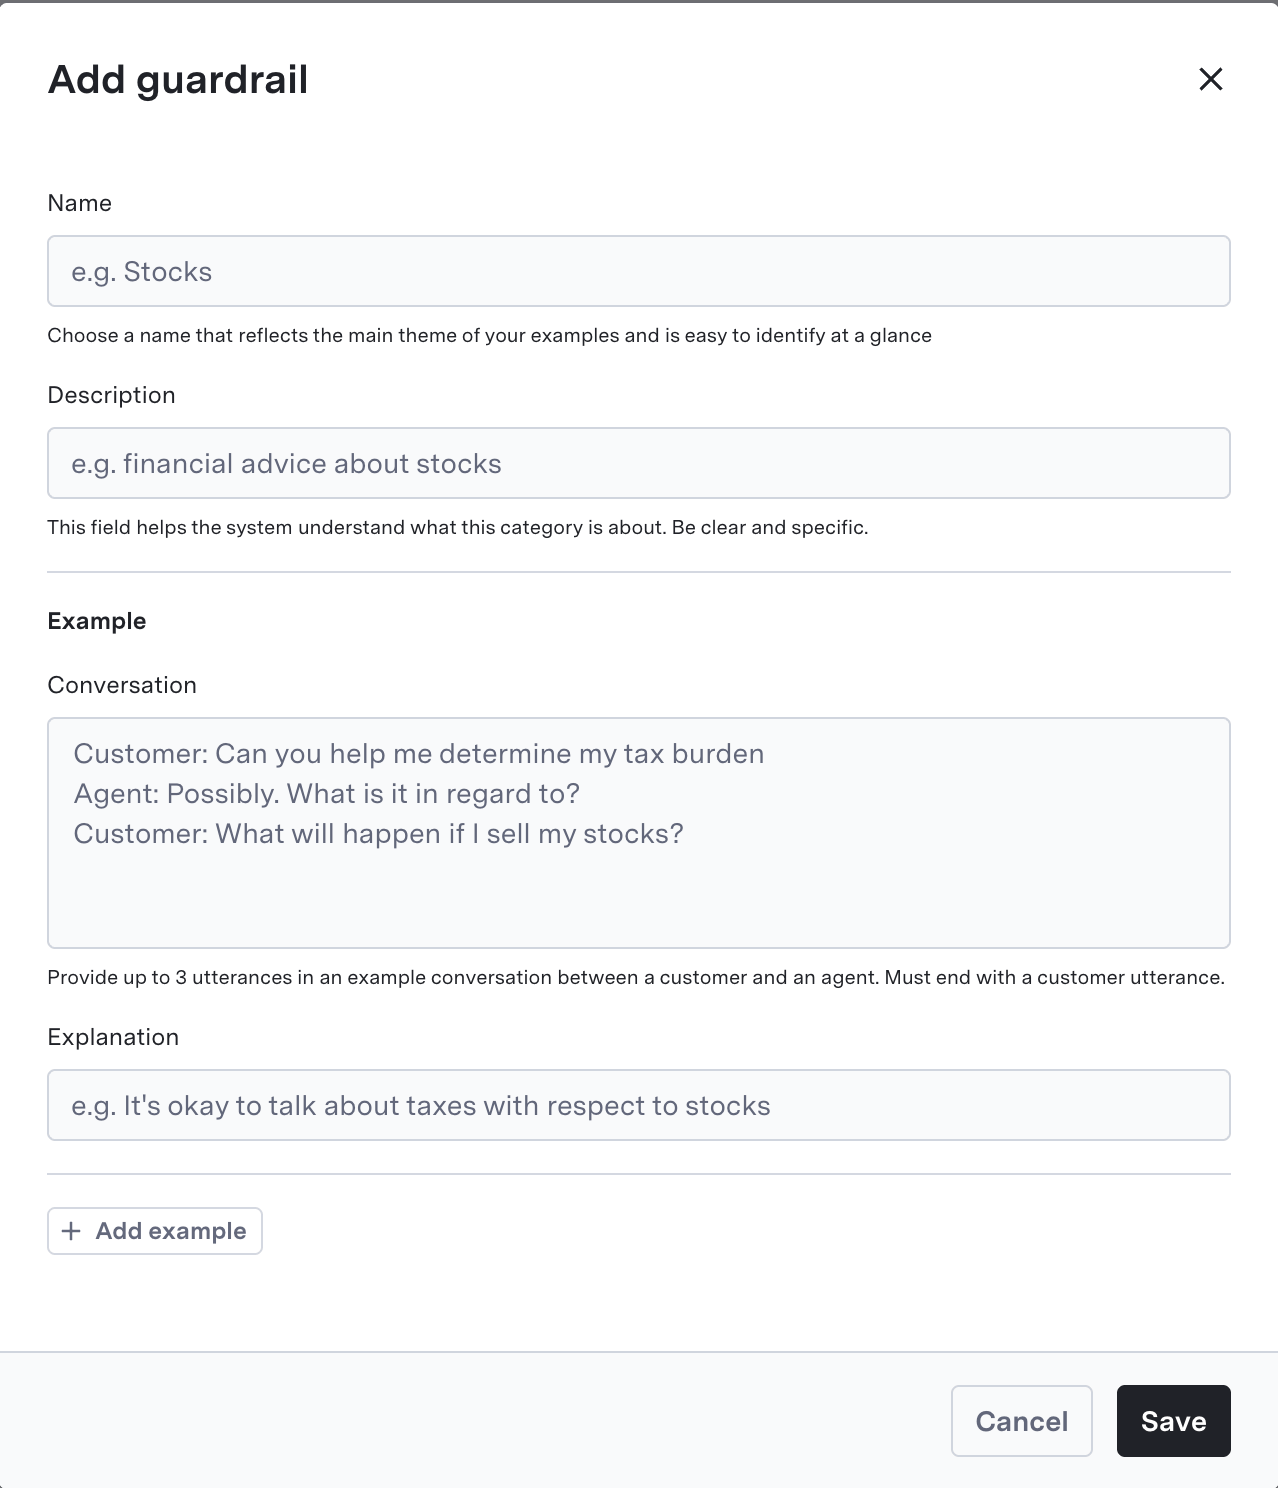
The Safety section allows you to add **Input Guardrails**, which are topics or content that the agent is allowed to discuss or respond to during interactions with customers. This helps ensure that the agent maintains appropriate and safe communication at all times.
To add an Input Guardrail, click on the **Add** button and specify:
* **Name**: A unique name that should reflect the main theme of the content (e.g., "Stocks", "Cancellations", etc).
* **Description**: A brief description that will help the agent understand the context and limitations of the content.
* **Example Conversation**: An example dialogue that illustrates how the agent should handle the topic or content within the guardrail. (e.g., "Customer: I want to cancel my subscription. Agent: Sure, I can help you with that.")
* **Example Explanation**: An explanation of why the example conversation is appropriate and how it aligns with the input guardrail.
You can add up to three examples. Once the examples are added, click the **Save** button.
## Safety Attributes
The Safety section allows you to add **Input Guardrails**, which are topics or content that the agent is allowed to discuss or respond to during interactions with customers. This helps ensure that the agent maintains appropriate and safe communication at all times.
To add an Input Guardrail, click on the **Add** button and specify:
* **Name**: A unique name that should reflect the main theme of the content (e.g., "Stocks", "Cancellations", etc).
* **Description**: A brief description that will help the agent understand the context and limitations of the content.
* **Example Conversation**: An example dialogue that illustrates how the agent should handle the topic or content within the guardrail. (e.g., "Customer: I want to cancel my subscription. Agent: Sure, I can help you with that.")
* **Example Explanation**: An explanation of why the example conversation is appropriate and how it aligns with the input guardrail.
You can add up to three examples. Once the examples are added, click the **Save** button.
 ## Voice Configuration
The Voice Configuration section allows you to set up the agent's voice and the Agent Version.
### Agent Version
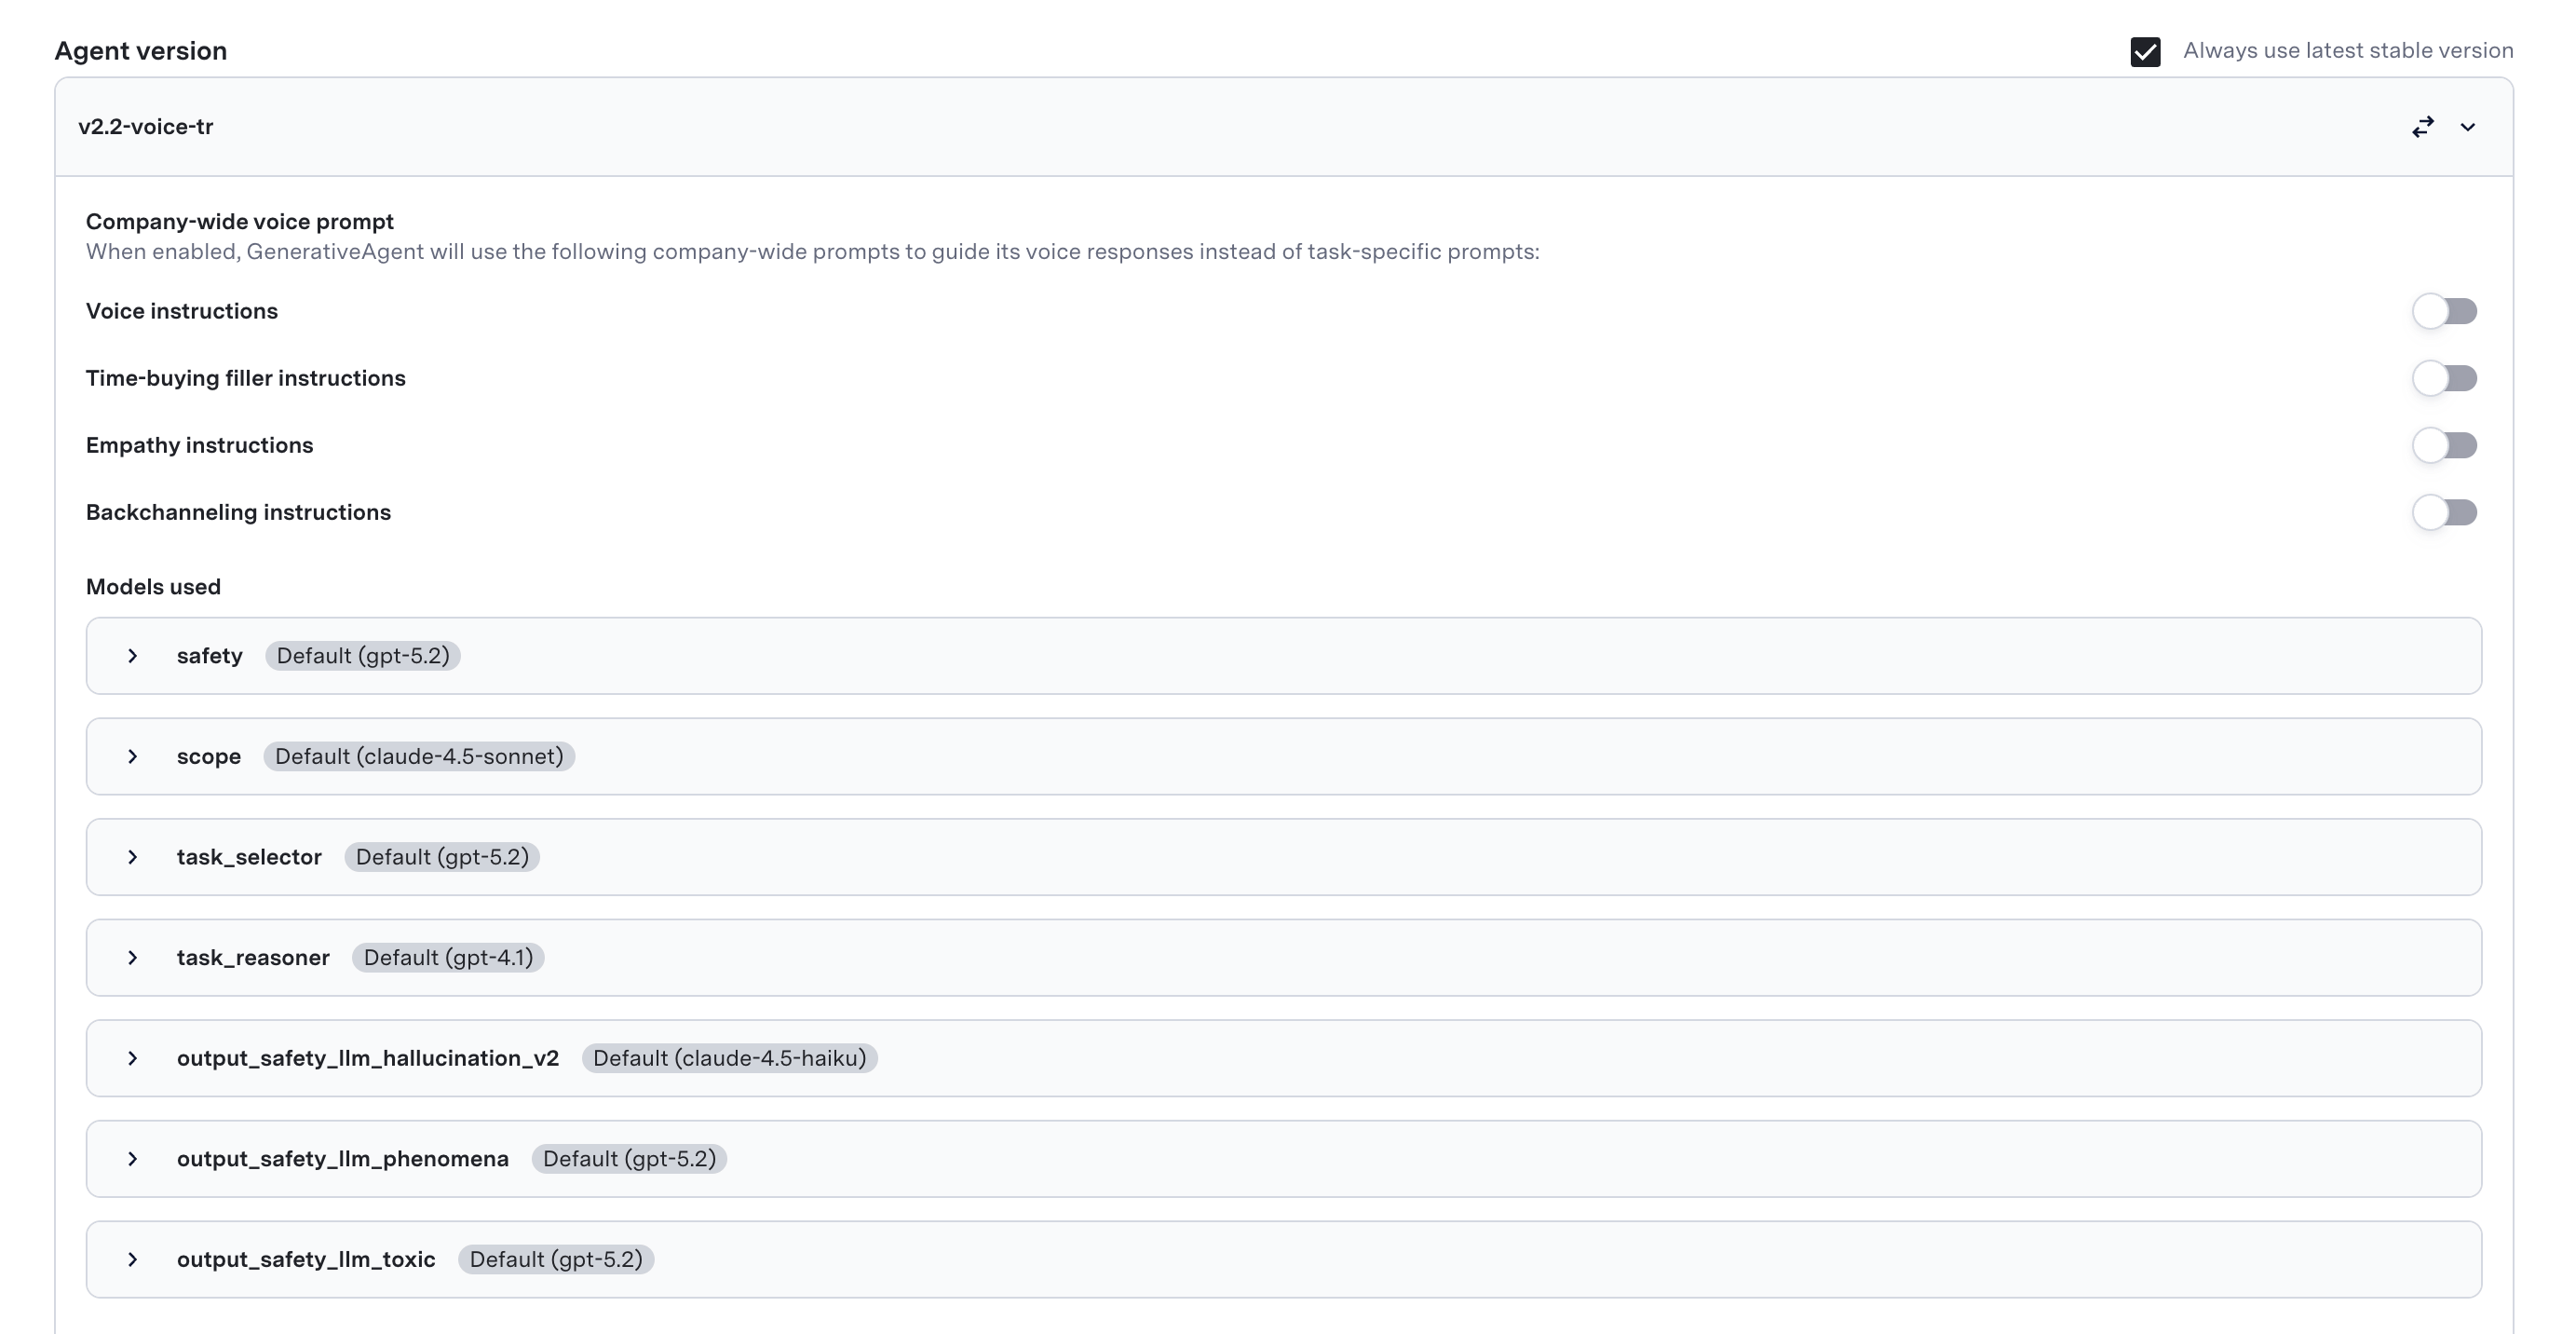
This setting allows you to specify Company-wide voice prompts and the version of the models that will be used during interactions with customers. You can swap between the different versions as needed.
You can also enable **"Always use latest stable version"** if you want the agent to automatically use the most recent stable version of the model.
Expand the Agent Version setting to configure:
## Voice Configuration
The Voice Configuration section allows you to set up the agent's voice and the Agent Version.
### Agent Version
This setting allows you to specify Company-wide voice prompts and the version of the models that will be used during interactions with customers. You can swap between the different versions as needed.
You can also enable **"Always use latest stable version"** if you want the agent to automatically use the most recent stable version of the model.
Expand the Agent Version setting to configure:
 ### Voice Selection
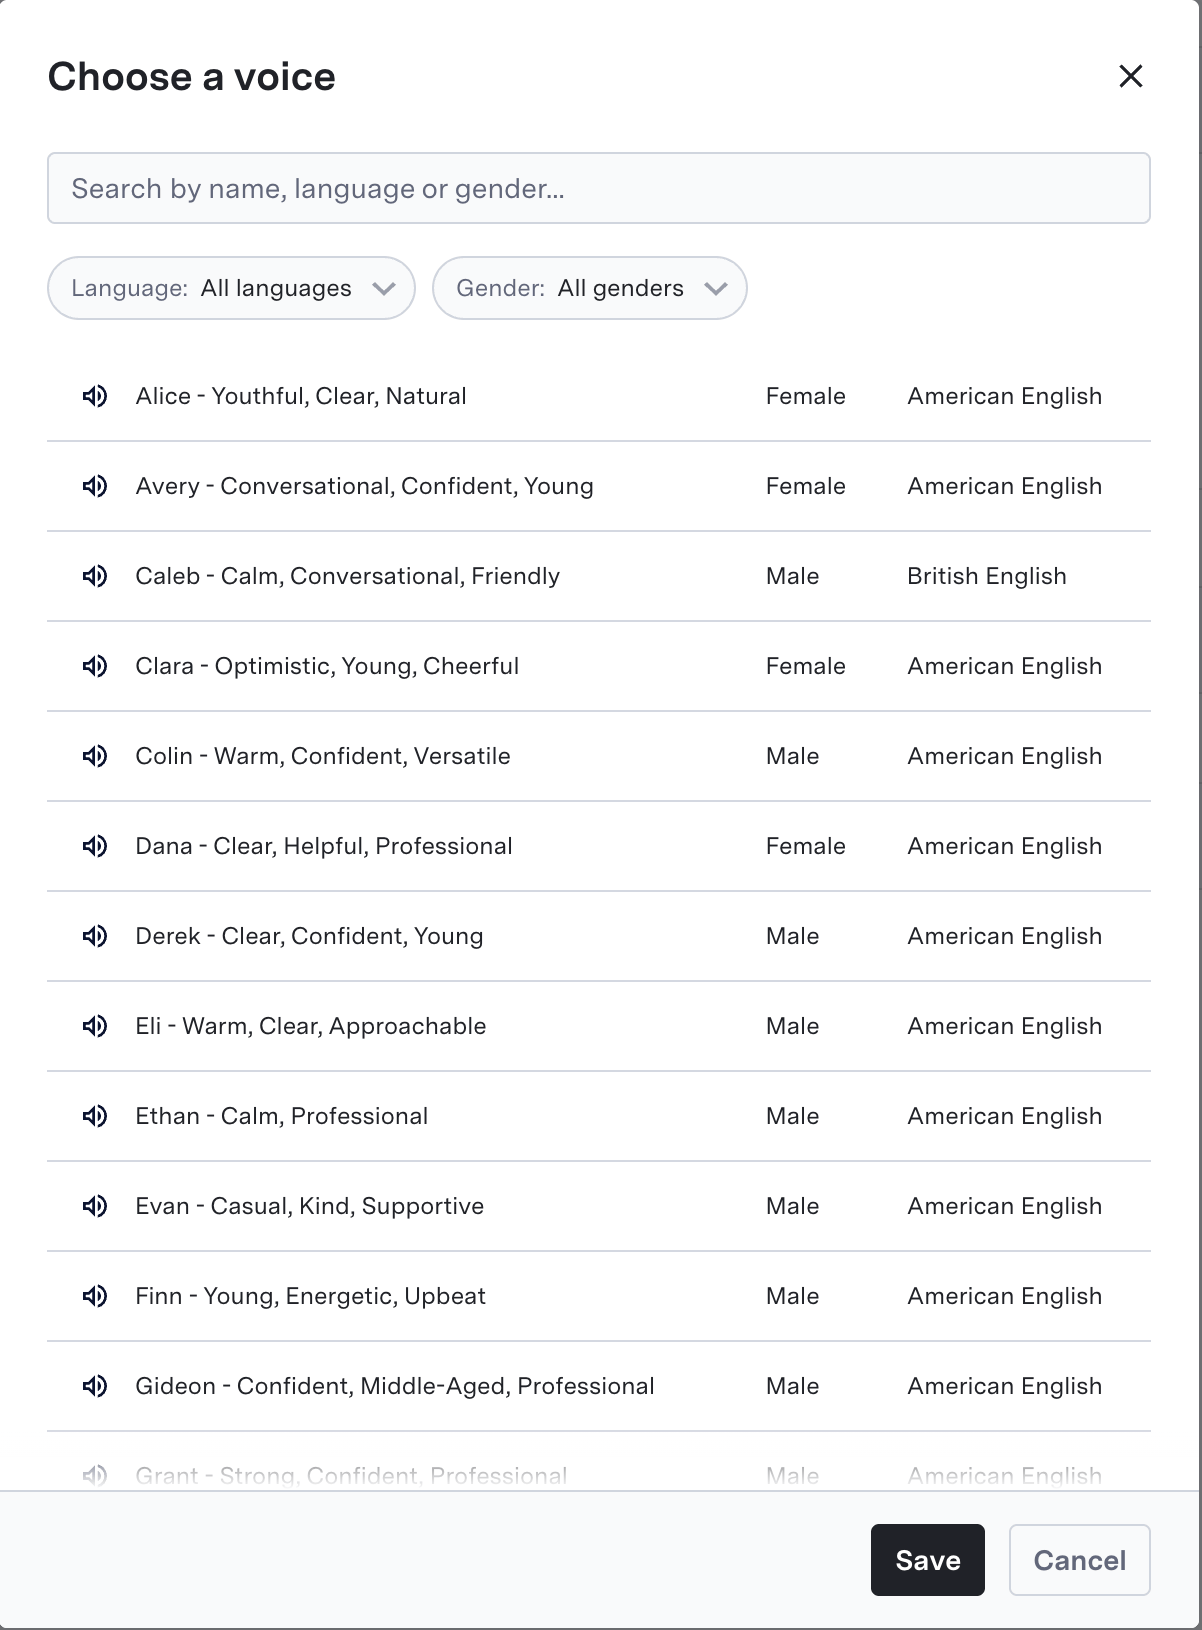
Select the voice for the agent from the available options. You can preview each voice before making a selection.
### Voice Selection
Select the voice for the agent from the available options. You can preview each voice before making a selection.
 ## Chat Configuration
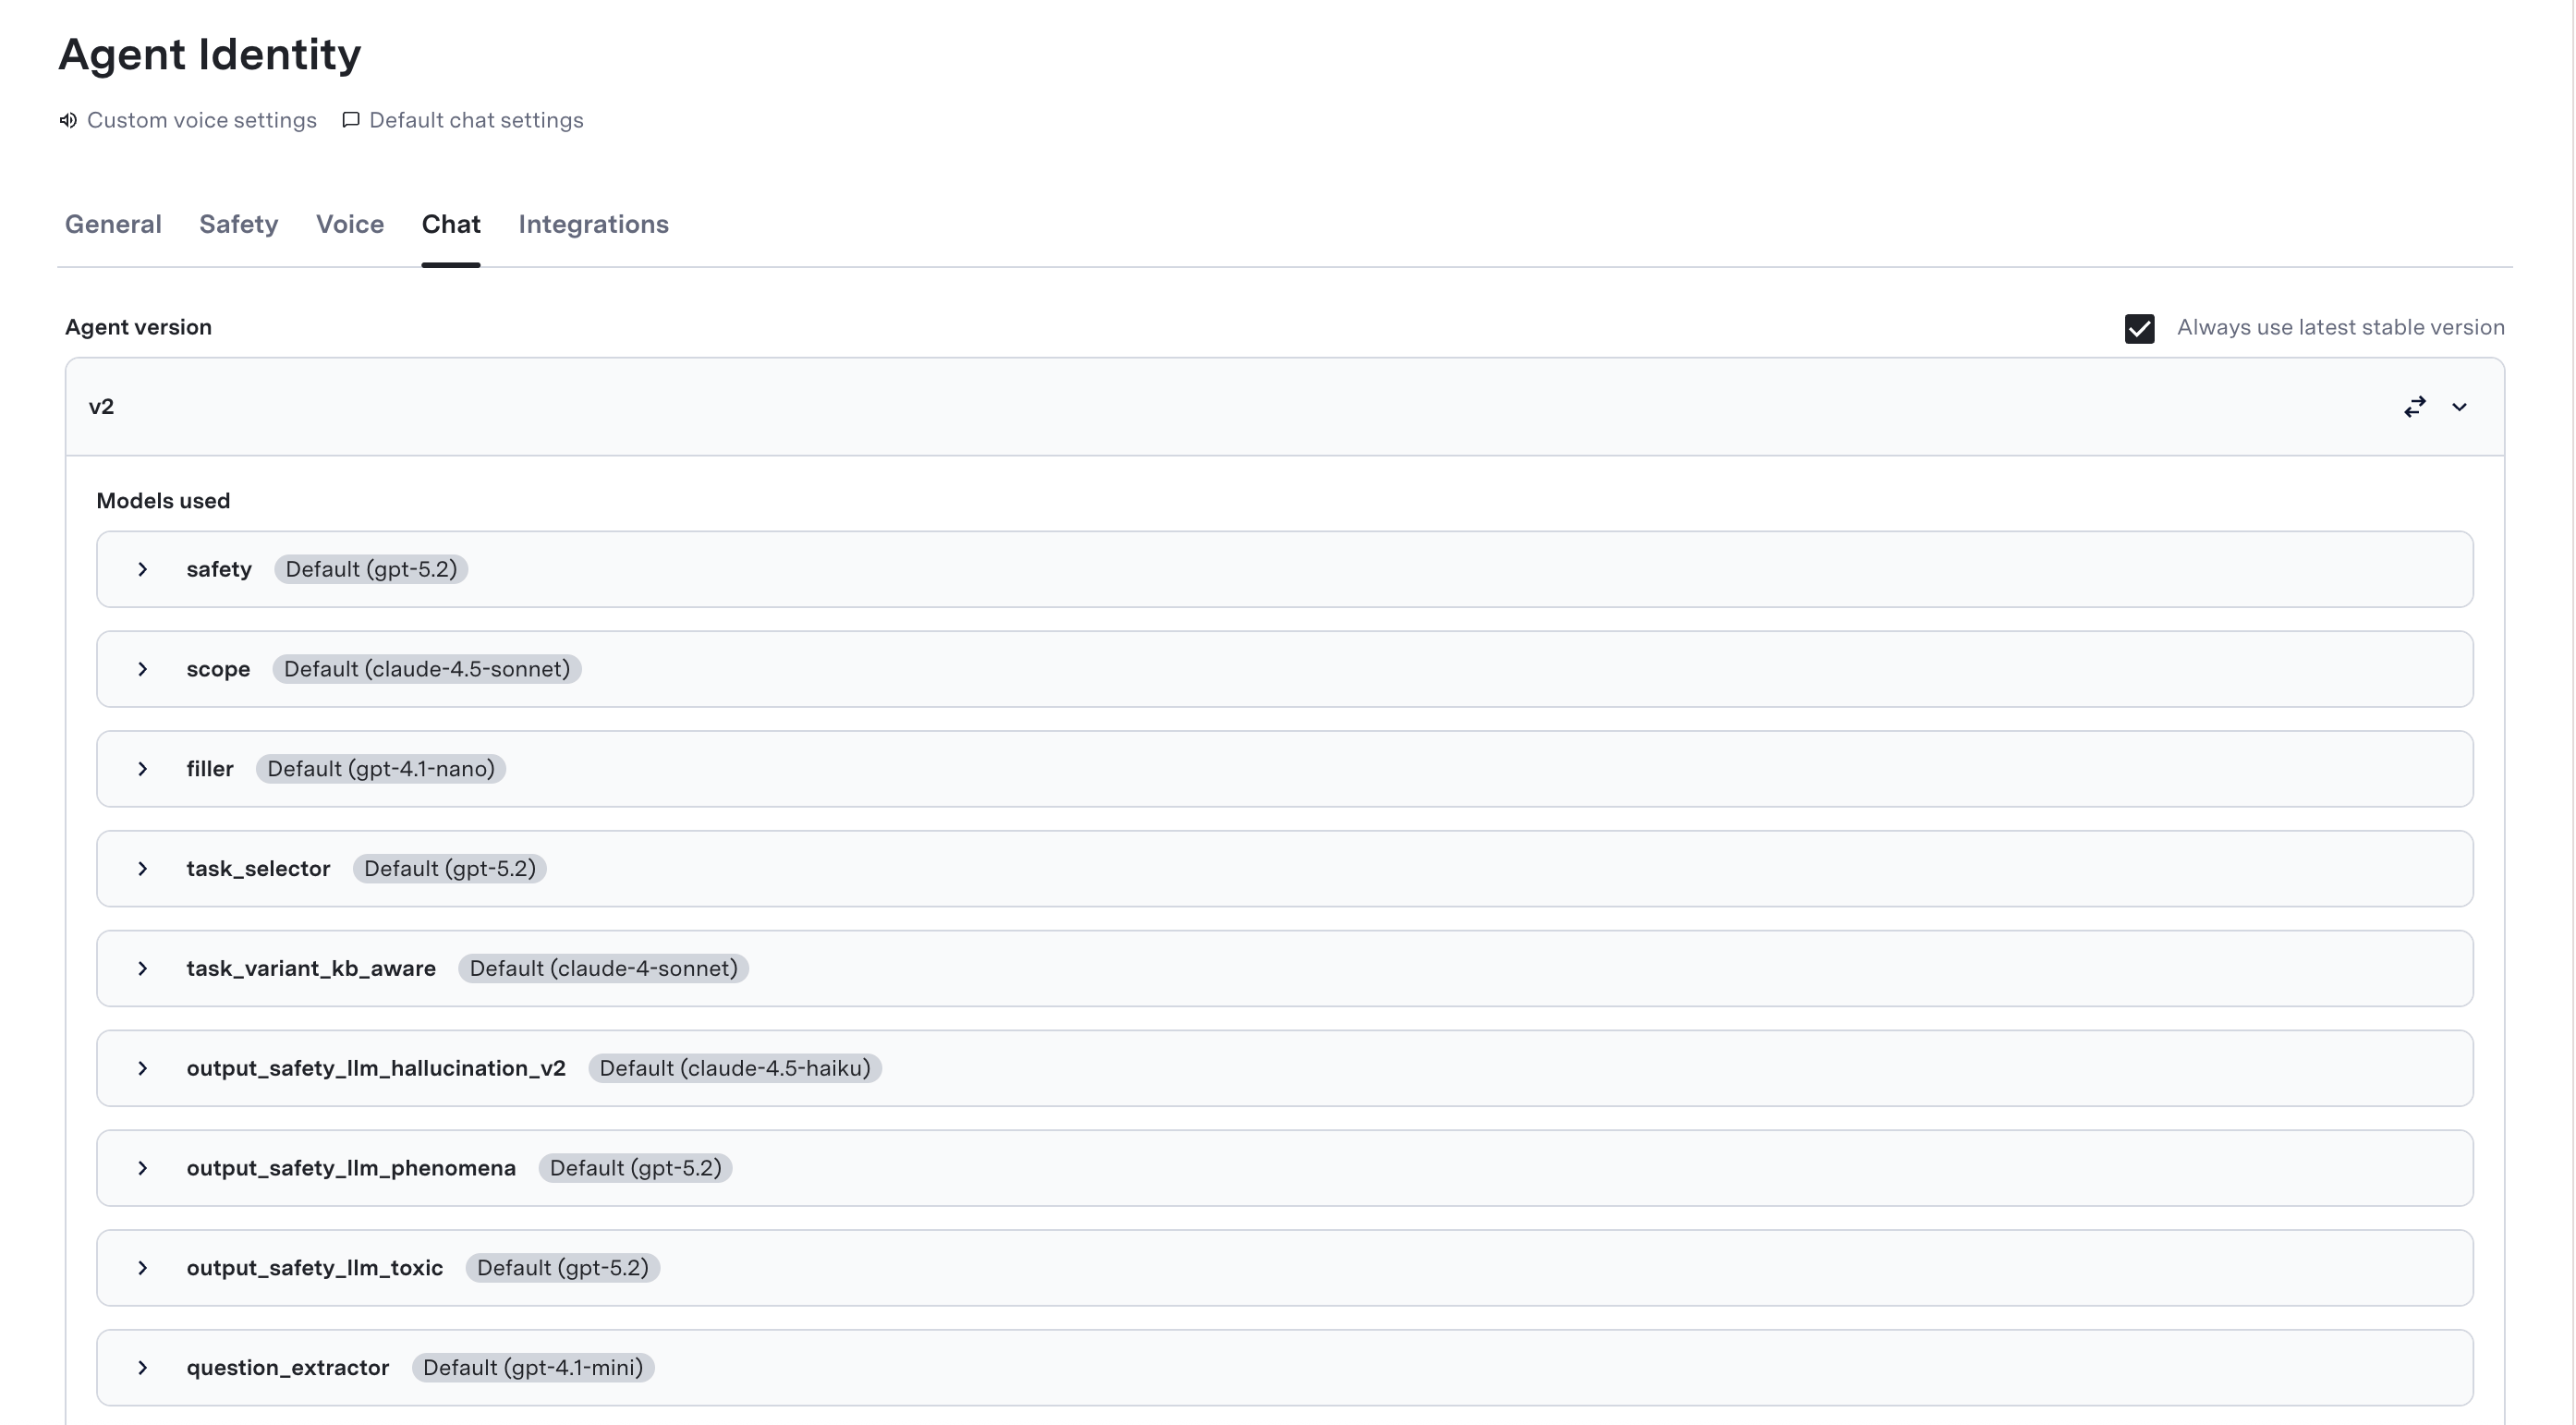
Configure the models used for the following functions during a chat interaction:
* safety
* scope
* filler
* task\_selector
* task\_variant\_kb\_aware
* output\_safety\_llm\_hallucination
* output\_safety\_llm\_phenomena
* output\_safety\_llm\_toxic
* question\_extractor
Expand each section to configure the model information such as:
* **Provider**: The provider of the model (e.g., OpenAI, Anthropic).
* **Model**: The model used (e.g., GPT-4, Claude v1).
* **LLM arguments**: The arguments passed to the model.
```json theme={null}
{
"max_tokens": 12,
"temperature": 0,
"extra_body": {
"timeout": 5,
"fallbacks": [
"claude-4.5-sonnet"
]
},
"llm_client_config_override": {
"retry_mechanism": "hedged",
"client_max_retries": 3,
"hedge_delay": 2.5,
"hedge_concurrent_requests": 2
}
}
```
* **Retry model settings**: The arguments passed to the model to handle retries.
* **Maximum retry attempts**: The maximum number of times the model will retry.
You can enable "B Variant" if you want the model to use the alternative variant for testing.
## Chat Configuration
Configure the models used for the following functions during a chat interaction:
* safety
* scope
* filler
* task\_selector
* task\_variant\_kb\_aware
* output\_safety\_llm\_hallucination
* output\_safety\_llm\_phenomena
* output\_safety\_llm\_toxic
* question\_extractor
Expand each section to configure the model information such as:
* **Provider**: The provider of the model (e.g., OpenAI, Anthropic).
* **Model**: The model used (e.g., GPT-4, Claude v1).
* **LLM arguments**: The arguments passed to the model.
```json theme={null}
{
"max_tokens": 12,
"temperature": 0,
"extra_body": {
"timeout": 5,
"fallbacks": [
"claude-4.5-sonnet"
]
},
"llm_client_config_override": {
"retry_mechanism": "hedged",
"client_max_retries": 3,
"hedge_delay": 2.5,
"hedge_concurrent_requests": 2
}
}
```
* **Retry model settings**: The arguments passed to the model to handle retries.
* **Maximum retry attempts**: The maximum number of times the model will retry.
You can enable "B Variant" if you want the model to use the alternative variant for testing.
 ## Integration-settings
Configure HILA integration and other third-party integrations with sensitive API keys.
### Sensitive API Keys
Add the names of of any API fields that contain sensitive customer data. Once added, the Sensitive data protection toggle in Safety controls whether filtering is active.
To add a sensitive API key, click the "Add" button, enter the name of the API field, and click "Add" again.
### HILA Configuration
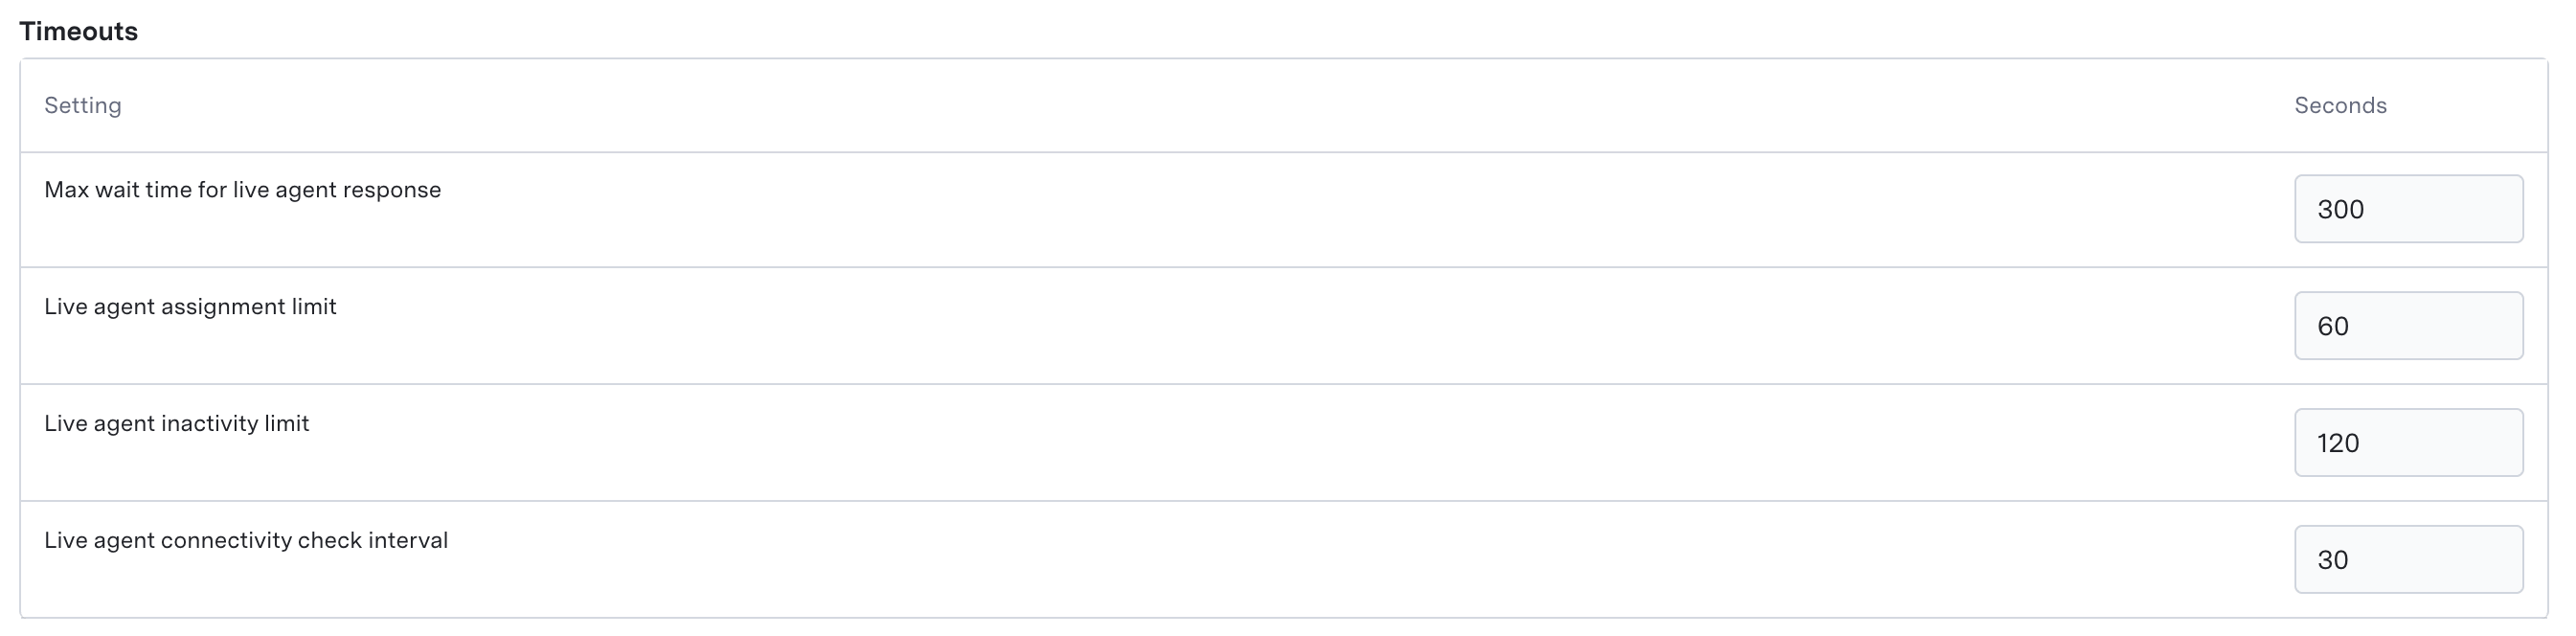
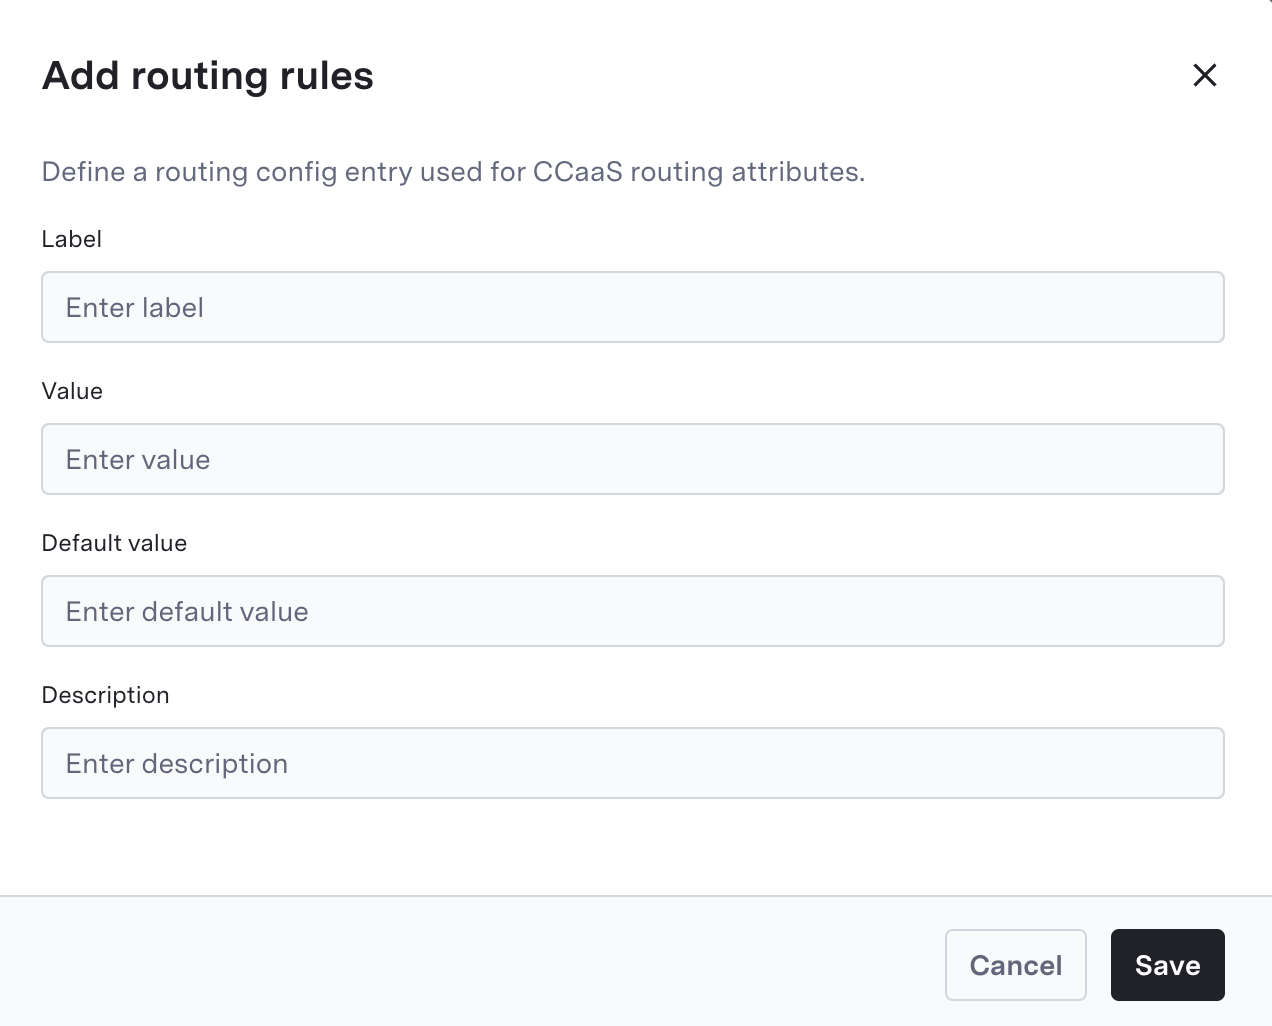
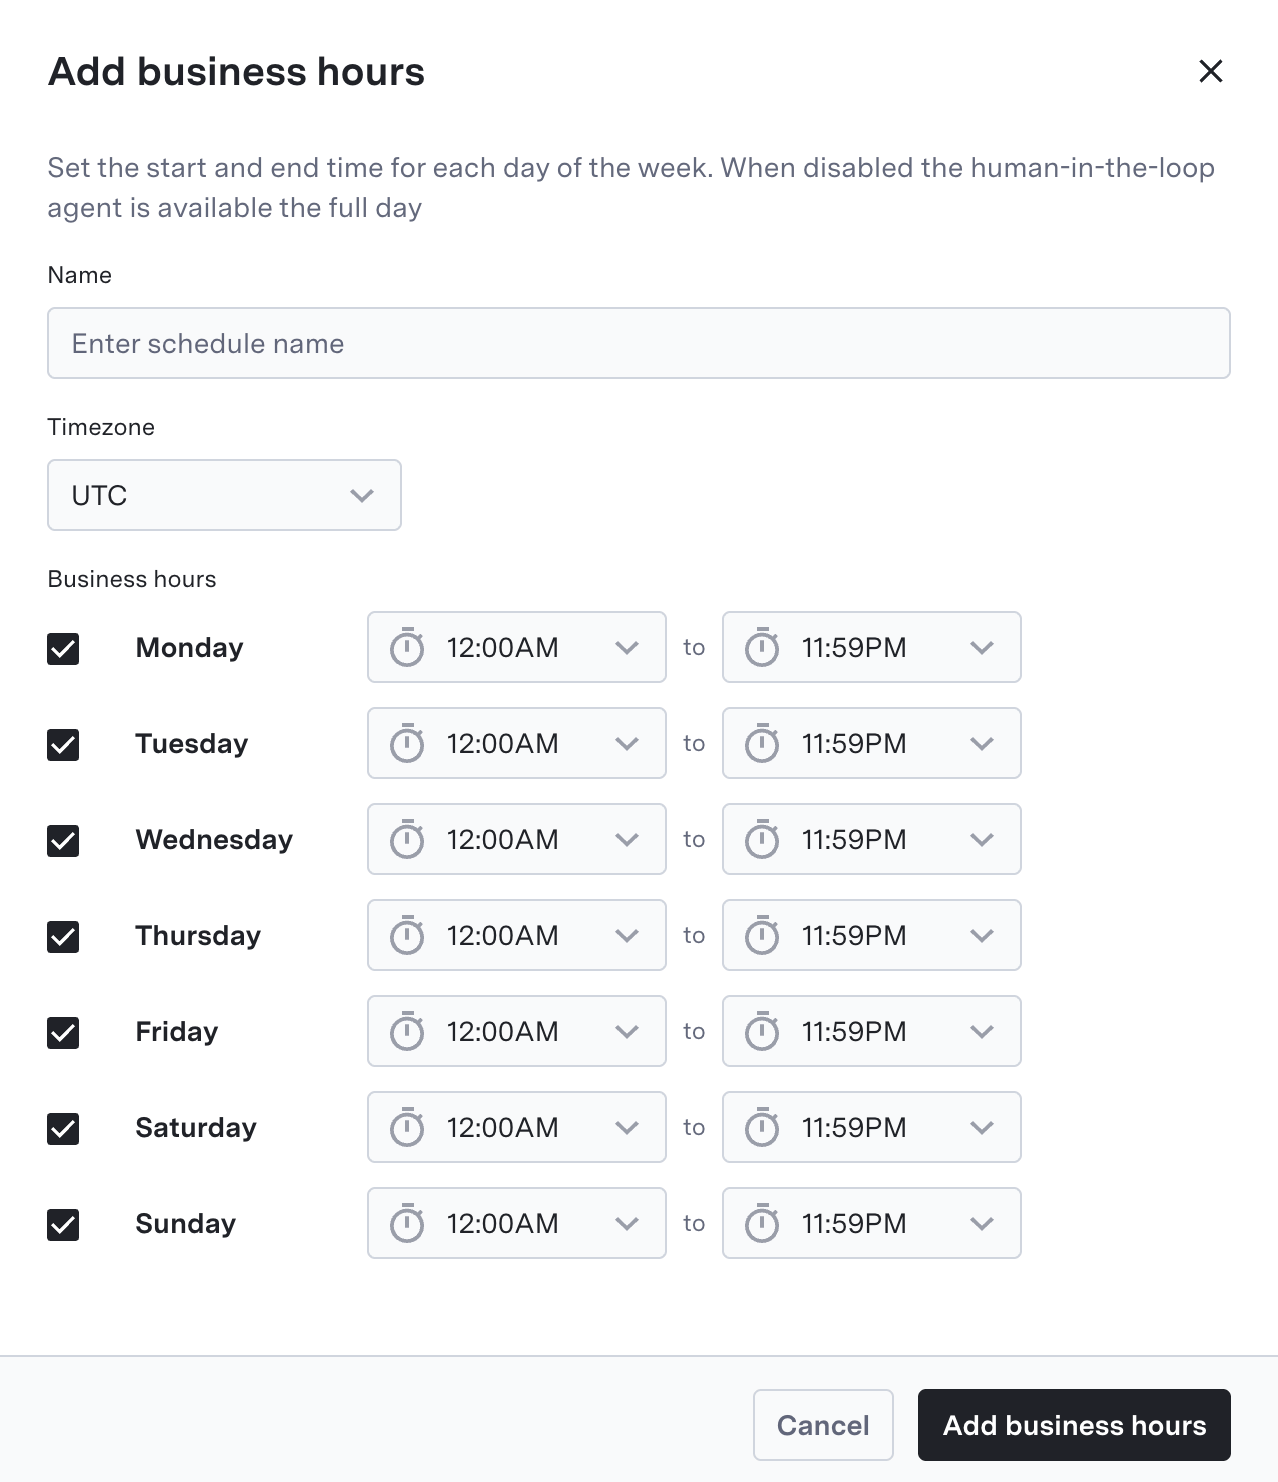
HILA (Human-in-the-Loop AI) allows you to integrate human oversight into the agent's decision-making process. You can configure HILA settings to manage the following aspects of contact center interactions:
## Integration-settings
Configure HILA integration and other third-party integrations with sensitive API keys.
### Sensitive API Keys
Add the names of of any API fields that contain sensitive customer data. Once added, the Sensitive data protection toggle in Safety controls whether filtering is active.
To add a sensitive API key, click the "Add" button, enter the name of the API field, and click "Add" again.
### HILA Configuration
HILA (Human-in-the-Loop AI) allows you to integrate human oversight into the agent's decision-making process. You can configure HILA settings to manage the following aspects of contact center interactions:
Learn how to add a use case for your agent, defining the specific scenarios and interactions it will handle.
Learn how to configure the knowledge base for your agent, including adding, updating, and managing knowledge articles.