> ## Documentation Index
> Fetch the complete documentation index at: https://docs.asapp.com/llms.txt
> Use this file to discover all available pages before exploring further.
# Genesys AudioConnector for GenerativeAgent
> Learn how to integrate GenerativeAgent into Genesys Cloud using our Genesys AudioConnector integration.
The Genesys AudioConnector integration with ASAPP's GenerativeAgent allows callers in your Genesys Cloud CX contact center to have conversations with GenerativeAgent while maintaining the call entirely within your Genesys environment.
This guide demonstrates how to integrate GenerativeAgent using Genesys AudioConnector and ASAPP-provided components. It showcases how the various components work together, but you can adapt or replace any part of the integration to match your organization's requirements.
## How it works
At a high level, the Genesys AudioConnector integration with GenerativeAgent works by streaming audio and managing conversations through your Genesys Architect flows:
1. **Stream the audio** to GenerativeAgent through Genesys AudioConnector.
2. **GenerativeAgent handles the conversation** using the audio stream and responds to the caller.
Since calls remain within your Genesys infrastructure throughout the interaction, you maintain full control over call handling, including error scenarios and transfers.
3. **Return control back** to your Genesys flow when:
* The conversation is successfully completed
* The caller requests a human agent
* An error occurs
## Before you Begin
Before using the GenerativeAgent integration with Genesys Cloud CX, you need:
* [Get your API Key and Secret](/getting-started/developers#access-api-credentials)
* Ensure your API key has been configured to access GenerativeAgent APIs. Reach out to your ASAPP team if you need access enabled.
* Have your dedicated **Base Connection URI** from ASAPP.
* This is a URI you will use when configuring the Genesys Audiohook Monitor, provided by your ASAPP account team.
* Have an existing Genesys Cloud CX Instance
* Genesys Cloud CX administrator account with permissions for:
* Managing integrations
* Configuring Architect flows
* Setting up Audiohook Monitor
* Managing audio streaming settings
## Step 1: Configure Genesys Cloud CX Integration
First, you need to install and configure the ASAPP GenerativeAgent integration in your Genesys Cloud CX environment.
You will need to install a separate Audio Connector Integration for each ASAPP environment (Sandbox and Production).
From Admin Home, navigate to Integrations > Integrations. This is a list of third-party integrations you have available to install.
Use the search functionality to find the ASAPP GenerativeAgent integration, called "AudioConnector".
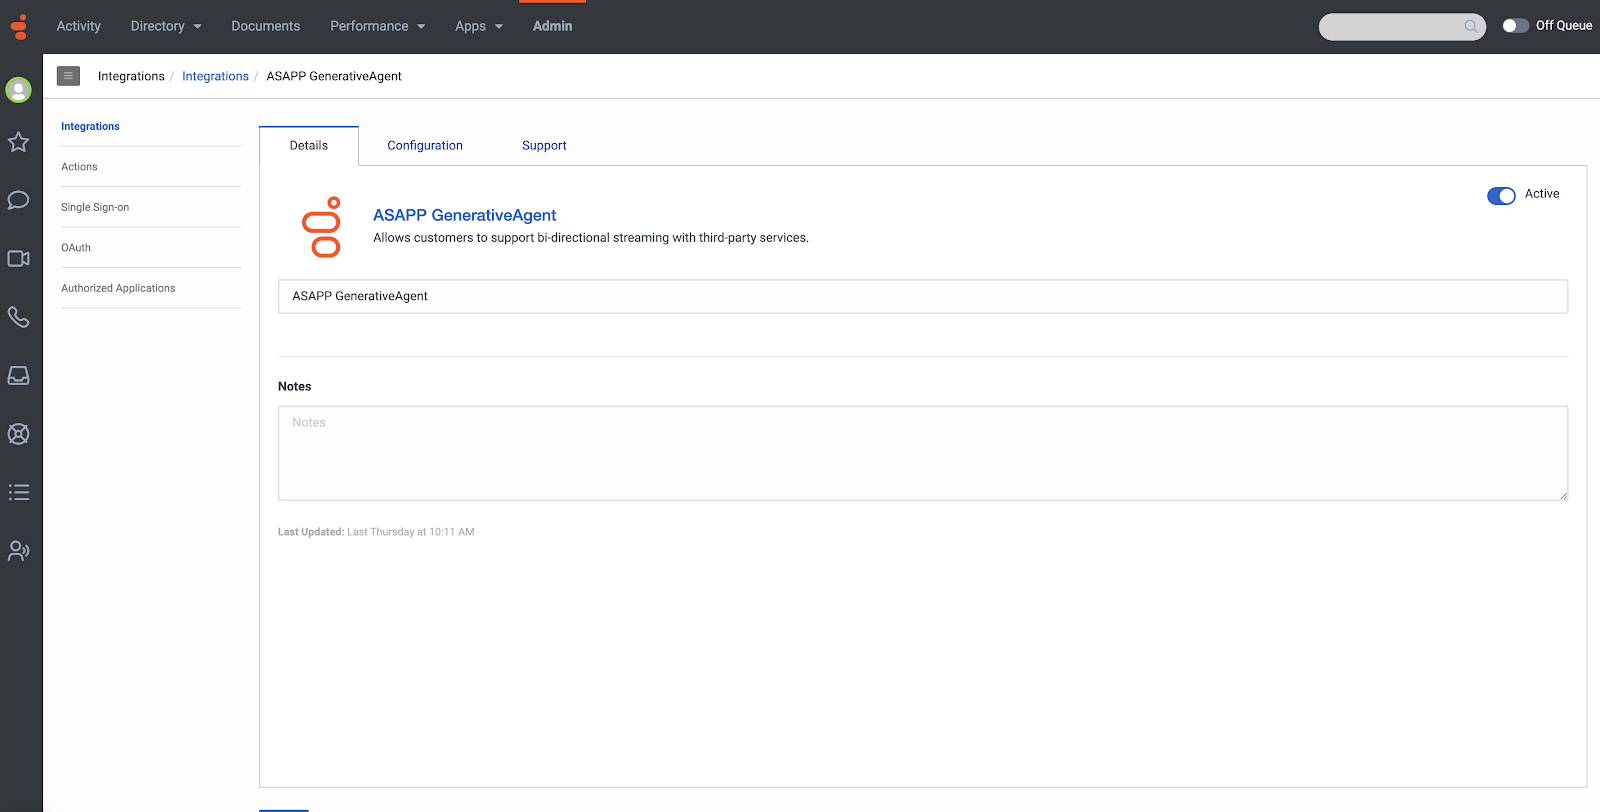
Once completing the install, you are taken to the Integration Details page.
 You will have two sets of credentials, one for accessing the Production ASAPP environment and one for the Sandbox ASAPP environment. You will need to install a separate Audio Connector Integration for each.
We highly recommend you include the appropriate environment when naming the connector, e.g. "ASAPP GenerativeAgent (Production)" or "ASAPP GenerativeAgent (Sandbox)"
1. Navigate to the Configuration tab > Properties and paste the **Base Connection URI**.
2. Navigate to Credentials sub-tab and click "Configure".
* Enter the **API Key** and **API Secret** for the appropriate environment and click "Ok".
Ensure the integration is set to "Active".
## Step 2: Set Up Architect Flow
With the Audio Connector configured, you need to incorporate GenerativeAgent into your call flows. This is done by adding the GenerativeAgent Audio Connector to your Architect flows at the points where you want GenerativeAgent to handle the conversation.
You will have two sets of credentials, one for accessing the Production ASAPP environment and one for the Sandbox ASAPP environment. You will need to install a separate Audio Connector Integration for each.
We highly recommend you include the appropriate environment when naming the connector, e.g. "ASAPP GenerativeAgent (Production)" or "ASAPP GenerativeAgent (Sandbox)"
1. Navigate to the Configuration tab > Properties and paste the **Base Connection URI**.
2. Navigate to Credentials sub-tab and click "Configure".
* Enter the **API Key** and **API Secret** for the appropriate environment and click "Ok".
Ensure the integration is set to "Active".
## Step 2: Set Up Architect Flow
With the Audio Connector configured, you need to incorporate GenerativeAgent into your call flows. This is done by adding the GenerativeAgent Audio Connector to your Architect flows at the points where you want GenerativeAgent to handle the conversation.
 Open or create the Architect flow where you want to use GenerativeAgent.
Determine where in the flow you want to add the GenerativeAgent Audio Connector.
* In the Toolbox, expand "Bot" and drag the Audio Connector module to the flow.
The connector should be placed at the point where you want to hand off the conversation to GenerativeAgent.
* Name the connector.
* Specify a Connector ID.
* This is not required, but we recommend versioning the connector ID for future version control.
* Optionally, configure input session variables:
* `customerId`: Passed directly as the customer ID in ASAPP's system
* `taskName`: Used to [enter a specific task](/generativeagent/configuring/tasks-and-functions/enter-specific-task)
* All other variables are passed as [Input Variables](/generativeagent/configuring/tasks-and-functions/input-variables)
When the GenerativeAgent Audio Connector is finished, it will return a result of either "Success" or "Failure".
* **Success**: Indicates GenerativeAgent is transferring control back to your system or the caller has requested a human agent.
* The block will return an output variable of `ASAPP_Disposition` with a value of:
* `agent`: Indicates the caller requested a human agent.
* `system`: Indicates GenerativeAgent has completed its task.
* The block will also return output variables as defined in your tasks and functions as part of the [system transfer](/generativeagent/configuring/tasks-and-functions/system-transfer).
* Configure your flow to route the conversation to the appropriate queue within Genesys Cloud.
* **Failure**: Indicates an error occurred. Configure your flow to handle error scenarios, such as playing an error message to the caller and routing to a fallback option.
## Step 3: Test and Deploy
Before deploying to production, thorough testing is essential to ensure the integration works as expected and provides a good caller experience.
Test the integration thoroughly:
* Make test calls through the flow
Test various scenarios including normal conversations or requests for human agents.
* Verify audio streaming quality and reliability
* Test conversation handling
* Ensure GenerativeAgent understands and responds appropriately
* Test different caller accents and speech patterns
* Verify handling of background noise and interruptions
* Check error scenarios
* Verify error handling paths in your flow
## Next Steps
After successfully integrating GenerativeAgent with your Genesys Cloud CX environment, consider these next steps to optimize your implementation:
Learn how to configure GenerativeAgent's behaviors and responses
Understand safety features and how to troubleshoot common issues
Follow our checklist for deploying to production
Open or create the Architect flow where you want to use GenerativeAgent.
Determine where in the flow you want to add the GenerativeAgent Audio Connector.
* In the Toolbox, expand "Bot" and drag the Audio Connector module to the flow.
The connector should be placed at the point where you want to hand off the conversation to GenerativeAgent.
* Name the connector.
* Specify a Connector ID.
* This is not required, but we recommend versioning the connector ID for future version control.
* Optionally, configure input session variables:
* `customerId`: Passed directly as the customer ID in ASAPP's system
* `taskName`: Used to [enter a specific task](/generativeagent/configuring/tasks-and-functions/enter-specific-task)
* All other variables are passed as [Input Variables](/generativeagent/configuring/tasks-and-functions/input-variables)
When the GenerativeAgent Audio Connector is finished, it will return a result of either "Success" or "Failure".
* **Success**: Indicates GenerativeAgent is transferring control back to your system or the caller has requested a human agent.
* The block will return an output variable of `ASAPP_Disposition` with a value of:
* `agent`: Indicates the caller requested a human agent.
* `system`: Indicates GenerativeAgent has completed its task.
* The block will also return output variables as defined in your tasks and functions as part of the [system transfer](/generativeagent/configuring/tasks-and-functions/system-transfer).
* Configure your flow to route the conversation to the appropriate queue within Genesys Cloud.
* **Failure**: Indicates an error occurred. Configure your flow to handle error scenarios, such as playing an error message to the caller and routing to a fallback option.
## Step 3: Test and Deploy
Before deploying to production, thorough testing is essential to ensure the integration works as expected and provides a good caller experience.
Test the integration thoroughly:
* Make test calls through the flow
Test various scenarios including normal conversations or requests for human agents.
* Verify audio streaming quality and reliability
* Test conversation handling
* Ensure GenerativeAgent understands and responds appropriately
* Test different caller accents and speech patterns
* Verify handling of background noise and interruptions
* Check error scenarios
* Verify error handling paths in your flow
## Next Steps
After successfully integrating GenerativeAgent with your Genesys Cloud CX environment, consider these next steps to optimize your implementation:
Learn how to configure GenerativeAgent's behaviors and responses
Understand safety features and how to troubleshoot common issues
Follow our checklist for deploying to production