Before You Begin
Before you begin, you will need:-
An ASAPP Dashboard account with Edit permissions for Code based API Connections.
Your Admin should be able to enable this for you. Reach out to your ASAPP account team if you need help.
- A basic understanding of JavaScript.
Using Code Based API Connections
1
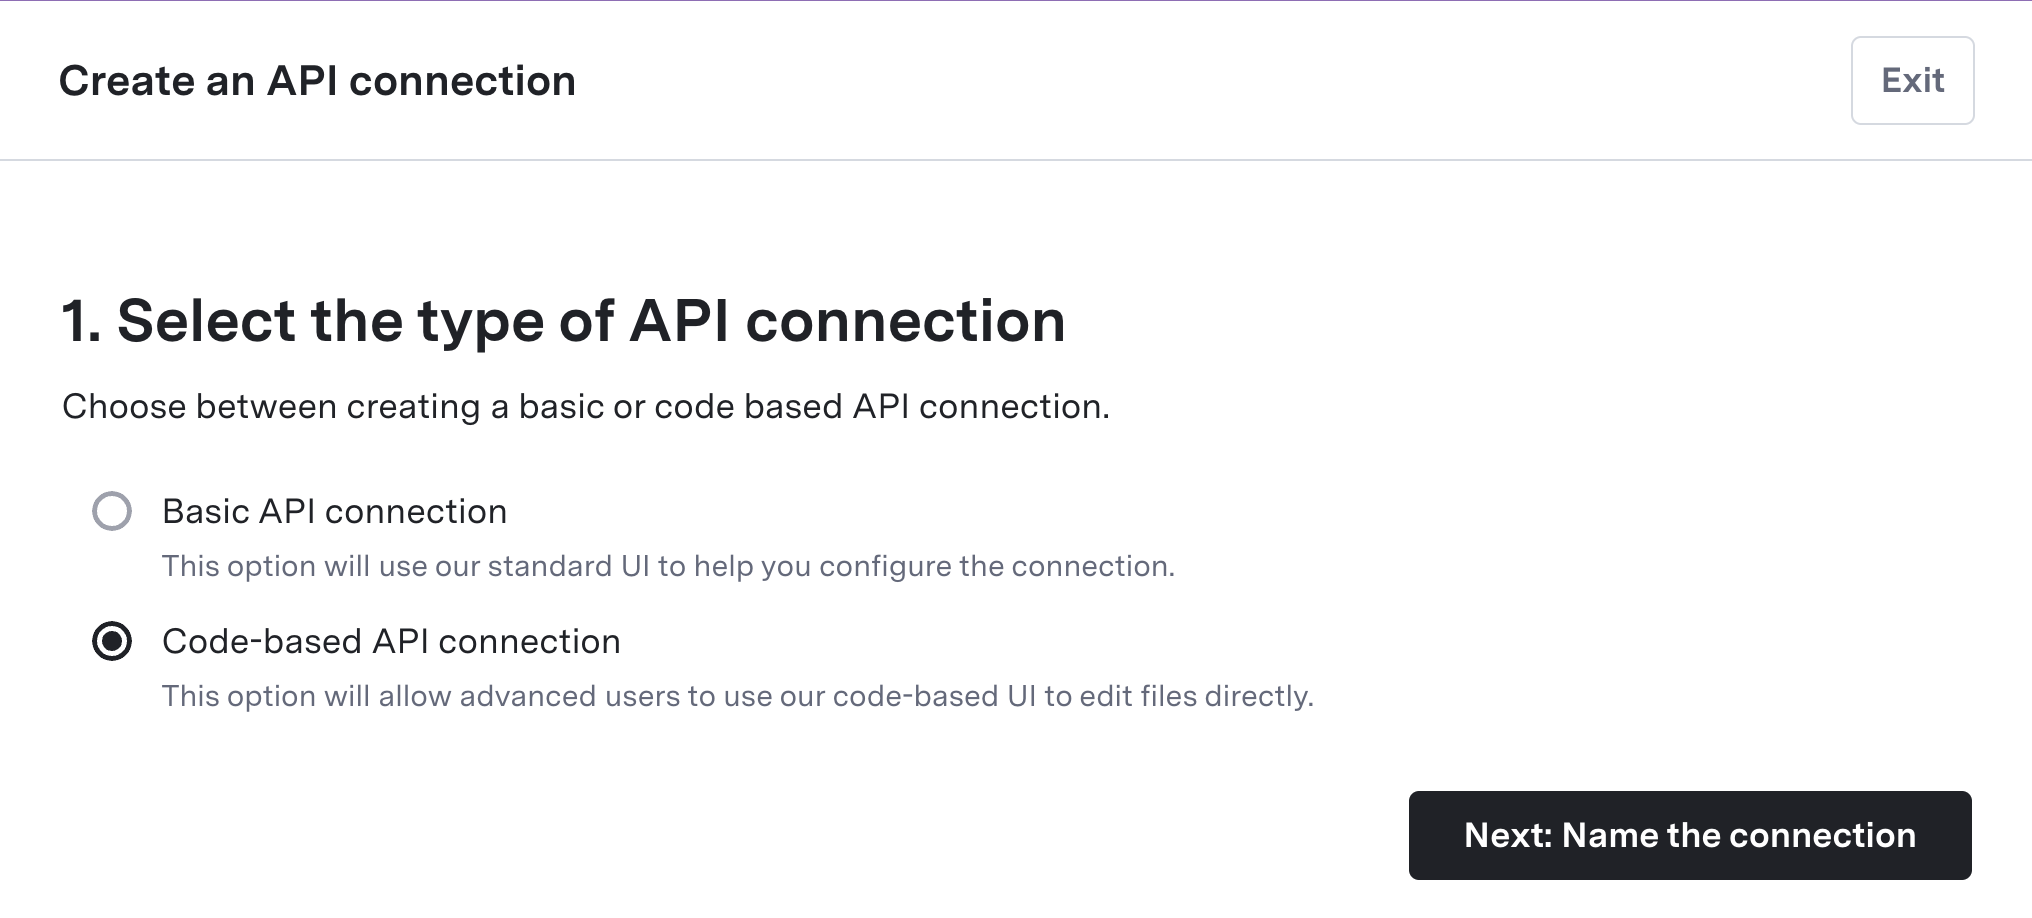
Create initial Code API Connection
- Navigate to API Integration HUB > API Connections
- Click Create Connection
- Select Code-based API Connection from the dropdown
- Enter a Name and optional Description.
- Click Create connection
2
Set Up Allowed Domains
Code-based API connections restrict access to an explicit whitelist of domains as a security measure. You need to add each domain that your code will reach out to.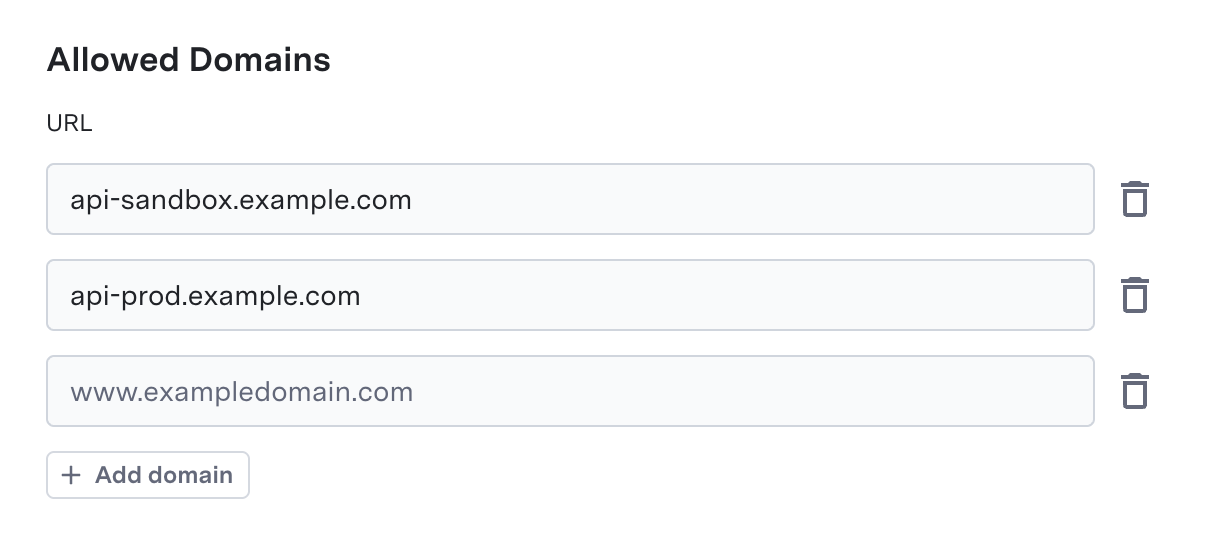
- In the Basic Settings tab, specify allowed domains for any API calls your code needs to make
- Click Add Domain and enter URLs (e.g.,
api.example.com) - Wildcards (
*) are supported for subdomains - Your code only calls URLs specified in the allowed domains using
asappUtilities.callAPI(url, apiRequest)
3
Import adapters (optional)
If your code will call adapters via
asappUtilities.getAdapter(), add them in the Basic Settings tab:- In Basic Settings, find the Import adapters section
- Click Add adapters and select the adapter(s) you need
- The string you pass to
getAdapter()in code must match the name of the adapter you added (e.g.getAdapter("SalesforceAdapter")requires an adapter named “SalesforceAdapter”)
4
Manage Environment Variables
Store and manage environment variables to be used in your code. This is often used to store data that will change between environments, such as URLs for the API call you will be making.
Environment variables support storing Secret values which the system encrypts when stored in the database. However, for API credentials and authentication data, we strongly recommend using Authentication Methods instead, as they provide better security and easier management.
- In the Environment Variables settings tab, add any variables your code needs.
- Specify the value for Sandbox and Production environments.
- Use the Secret checkbox to store encrypted environment variables (for configuration data, not API credentials)
- Access environment variables in your code using
asappUtilities.getEnvVariable("VARIABLE_NAME")
5
Add Authentication Methods
If your API connection requires authentication, add authentication methods to your API connection.
- Navigate to Settings → Authentication Methods
- For each environment, click Add Authentication to add a new authentication method.
- Create a new authentication method or select an existing one.
6
Define Request and Response Schemas
You need to define the structure of data that your API connection will receive and return:
- Request Schema (
schemas/request.json) - Define the request schema that your function will receive - Response Schema (
schemas/response.json) - Define the response schema that your function will return
7
Implement Your Function
Implement the
handleRequest(request) function in src/index.js that takes the request object and returns the response object.See the Implementing the Handle Function section below for detailed information on how to implement your function.8
Test Your Code
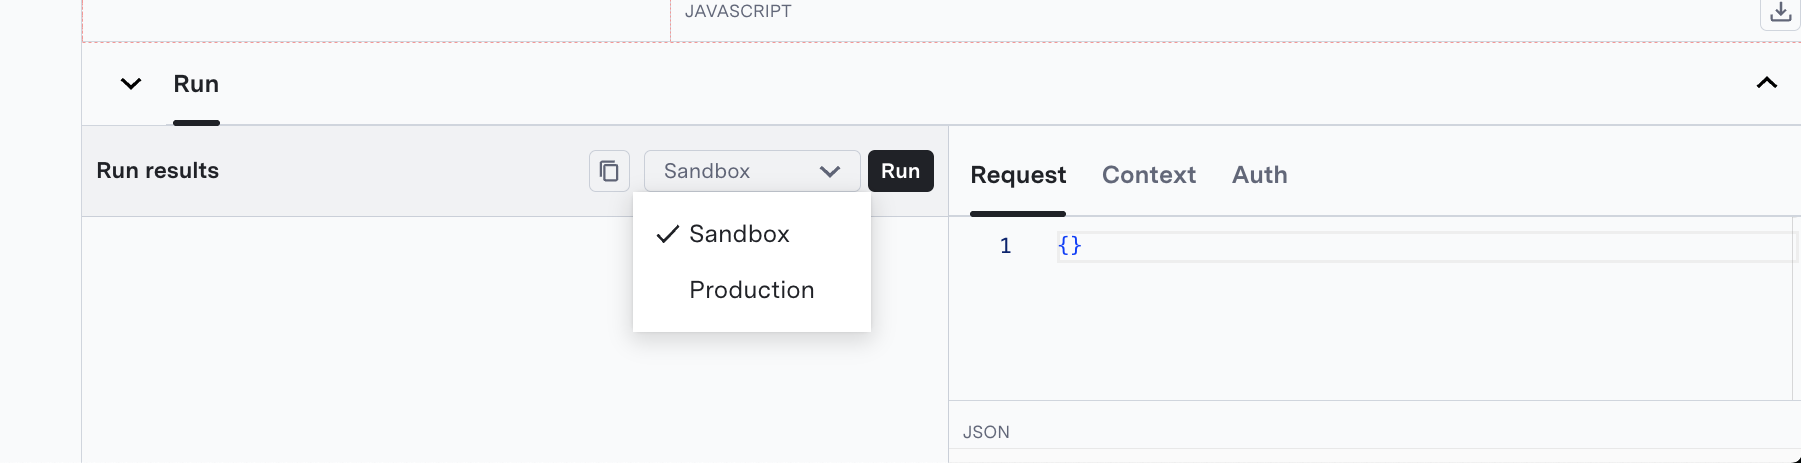
As you write code, test it to ensure it works as expected:
- In the Run panel, define an example request that matches your
request.jsonschema - Select which environment to run: Sandbox or Production
- Click Run
- Review the results in the left panel
9
Save and Deploy
Once you have successfully tested your API connection:
-
Publish the API connection. This will save your code and make it available as a new version.
The system does not provide separate Save vs Publish functionality. You must directly publish any changes to your code.
- It will now be available for use in your GenerativeAgent tasks and functions. If you have an existing function that uses this API connection, you will need to update it to use the new version.
- Test the integration end-to-end to ensure it works as expected
Request Schema
The request schema (schemas/request.json) defines the structure of data that your function will receive. This JSON schema is both the request schema that your function will receive and the parameters shown to GenerativeAgent.
Add the variables you want as input. Ensure the name and description of each variable is easy for GenerativeAgent to understand.
By default, the request schema is empty.
Example Request Schema
This example takes a last name and confirmation code as input for an airline rebooking function.Response Schema
The response schema (schemas/response.json) defines the structure of data that your function must return. This is the response that GenerativeAgent receives.
Add the variables you want as output. Ensure the name and description of each variable is easy for GenerativeAgent to understand.
By default, the response schema is empty.
Example Response Schema
Implementing the Handle Function
ThehandleRequest(request) function in src/index.js is the core of your API connection. This function takes the request object and returns the response object.
When first created, your function looks like this:
NOT_IMPLEMENTED error with your own implementation for the API connection.
Function Parameters
Therequest parameter contains the data defined in your request schema.
Return Value
Your function should return an object that matches your response schema.The serialized response must not exceed 10 MB. If your result exceeds this limit, the execution will fail with a validation error.
Error Handling
We exposeseveral error classes in the asappUtilities library. Always use one of these error classes for error handling to ensure proper error propagation to ASAPP:
ASAPP Utilities
ASAPP Utilities is a library designed for integration of Code Driven API Connections. It provides tools for writing secure and efficient code.Making API Calls
The library provides a secure way to make API calls to allowed domains with thecallAPI function. This function uses fetch under the hood and follows fetch’s interface.
This is the only way to make external HTTP API calls from your code.
Environment Variables
Access environment variables configured during setup. Use environment variables for configuration data like API URLs. Do not use environment variables for sensitive credentials.For API credentials and authentication data, use Authentication Methods.
ASAPP Utilities Errors
In order to properly propagate errors to ASAPP, you must throw anasappUtilities error:
asappUtilities.APIConnectionError
asappUtilities.APIConnectionError
This is a generic error that can be used to catch any error that occurs in your code.
asappUtilities.ClientAuthenticationError
asappUtilities.ClientAuthenticationError
This is an error that is thrown when a client authentication error occurs.Raising this error will cause GenerativeAgent to send an authentication_required event to the client.
asappUtilities.AuthMethodError
asappUtilities.AuthMethodError
This error is thrown when there is a problem with an authentication method, such as when the specified authentication method is not found or not provided.
Context Data
UsegetContextData() and setContextData() to read and write conversation-scoped data within a Code Connection execution.
getContextData
Returns the current context object for the conversation. This includes ASAPP-provided identifiers, the active task name, the conversation’s input and reference variables, and any custom data previously written viasetConversationData().
Reading input and reference variables here lets a connection use deterministic values directly, instead of relying on GenerativeAgent to pass them in as function parameters.
Context data shape
Context data shape
externalCustomerId and asapp fields are always present. taskName is the name of the task running the connection. inputVariables and referenceVariables hold the input and reference variables set on the conversation. Custom data written with setConversationData() is nested under the conversation key.setConversationData
Writes custom key/value data into theconversation object. Values written here are available to subsequent Code Connection executions within the same conversation via getContextData().conversation. Set a key to null to delete it.
setConversationData() is only available in Code Connections.Encryption Utility
The encryption utility provides methods for secure data encryption and encoding operations.PDF Utility
The PDF utility allows you to extract structured text from PDF documents.MCP (Model Context Protocol)
You can connect to MCP servers from your code to execute tools or discover available capabilities. MCP server endpoints must be included in your allowed domains.Execute an MCP Tool
Discover MCP Server Capabilities
Fetch Authentication Method Data
To use authentication methods for an API call, provide them as part of the request toasappUtilities.callAPI().
There may be times you want to pull out data from the authentication method, such grabbing claims from a JWT token. You can access the authentication methods you’ve configured in your code using the asappUtilities.getAuthMethod() function.
Using Authentication Methods
If your API connection requires authentication, first you must add the authentcation method in Settings > Authentication Methods. Then, when making API calls withasappUtilities.callAPI(), specify which authentication method to use by name for each environment:
authMethods object maps environment names to the exact names of your configured authentication methods. ASAPP automatically applies the appropriate authentication (e.g. tokens, api keys, etc.) to the headers based on the method you’ve configured for each environment.
Important: The authentication method names in your code must exactly match the names you gave them when creating the authentication methods in the Settings → Authentication Methods section.
Running your code
While developing your code-based API connection, you can test it by running it in the Run panel. This will allow you to test your code without having to publish it. Anyconsole.log statements will be displayed in the Run panel.
To specify the data that will be passed to your function when running, in the right hand run panel, you need to specify:
- The Request object that will be passed to your function. This must match the
request.jsonschema. - The Context object that will be passed to your function.
- The Auth object that will be passed to your function. This is only used if the authentication method you are using uses client authentication data.
Examples
Calling an adapter
UseasappUtilities.getAdapter() to call a pre-built adapter. First add the adapter in Basic Settings under Import adapters (click Add adapters); the string you pass to getAdapter() must match the adapter name exactly (e.g. getAdapter("SalesforceAdapter")). The second argument to adapter.call() is a timeout in milliseconds.
Simple API Call
Using JWT Claims from Authentication
Additional Libraries
Code-based API connections do not support arbitrary third-party libraries; you cannot userequire() or import statements in your code. However, the following libraries are pre-provided and available as globals: