Navigate to Intent Routing
You can access Intent Routing in the Virtual Agent navigation panel.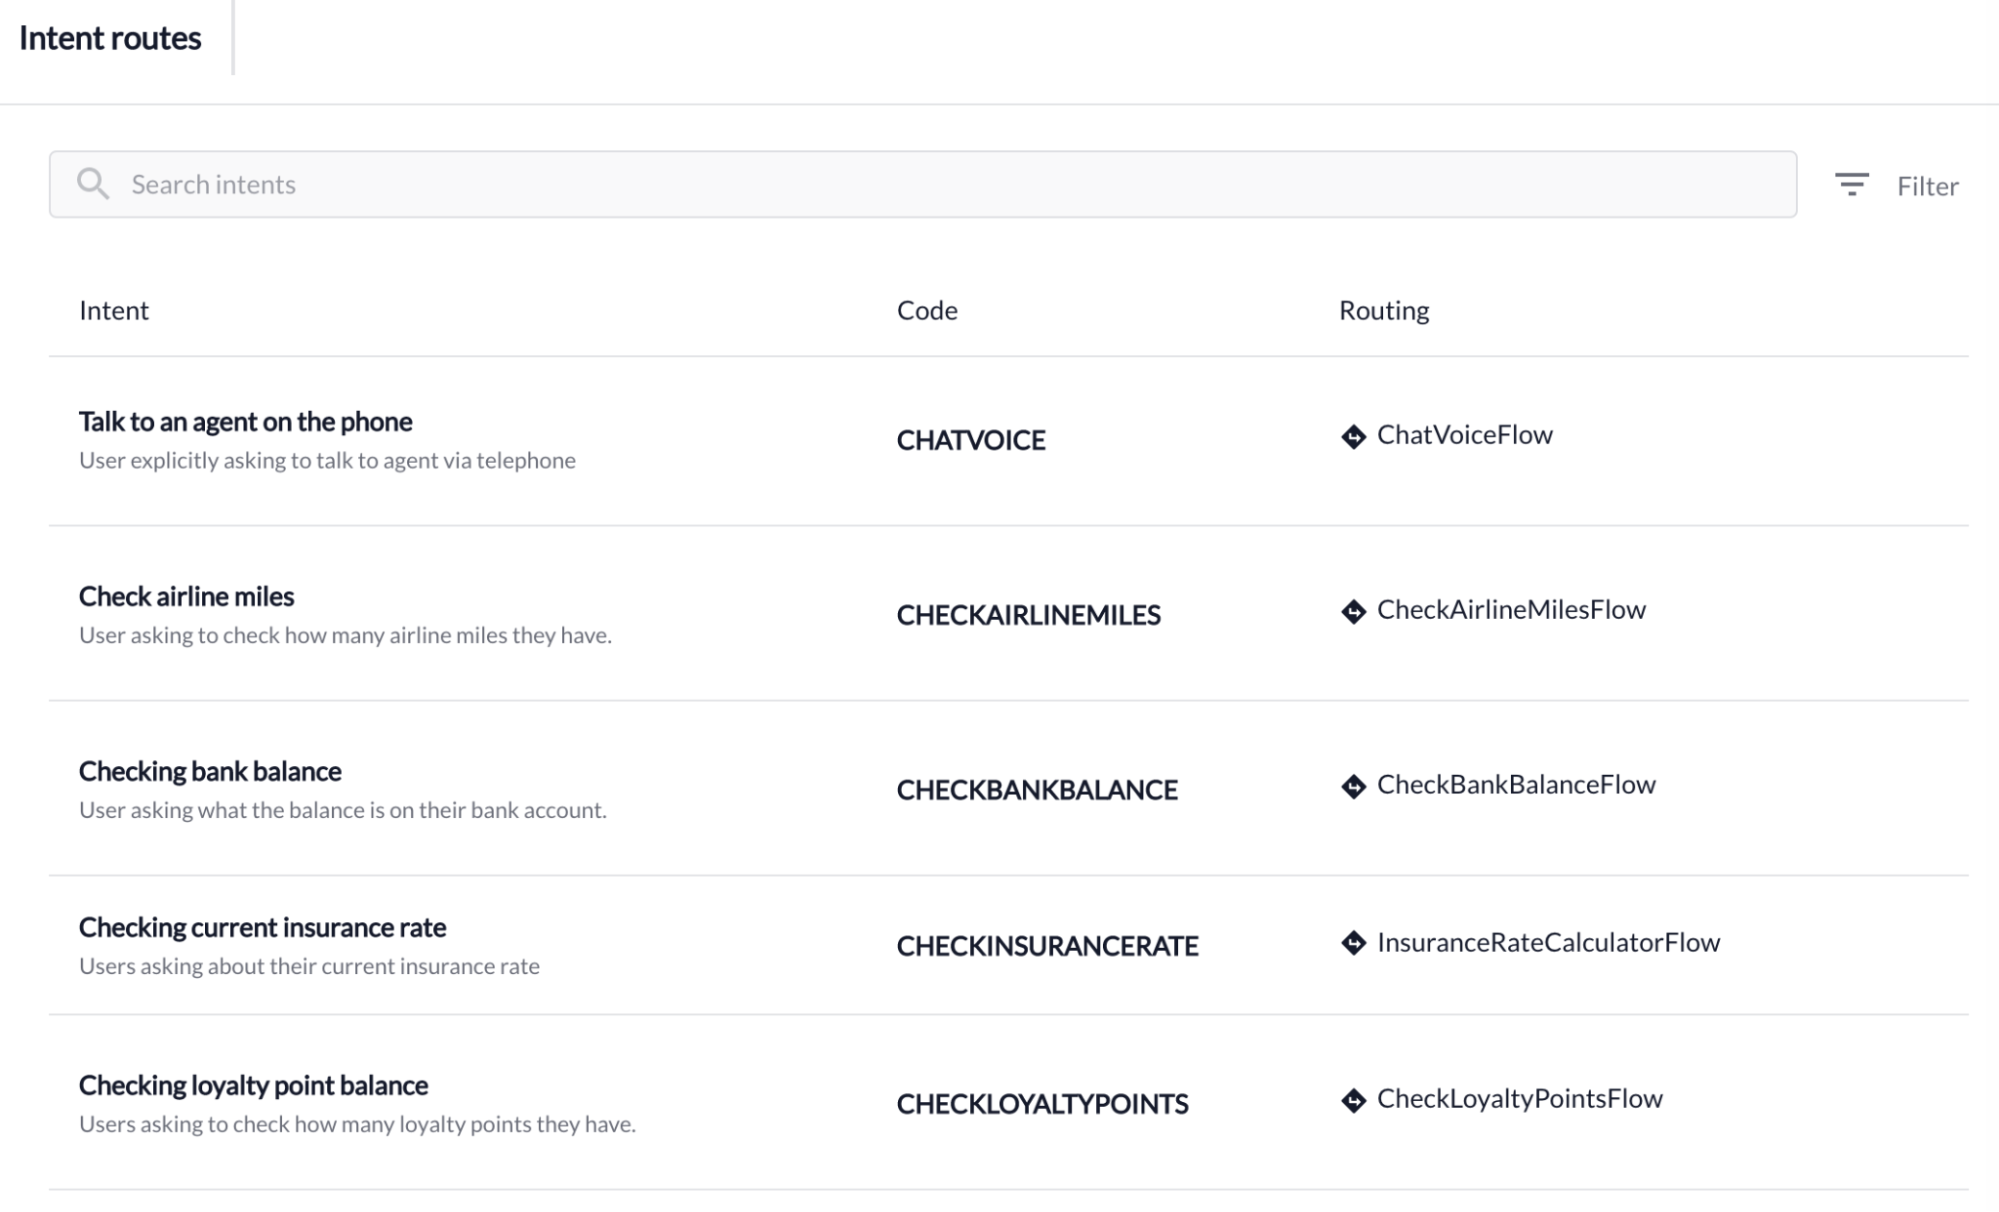
Intent Routing List
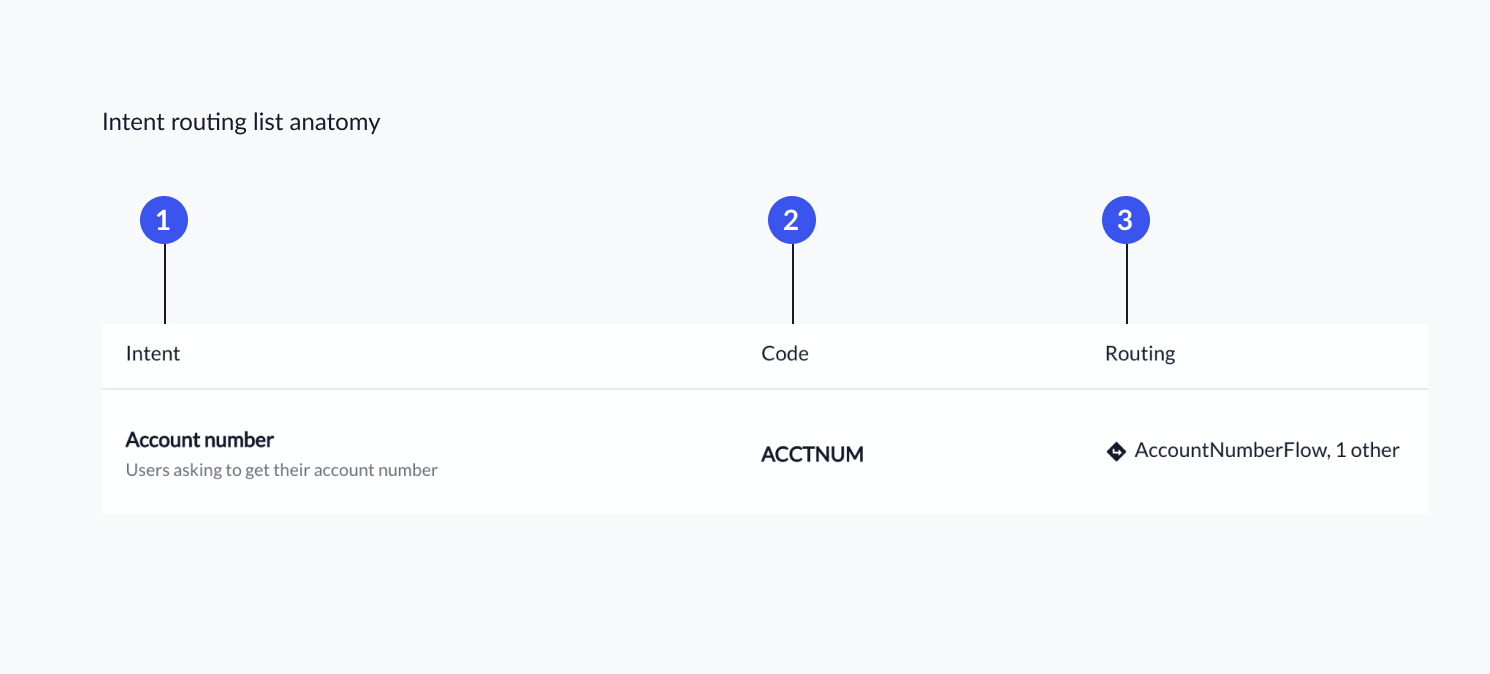
On the intent routing page, you will find a filterable list of intents along with their routing information. The table displays the following information:- Intent name: displays the name of the intent, as well as a brief description on what it is.
- Code: unique identifier for each intent.
- Routing: displays the flow routing rules currently configured for an intent, if available. a. If the intent is routed to one or more flows, the column will list such flow(s). b. If the intent is not routed to any flow, the column will display an ‘Add Route…’. These intents will immediately direct customers to an agent queue.
Intent Routing Detail Page
Clicking on a specific intent in the list will direct you to a page where routing behavior for the intent can be defined. The intent detail page is broken down as follows:- Routing behavior
- Conditional rules and default flow
- Intent information
- Intent toolbar
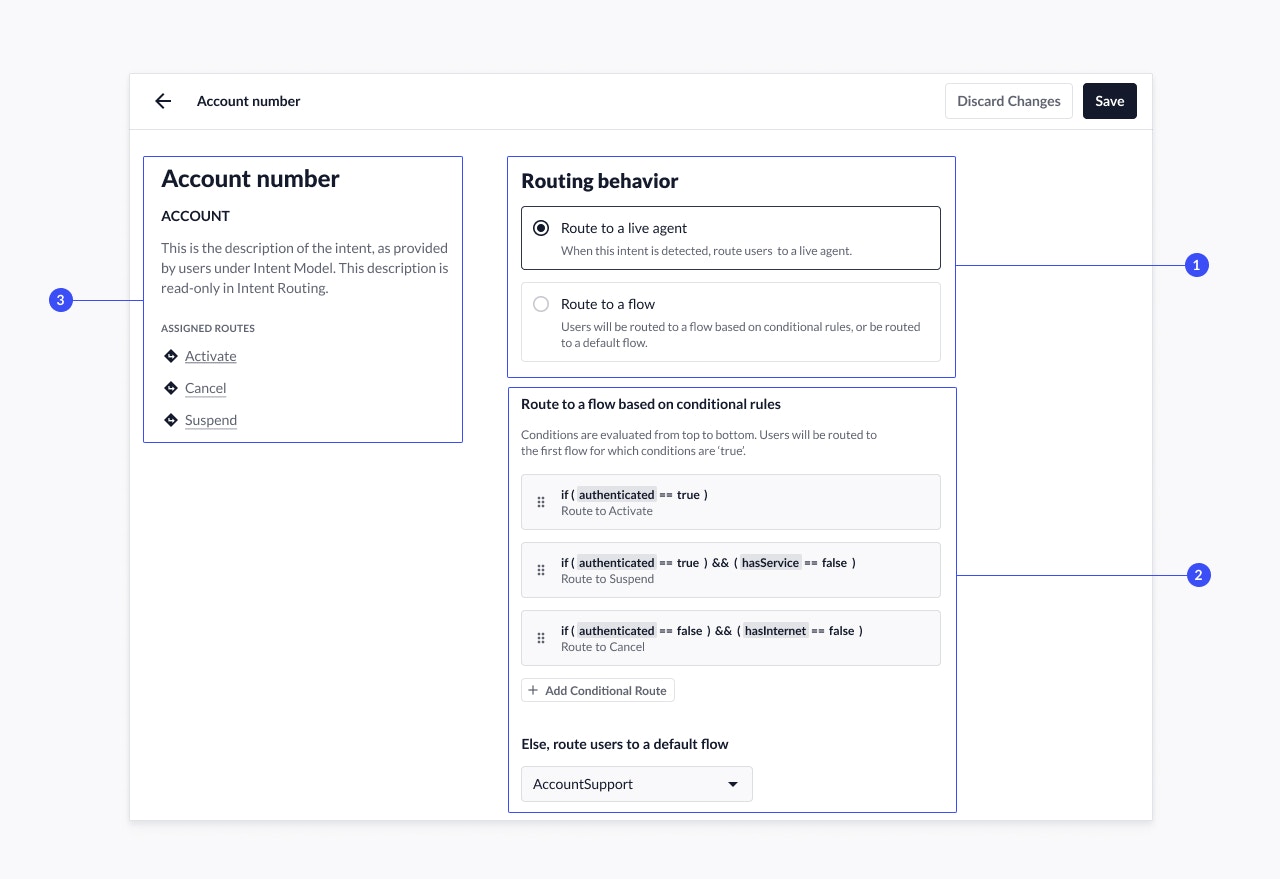
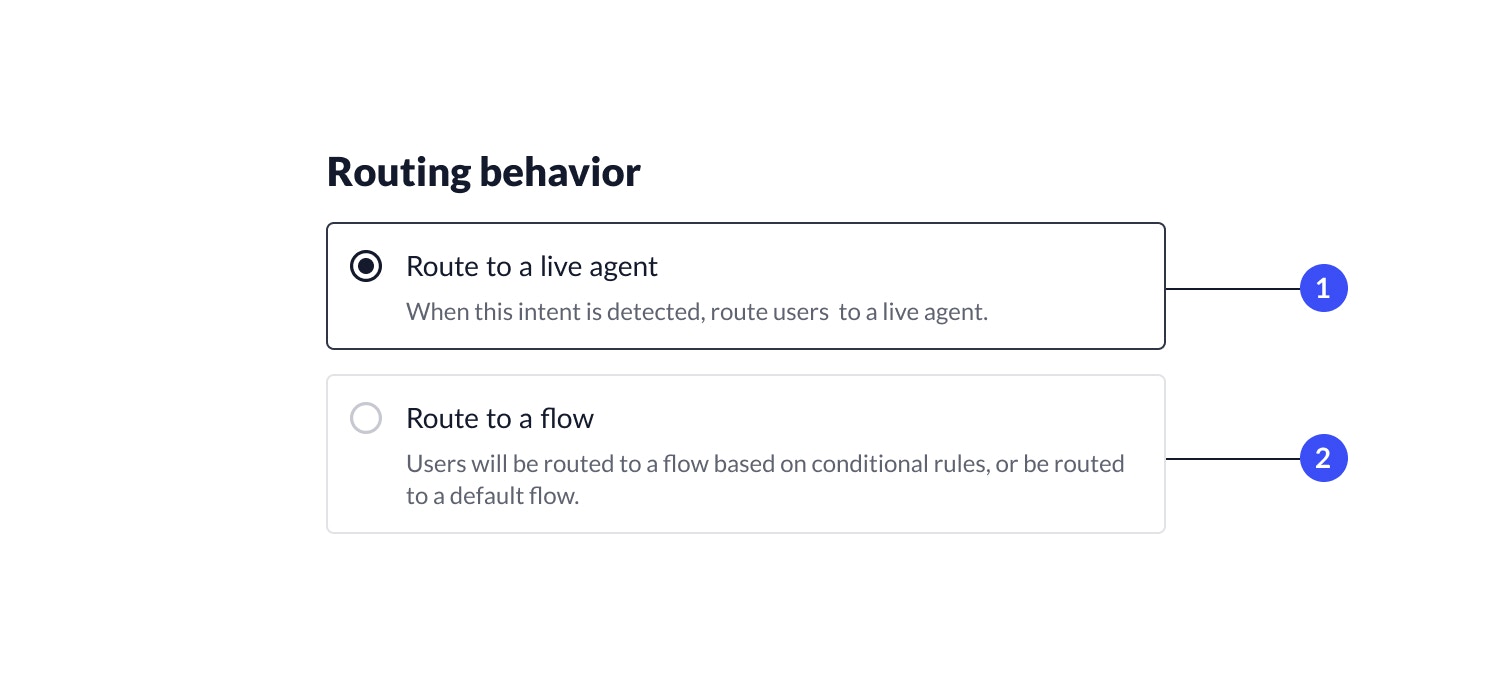
Routing Behavior
Routing behavior for a specific intent is determined by selecting one of the following options:- Route to a live agent When the system identifies the intent, it will immediately direct the customer to an agent queue. This is the default selection for any new intents unless configured otherwise.
- Route to a flow When the system identifies the intent, it will direct the customer to a flow in accordance with the conditional rules that you will subsequently define.
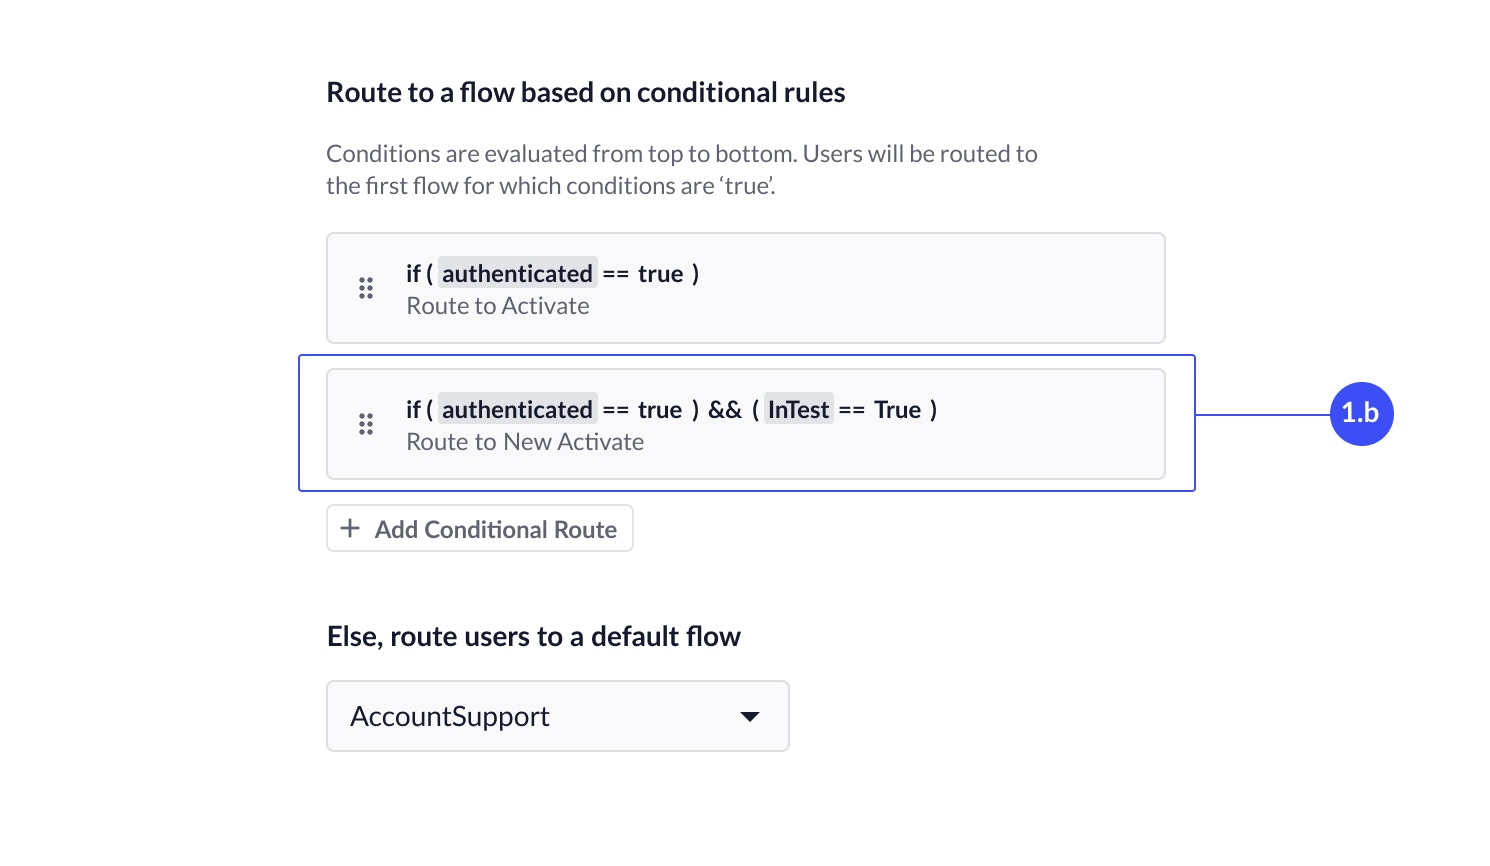
Conditional Rules and Default Flow
If an intent is configured to be routed to a flow, you have the option to build conditional rules and route to a flow only when the system validates the conditions as TRUE. If all the conditional rules are invalid, the system will route customers to a default flow of your choosing.Add Conditional Route
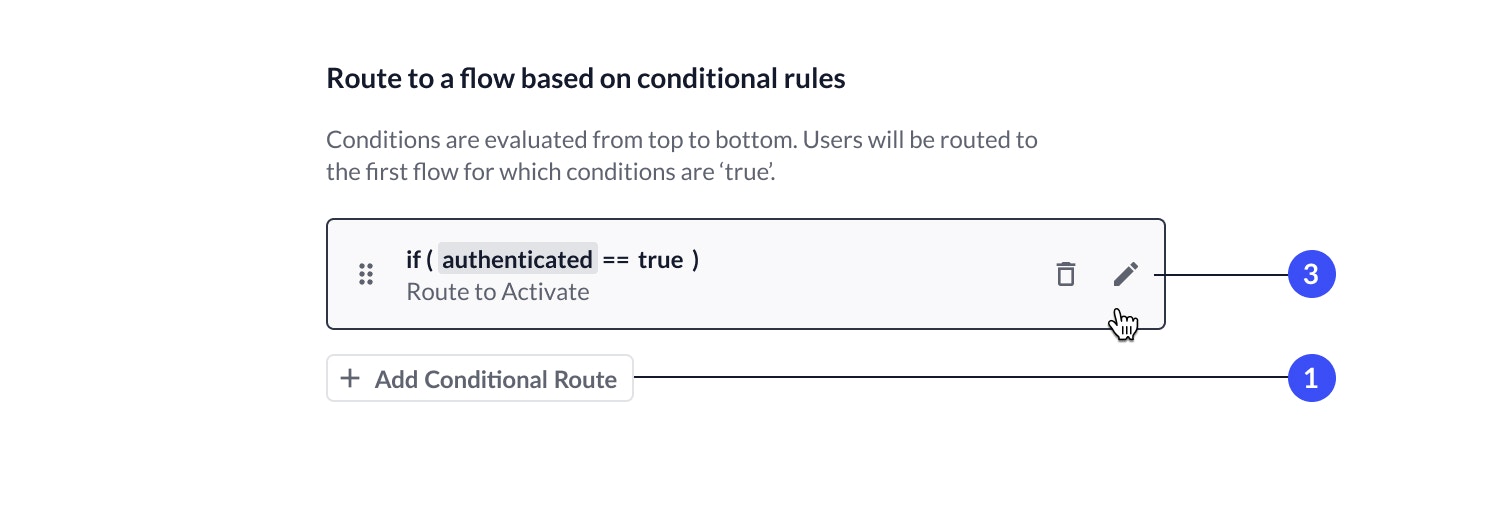
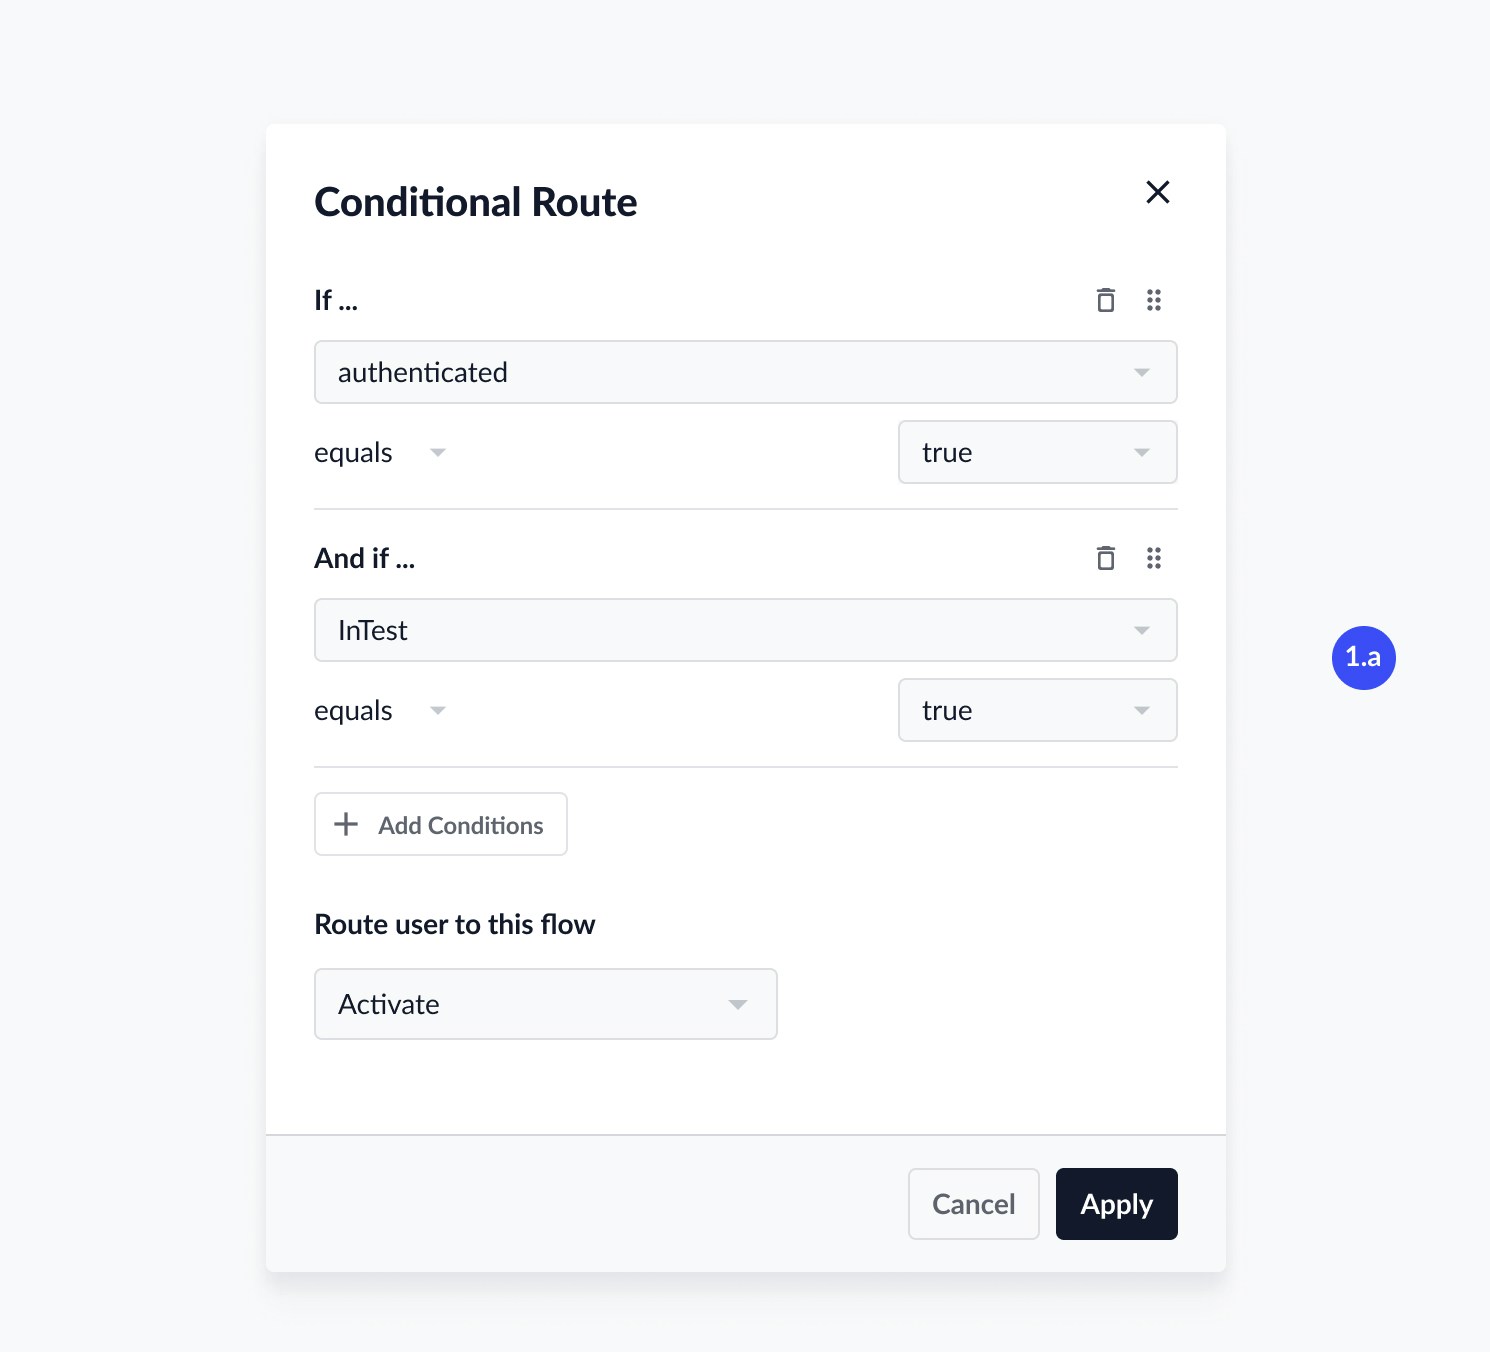
To add a new conditional route:- Select Add Conditional Route.
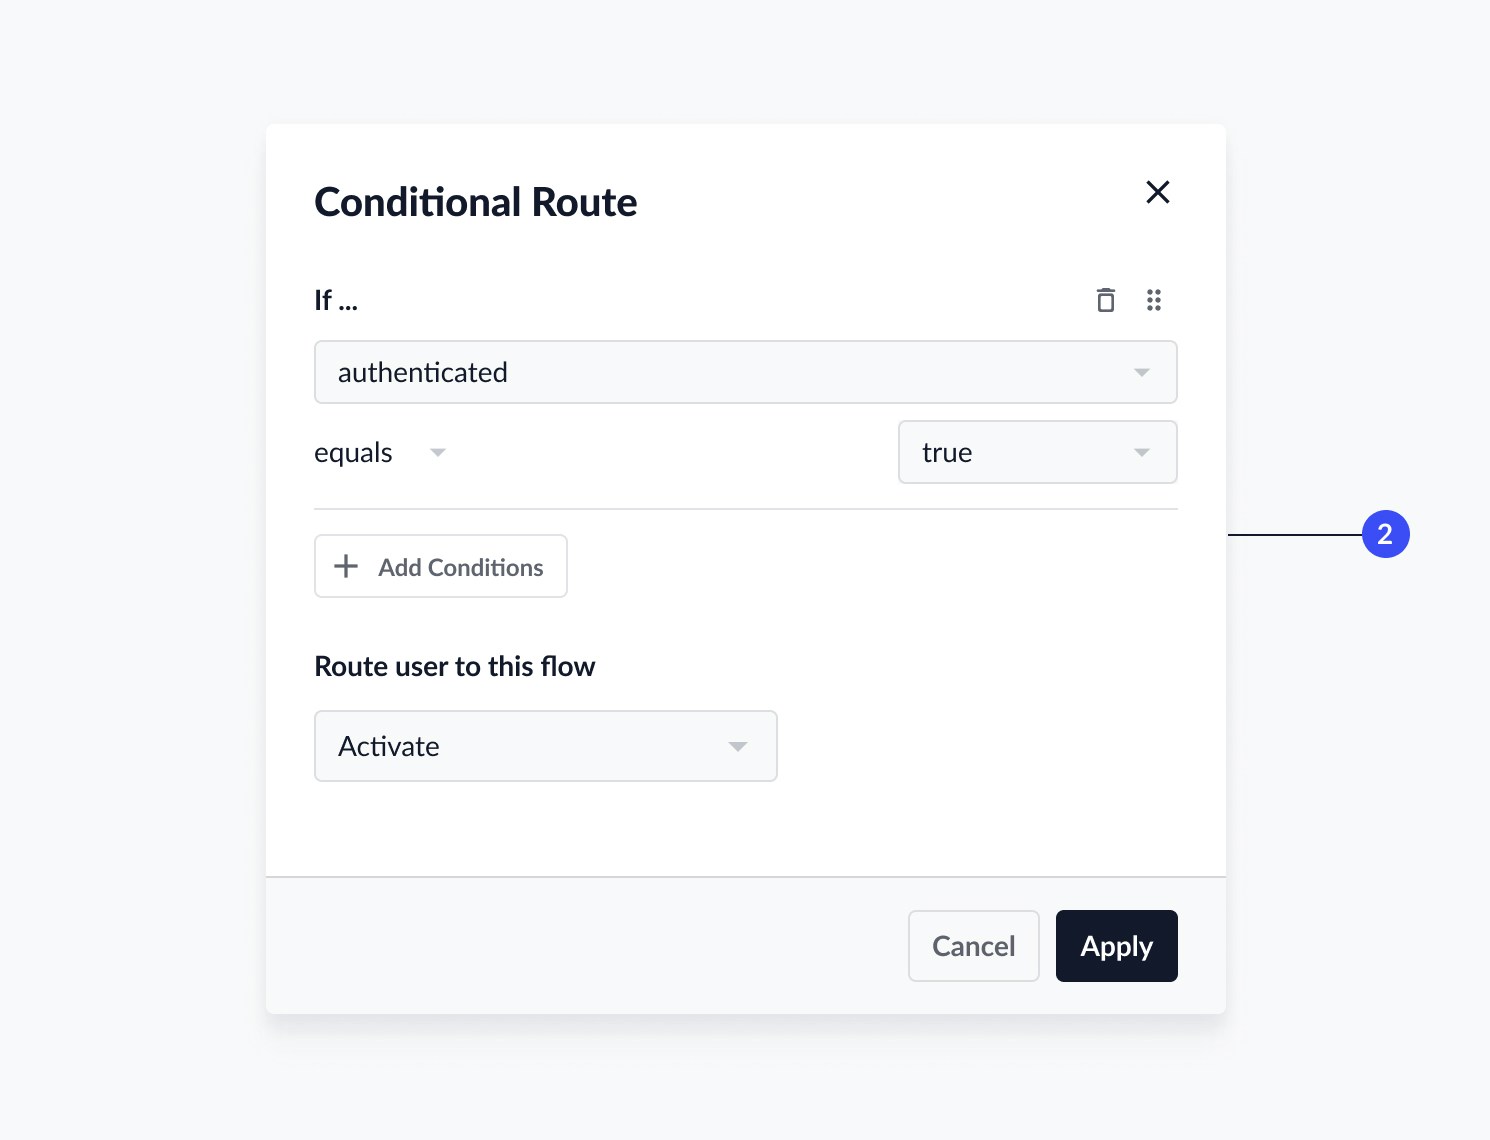
- Define a conditional statement in the Conditional Route editor by: a. Selecting an available attribute as target from the drop-down menu and choose the value to validate against. E.g. authentication equals true. i. Multiple conditions can be added by clicking Add Conditions. Once added, they can be reordered by dragging, or deleted by clicking the trash can icon. b. Selecting the flow to route customers to, if the conditions are validated in the dropdown. c. Click Apply to save your changes.
- Edit or delete a route by hovering over the route and selecting the respective icons.
Multiple Conditional Routes
You can add multiple conditional rules that can route to different flows. You can reorder these conditions by dragging the conditional rule from the icon on the left. Once saved, the system evaluates conditions from top to bottom, with the customer being routed to the first flow for which the system validates the conditions. If no conditional route is valid, the system will route the customer to the default flow.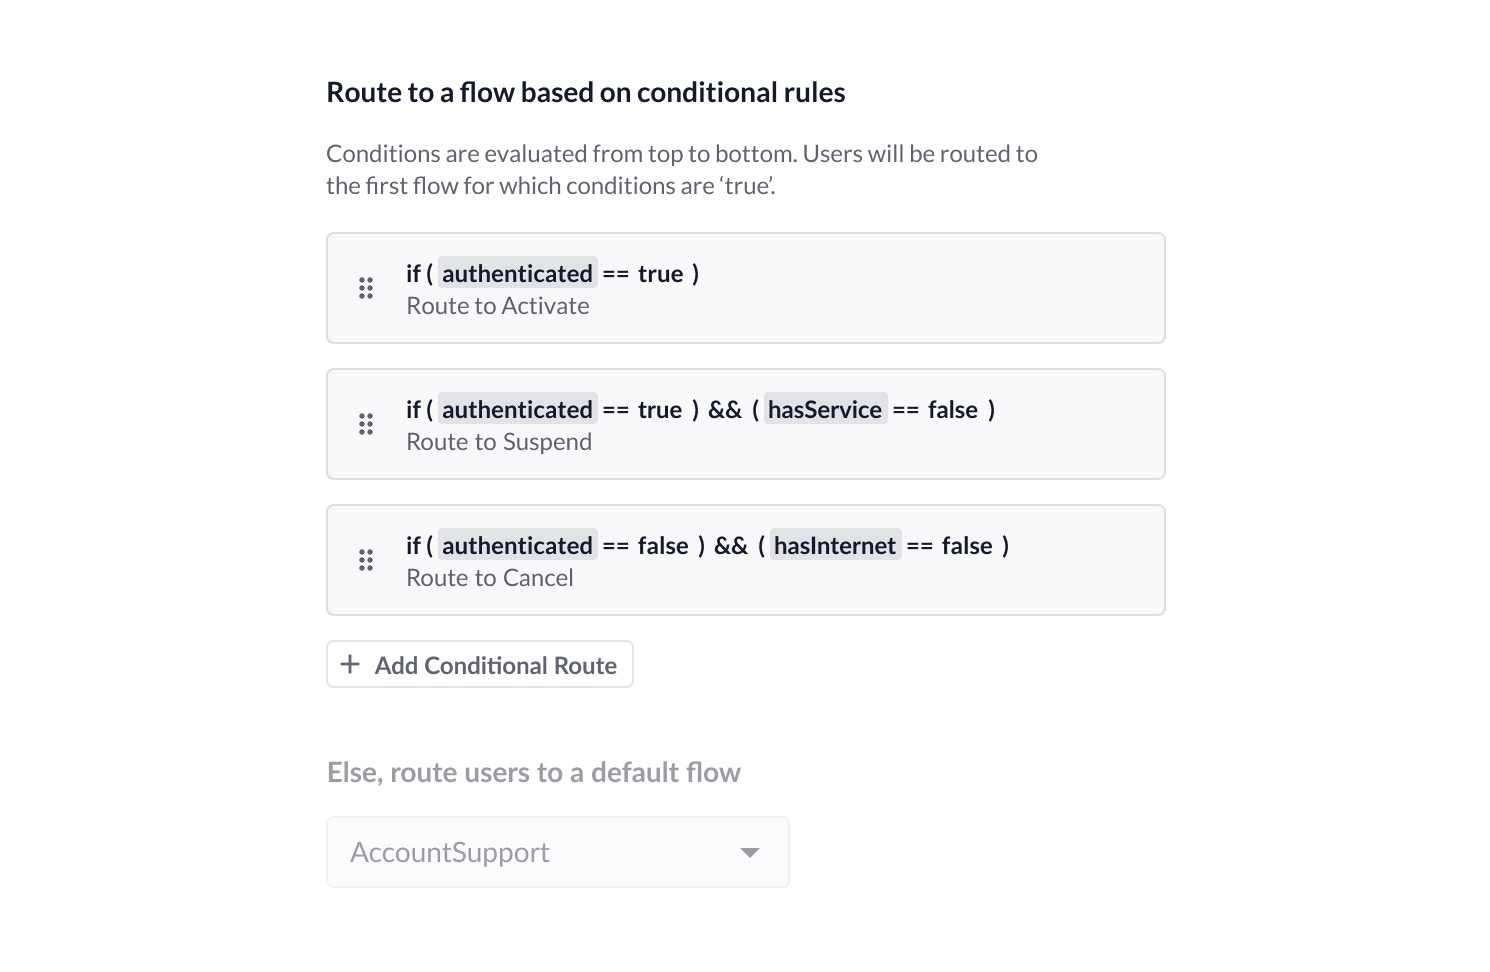
Default Flow
A default flow must be selected if the routing behavior is defined to route to a flow. Customers will be routed to the selected default flow if no conditional routes exist, or if none of the conditional routes were valid.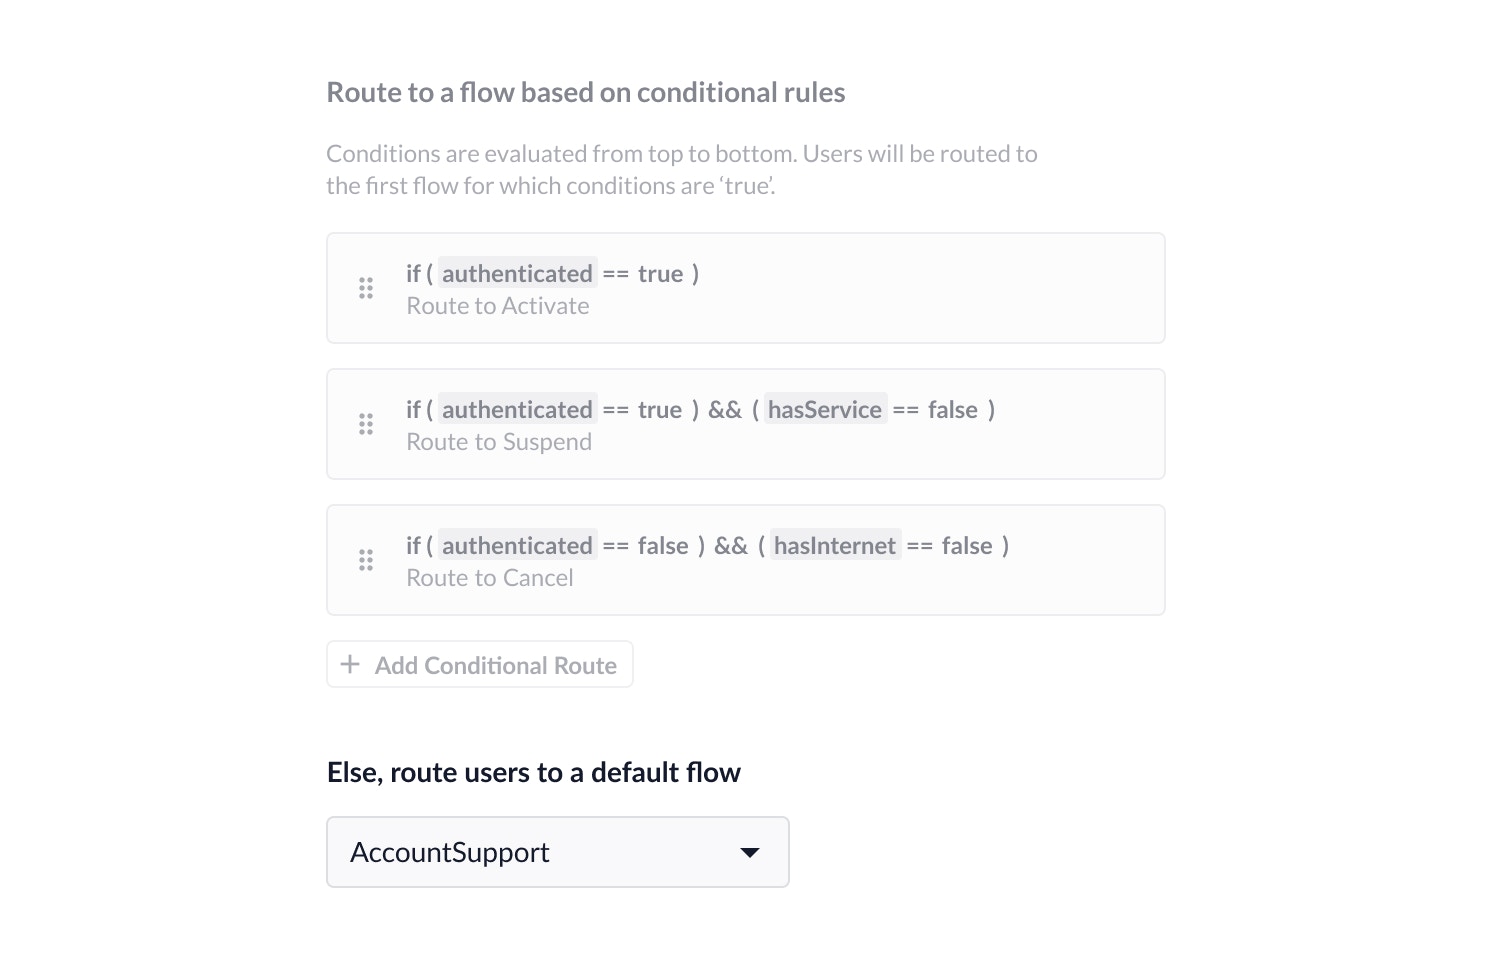
Intent Information
The Intent Information panel will display the intent name, code, and description for easy reference as you are viewing or editing intent routes. The Assigned routes will display any flow(s) that are currently routed from the intent.Intent Toolbar
When you are editing intent routing, the toolbar displays the following buttons:- Discard changes: remove all unsaved changes.
- Save: save changes to intent routing.
Save Intent Routing
To save any changes to intent routing, click Save from the toolbar. By default, when saving an intent route, it is immediately released to production. There is currently no versioning available when saving intent routes.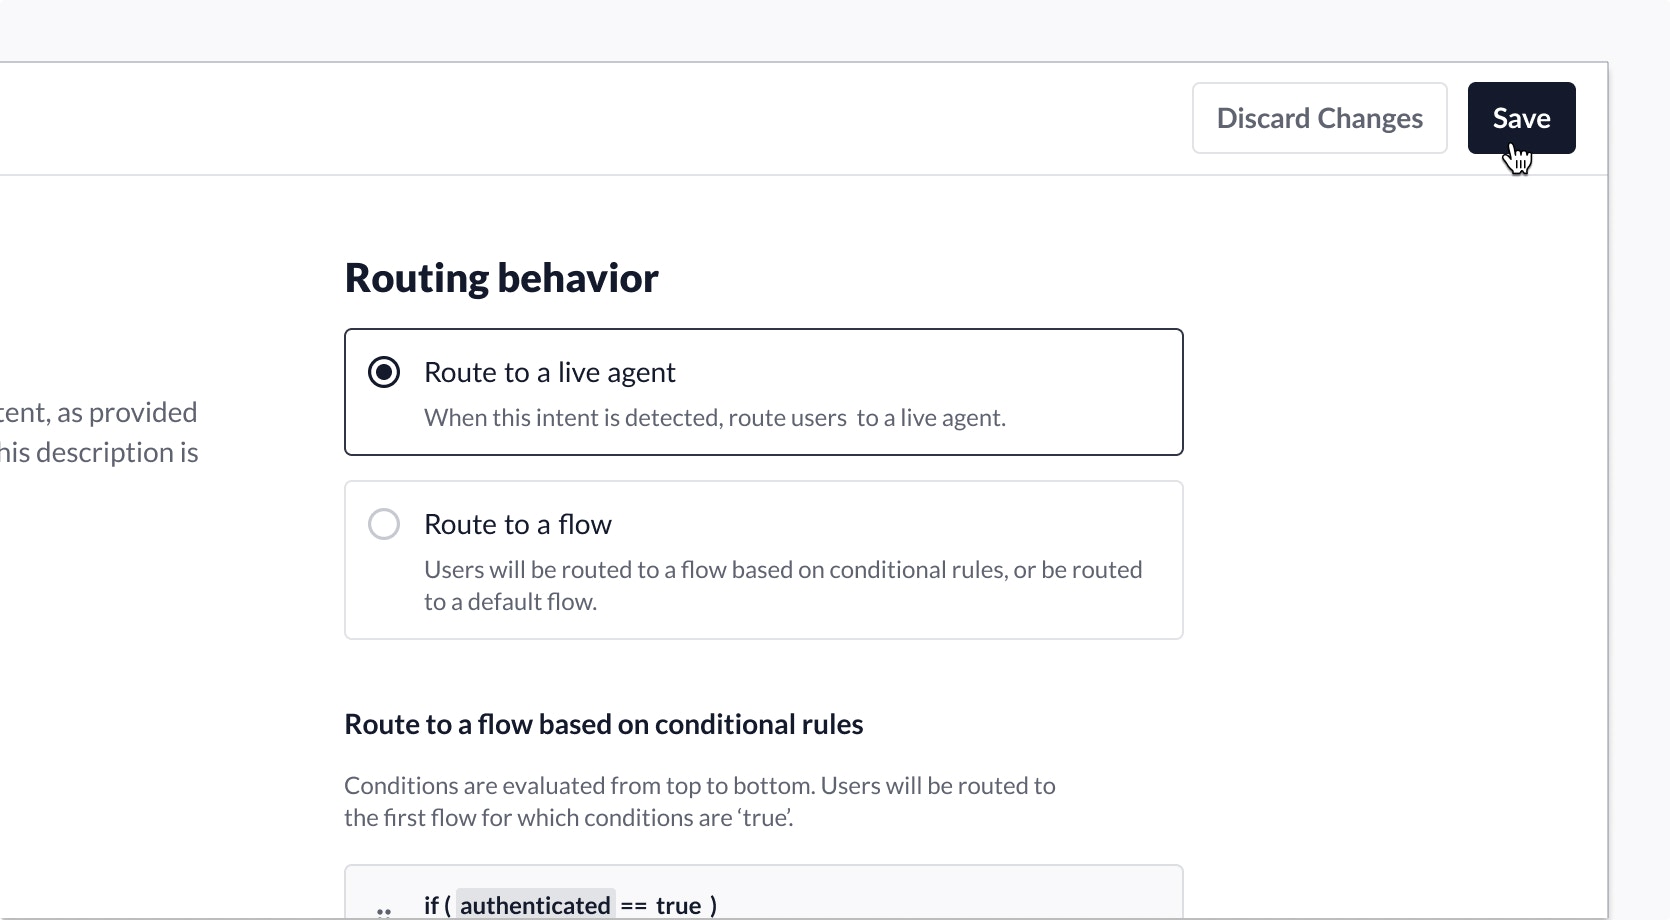
Test a Different Intent Route in Test Environments
To avoid impacting customer routing and assignments in production you can test a particular intent route in a test environment before releasing it to customers by following the steps below:- In the Conditional Route editor, add a condition that targets the ‘InTest’ attribute. a. The value assigned to ‘InTest’ should equal ‘TRUE’. b. Select the flow that you want to test the routing for. c. Click Apply.
Test Intent Routes
Intent routes can be tested in demo environments. To test an intent route:- Access your demo environment.
- Type
INTENT_INTENTCODE, whereINTENTCODEis the code associated with the intent you want to test. Please note that this is case sensitive. - Press Enter to test intent routes for that intent.