

- Compliance and data security: Sensitive inputs are encrypted, and submitted data never appears in plain text in chat transcripts or conversation logs. Agent visibility is limited to a configurable window, reducing regulatory and audit risk.
- Higher resolution and containment: HILAs collect sensitive details in-channel and fully resolve interactions without unnecessary live agent escalations.
- Lower operational costs: HILAs handle a broader range of interactions directly, reducing handoffs and the labor cost of live agent routing.
- In-context customer experience: The form is embedded in the customer’s messaging SDK interface, so customers submit sensitive details without switching channels or exiting the active conversation.
How it works
- The Customer initiates a conversation with GenerativeAgent, and the agent determines that it needs sensitive information to complete the task.
-
The agent toggles to Request Info as the input mode.
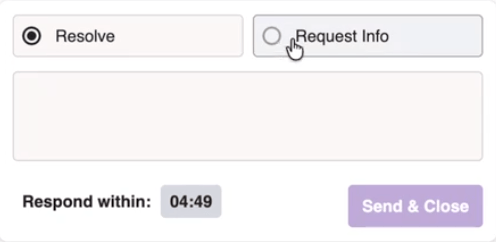
- The agent then selects a form from the list of available forms in the messaging interface.
- The form appears directly in the customer’s chat interface within the messaging SDK. The customer completes it without leaving the conversation.
- After the customer submits the form, the system saves the information in an encrypted format.
- The agent can view the information for a set period of time. After that period, the system removes access to the information.
Submitted values are never written to the chat transcript or the conversation logs in plain text.
Create a Secure Form
1
Create a Secure Form View
To create a secure form, follow these steps:
- Navigate to the ASAPP Messaging section in the AI Console.
- Navigate to the Library section and click Forms tab.
- Click Add Form to create a new form.
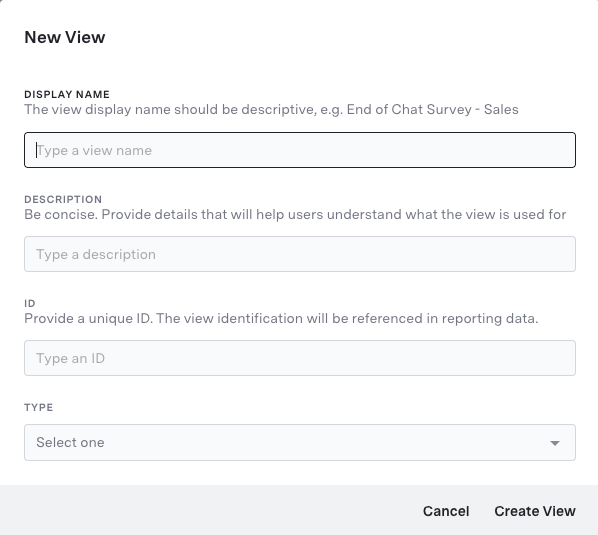
- Fill in the required details for the form, such as the Display Name, Description, Unique Id. For the Form Type, select Universal View.
- Click Create View to create the form view.
2
Add Fields to the Form
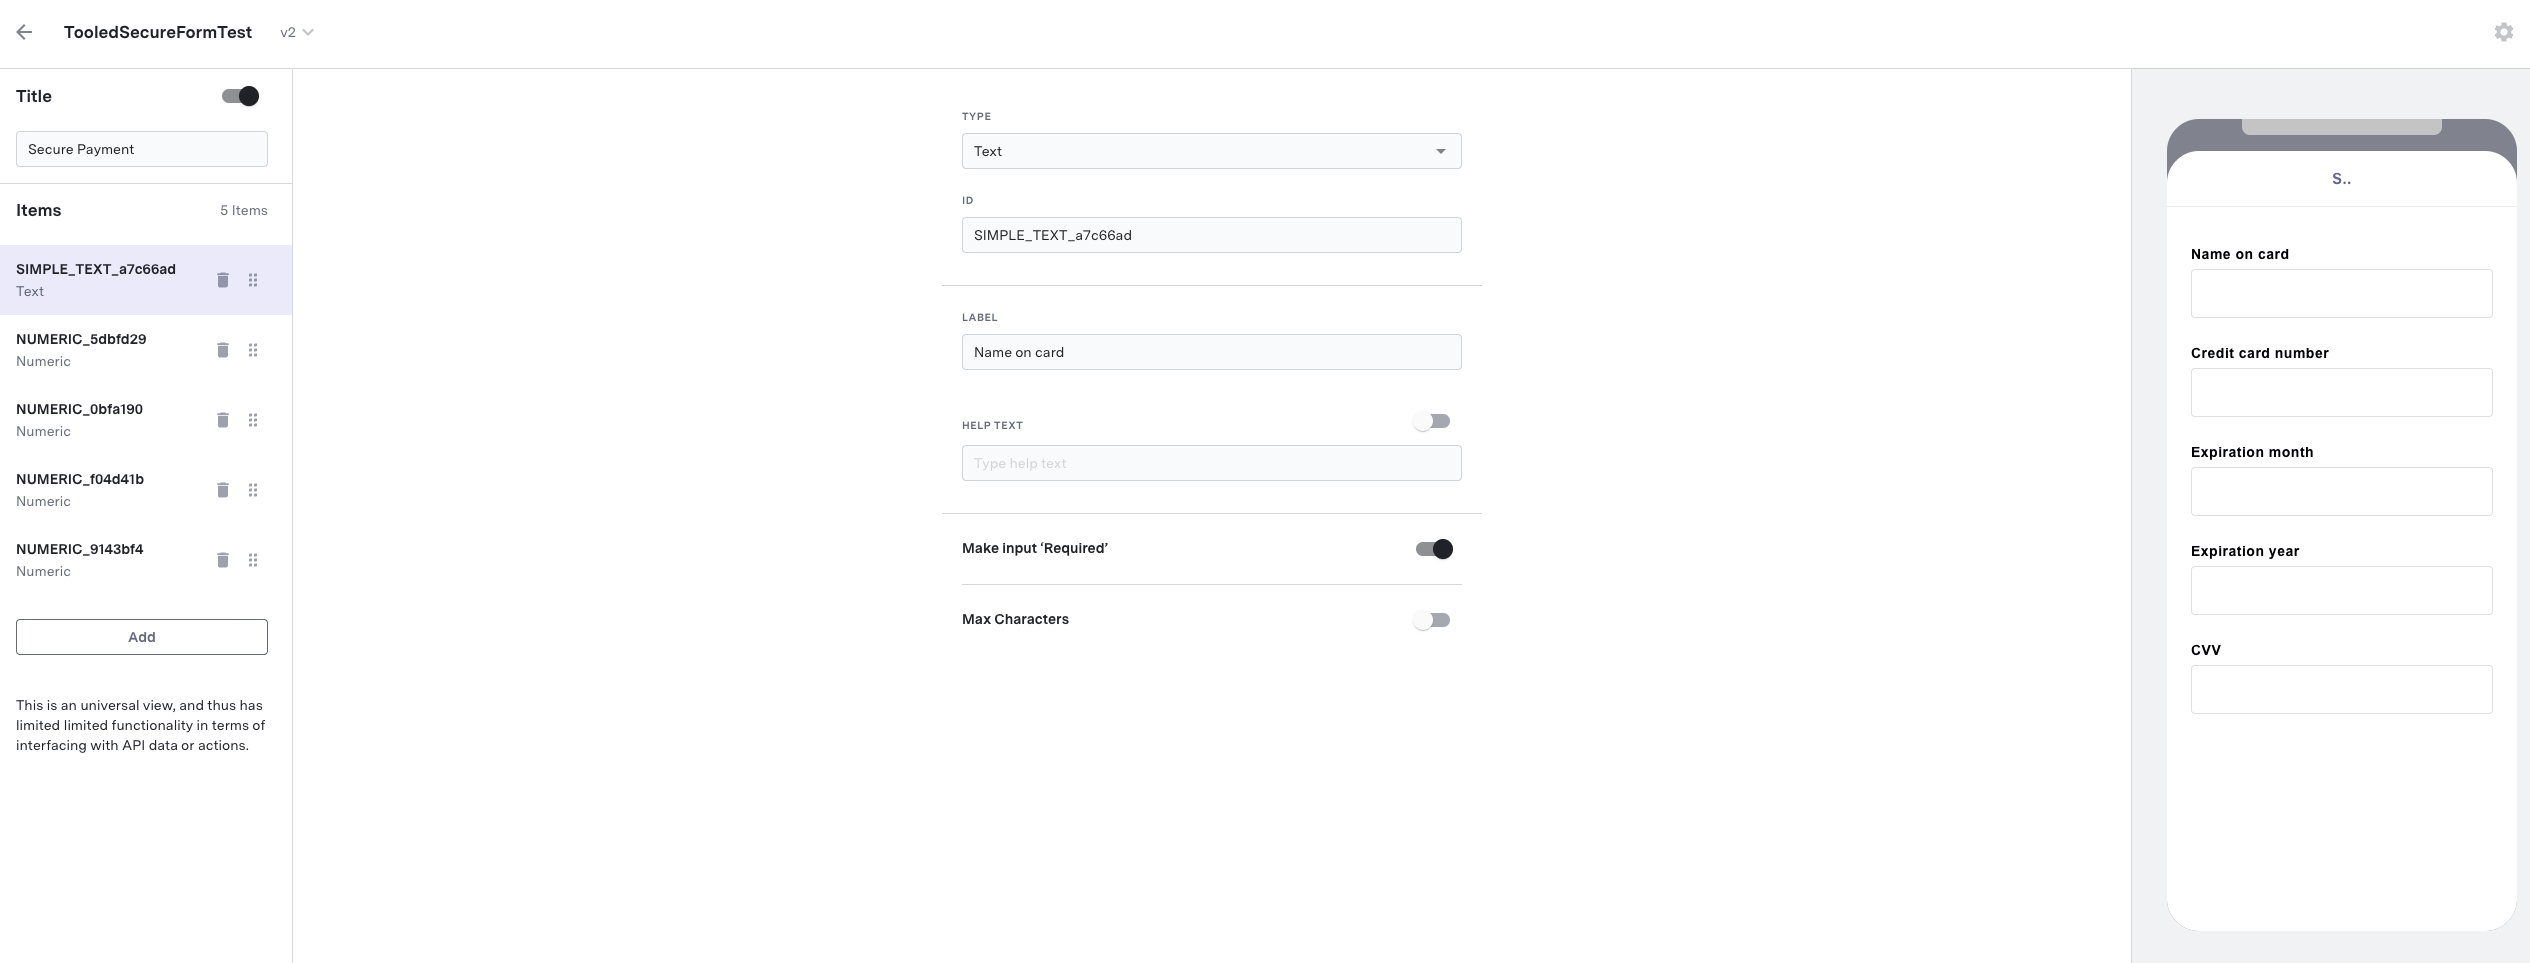
In the form view, you can add fields to the form, assign a title to it, and see how it will appear to the customer.
- To give the secure form a title, toggle the Title switch on and enter a title in the text box.
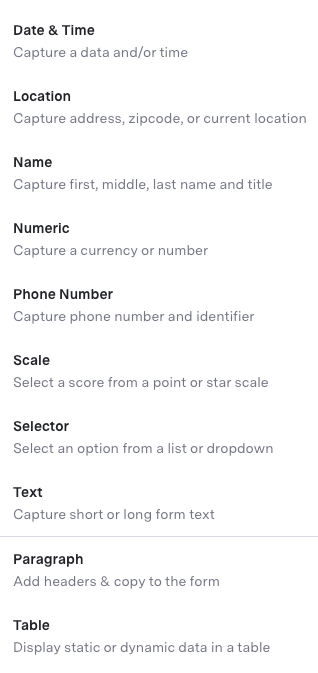
- To add a field to the form, click Add under the items section. You can add multiple fields to the form from the available field types.
- Each Item has a set of properties that you can configure. You can also add validation rules to the fields to ensure that the customer submits valid information.
- Click Save to save the form.
Enable HILA Secure Forms
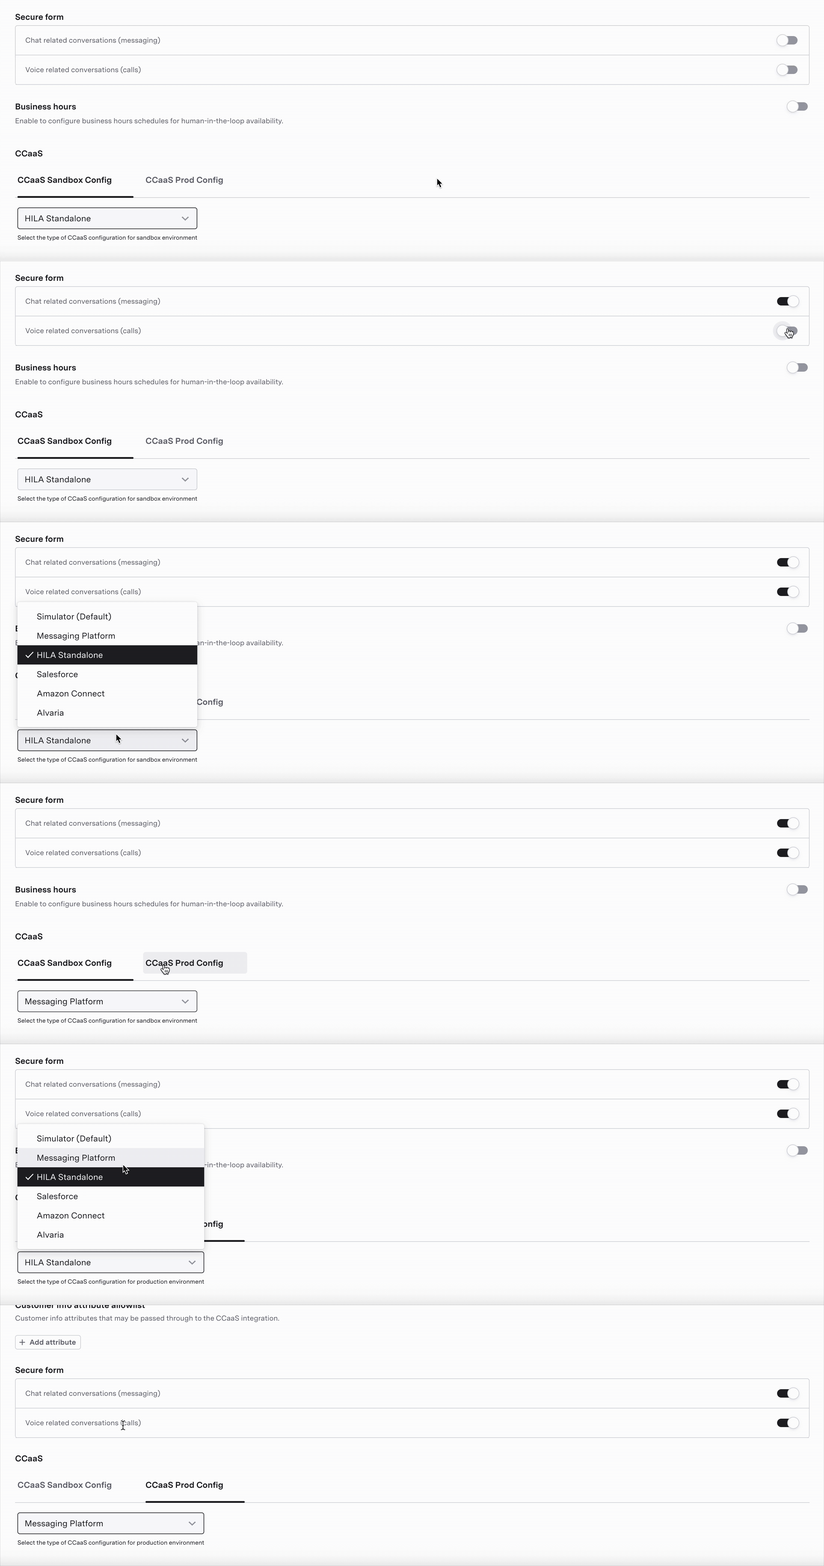
Ensure that you have enabled Secure forms. to do this:- Navigate to the Agent Identity section in the CXP.
- In the Integrations section, expand HILA Configurations and scroll down to Secure Forms.
- Toggle the switch corresponding to Chat related conversations and Voice related conversations to enable Secure Forms for chat and voice conversations respectively.
- Scroll down further to Ccaas Configurations and choose Messaging Platform from the dropdown for both sandbox and production environments.
- Deploy the changes to the desired environment.
If you do not see the HILA Configurations section, you can enable it by adding
is_secure_form_enabled_chat and is_secure_form_enabled_voice to your Partner Configuration Data.Next Steps
Human-in-the-Loop
Learn about the core HILA capabilities and how to incorporate them into your use cases.
Approver Mode
Learn how HILAs review and refine GenerativeAgent responses before delivery.
Digital Agent Desk
Learn how agents handle messaging conversations in the Digital Agent Desk.
Web SDK
Integrate the messaging SDK that renders secure forms for customers.