

How it works
A Dynamic Form is a set of sequential pages joined by transition rules. When a customer submits a page, ASAPP evaluates the rules for that page and serves the next page in real time.- Question-to-question transitions: each page declares which page follows it. A page can route to different destinations depending on the response.
- Conditional logic: transition rules use if/then conditions evaluated against the answer on the current page and answers collected earlier in the form.
- Real-time progression: the path through the form is resolved as the customer answers, so no page is sent until its condition is met.
- Default paths: each branching page needs a fallback destination so that any response that matches no condition still advances the form.
Question types available on a page
Each page holds a single question or a small set of related inputs. Configure the input type per question:- Date & time : Allows customers to select both a date and a time.
- Numeric : A numeric input field that accepts only numbers. Can be used for phone numbers, zip codes, or any other numeric input.
- Selector : A question that allows the customer to choose from a predefined set of options.
- Text : A free text input field that accepts any characters. Can be used for names, addresses, or any other textual input.
- Paragraph : A multi-line text input field that allows customers to provide longer responses.
Build a form in AI Console
The Form Builder in AI Console handles form creation, question configuration, and the logic that connects pages.Create the form view
To create a secure form, follow these steps:
- Navigate to the ASAPP Messaging section in the AI Console.
- Navigate to the Library section and click Forms tab.
- Click Add Form to create a new form.
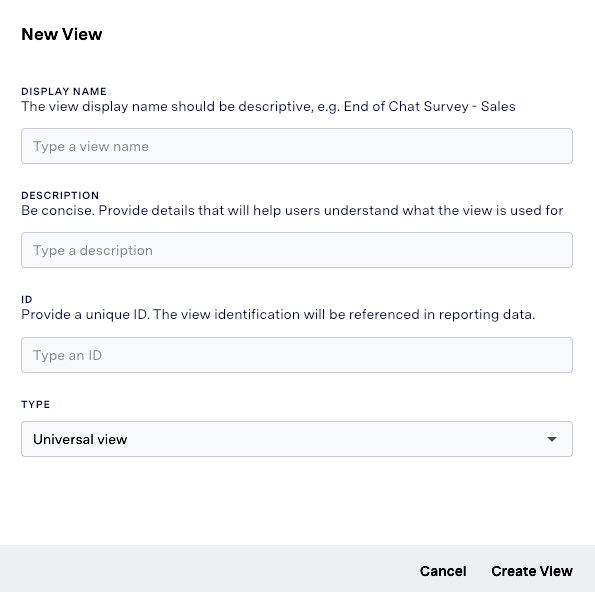
- Fill in the required details for the form, such as the Display Name, Description, Unique Id. For the Form Type, select Universal View.
- Click Create View to create the form view.
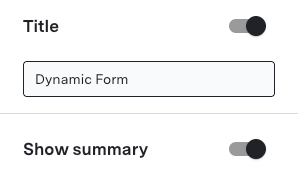
Enable Title and Summary (Optional)
Optionally, you can enable if you want to display a title and summary for the form.
Define Splash Text
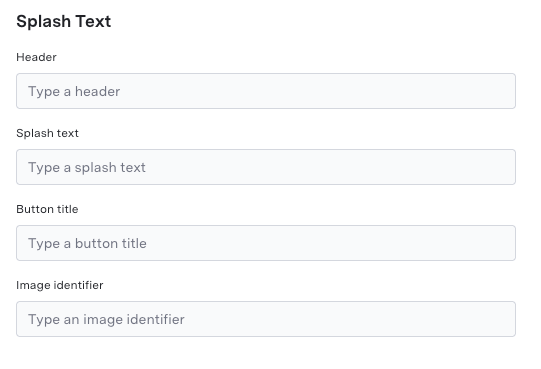
The splash text is the introductory text that appears at the beginning of the form. It provides context and instructions to the customer before they start filling out the form.
To define the splash text, enter the Header, Splash Text, Button Title, and Image Identifier in the respective fields.
Add pages and questions
Add one page per question. To add a new page:
- Click Add under Item.
- Select a question type from the available options.
- Configure the question text, labels, ID, and any additional settings for the question.
- Repeat the above steps for each question/page you want to add to the form.
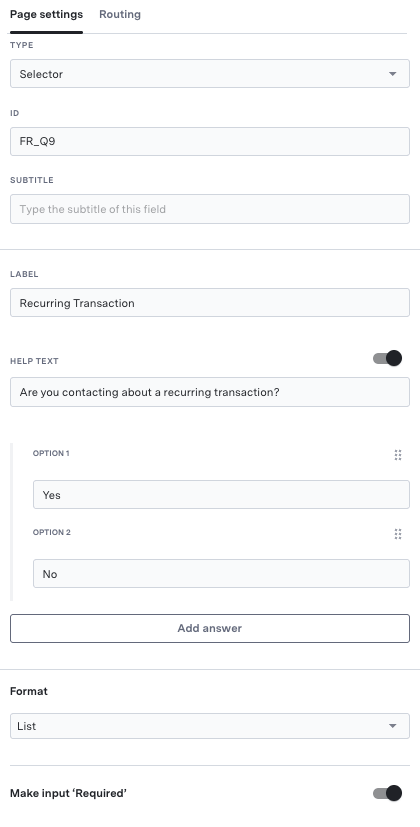
Keep question text short, because AMB renders each page in the Messages interface.
Define transition rules
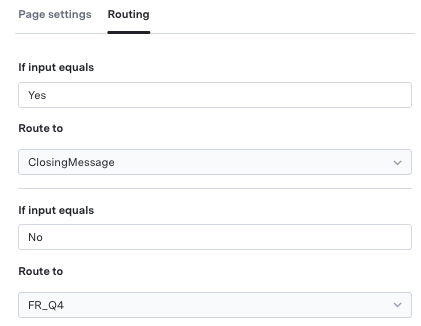
To define transition rules, select the page you want to configure, navigate to the Routing tab, and select a destination page under Route to or Route from for each possible answer.
Save the form
After configuring all pages, questions, and transition rules, click the Save button on the top right to save the form.
For any changes made to the form, you can choose to save the changes as a part of the same version or a new version.