Salesforce Setup
ASAPP’s HILA integration requires particular queues, flows, and channels to be set up in Salesforce by an administrator. Follow the steps below to configure your HILA integration.1
Create a New Queue
Create a new queue with the settings below, add the necessary users or groups, and save.
- Name: HILA Queue
- Object: Messaging Session
2
Create a Record-Triggered Flow
Create an Omni-Channel flow for routing. Activate the flow after saving.
- Object: Messaging Session
- Trigger: A record is created
- Action: Assign to the HILA Queue created in Step 1
3
Create a New Channel
Navigate to Setup → Messaging Settings → New Channel. Activate the channel after saving.
- Channel Type: Messaging for In-App and Web
- Name: HILAChannel
- Developer Name: HILAChannel
- Routing Settings: Configure Omni-Channel Routing and select the Queue and Flow from Steps 1 & 2
4
Create an Embedded Service Deployment
- Navigate to Setup → Embedded Service Deployments → New Deployment.
- Under deployment type, select Messaging for In-App and Web.
- When prompted, choose Custom Client to integrate with your own web or mobile experience.
- Your Deployment Name and API Name should match and reference HILA.
- Select the Messaging Channel you created in Step 3 and fill in the required fields. Once completed, click Publish to finalize the deployment.
5
Add the HILA Component to the Messaging Session Page
- Navigate to Setup → Object Manager → Messaging Session → Lightning Record Pages.
- Edit the record page layout, dragging and dropping your custom component from the package.
-
Configure the component with the following settings:
6
Provide ASAPP with Setup Information
Provide ASAPP with the following to complete the HILA setup:
- Organization ID — Setup → Company Information → Salesforce.com Organization ID
- Domain Name — Setup → Domain (Sites and Domains) → URL (which have Salesforce Sites Domain as Current Domain Configuration Option )
- API Name — The API Name defined in Step 4
You must check the Presence Status Settings in Salesforce to ensure that Messaging channel is assigned to it. If it isn’t assigned, you must add the Messaging channel and assign it to the specific Presence Status.
Using HILA in Salesforce
When customers interacting with GenerativeAgent reach a point that GenerativeAgent cannot solve on its own, GenerativeAgent will reach out to a Human-in-the-Loop Agent to complete the transaction. These escalation points are configurable and specific to your particular workflow.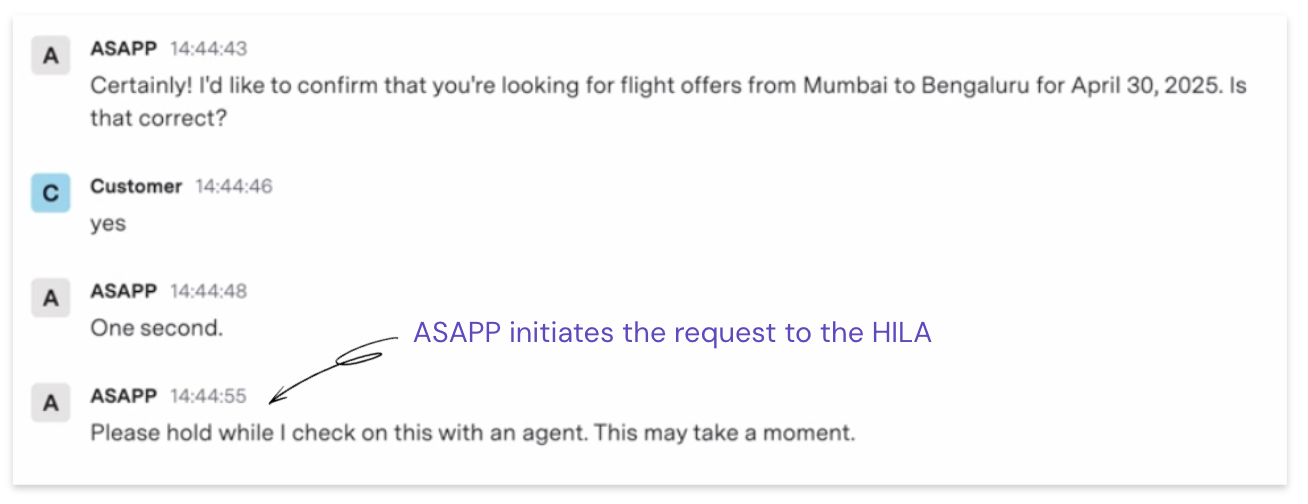
- Respond to GenerativeAgent
- Transfer the conversation to a Live Agent
- View the interaction thread history
- Access relevant customer information and summarized conversation context
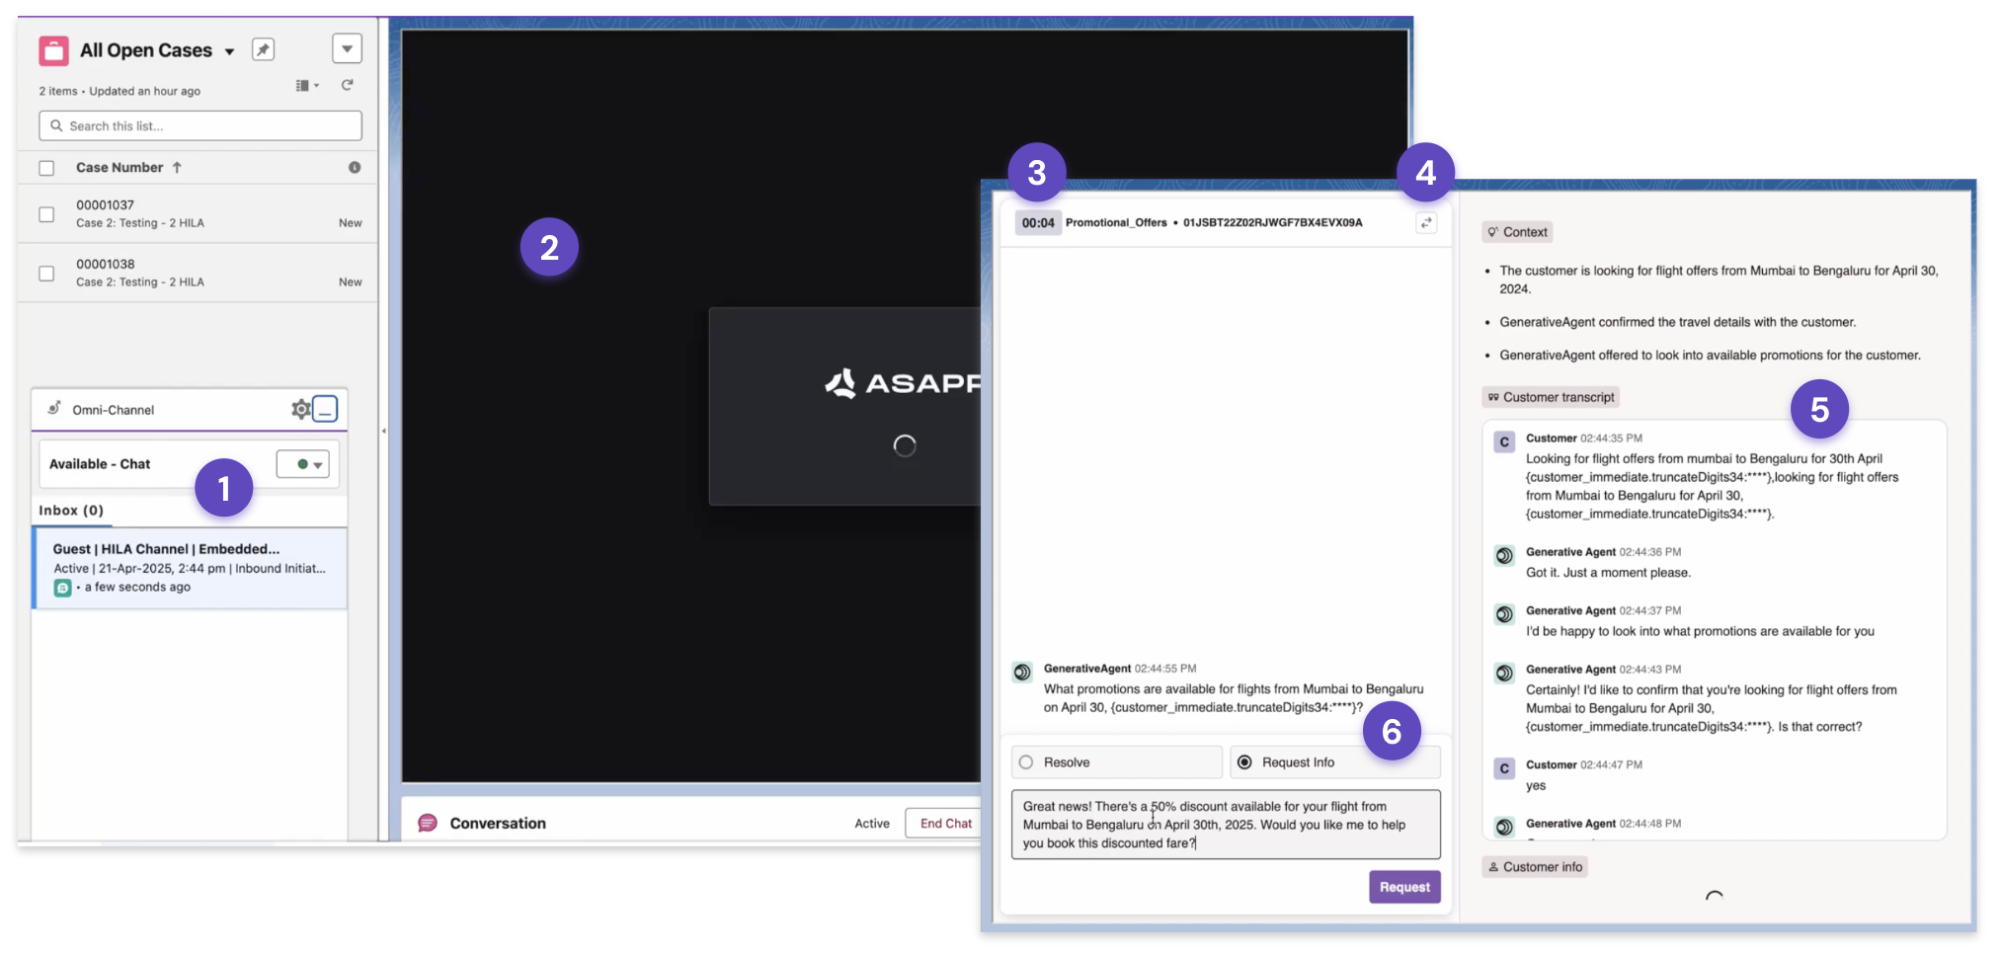
- New request notification: The new HILA request pops up automatically.
- Component Loading: Agents will briefly see an ASAPP loading screen as the HILA component initializes.
- Ticket Assignment Timer: Tracks the time elapsed since the ticket was assigned to the Human-in-the-Loop Agent.
- Transfer: Allows the Human-in-the-Loop Agent to transfer the conversation from GenerativeAgent to a Live Agent.
- Context panel: Displays the summarized context of the request, the prior transcript, and the customer’s details.
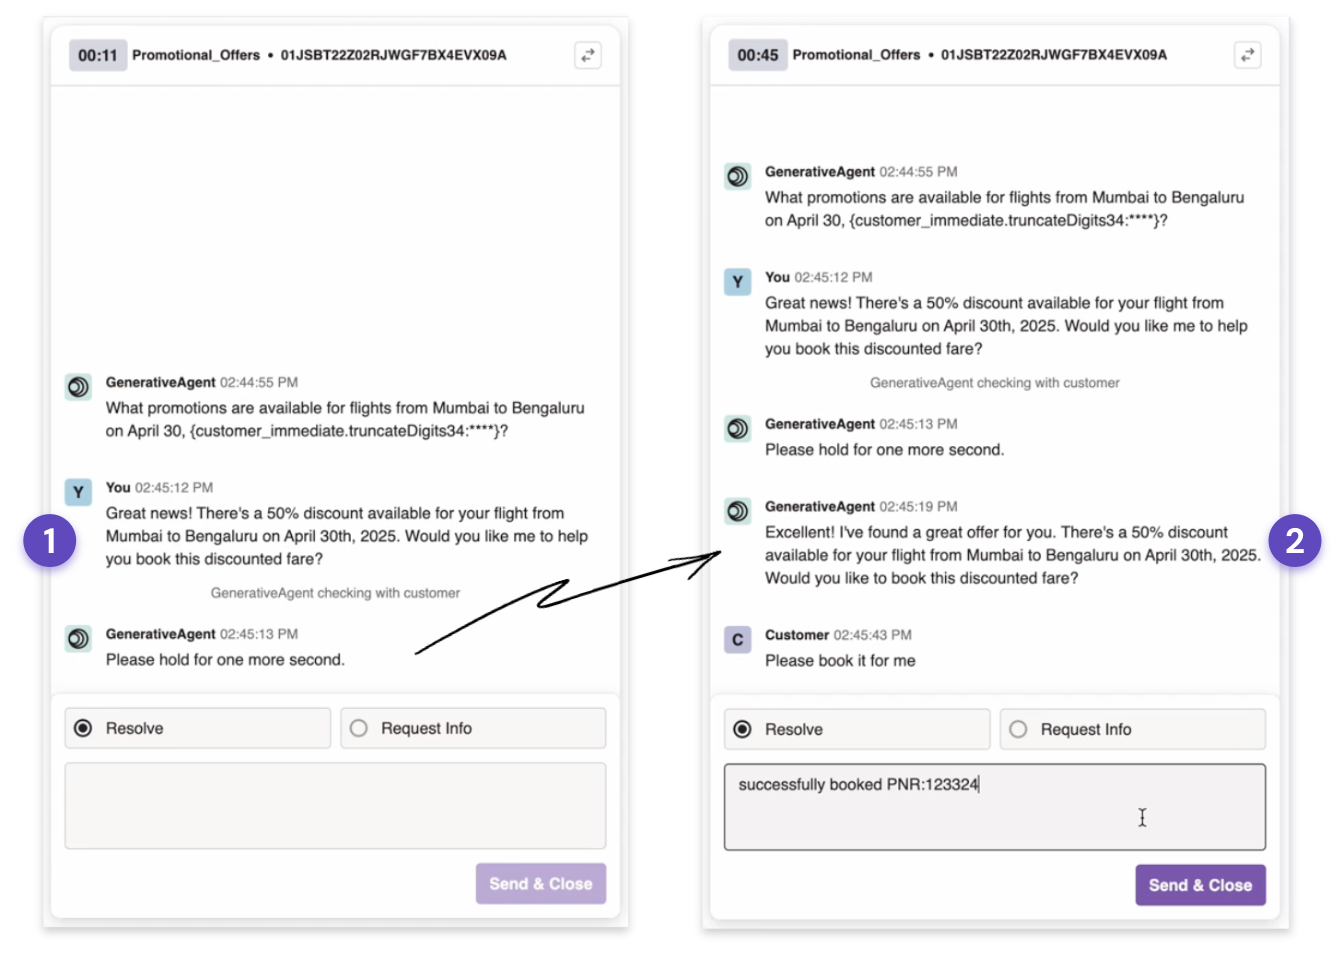
- Prompt & Response: Indicates the specific assistance GenerativeAgent needs to unblock the customer. Human-in-the-Loop Agents respond here as they would to the customer directly — GenerativeAgent will use their response to formulate its own.
If the Human-in-the-Loop Agent is doing anything other than completing the transaction, select Request Info. Resolve will close the HILA chat fully.