

General Information
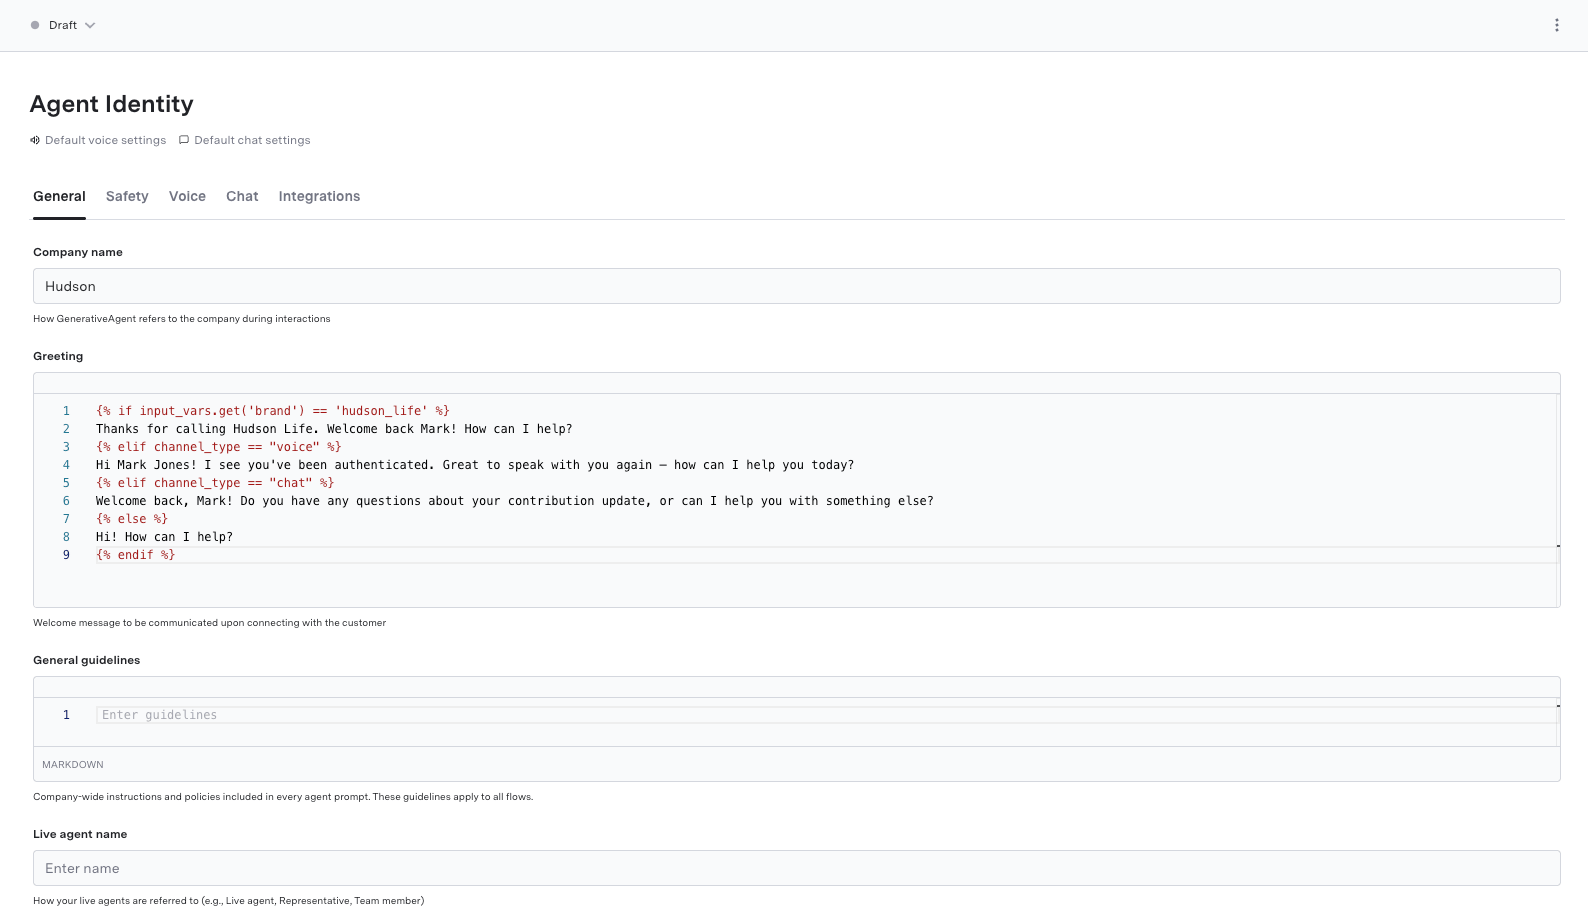
The General Information section allows you to specify the basic identifying details of the agent, such as:- Company name: The name of the company the agent represents.
- Greeting: The initial message or salutation used by the agent when interacting with customers.
- General Guidelines: Any overarching rules or principles that is applied to all agent prompts and interactions.
- Live agent name: How the live agent is referred to during interactions with customers (e.g., “Support agent”, “Team member”, etc.)
Safety Attributes
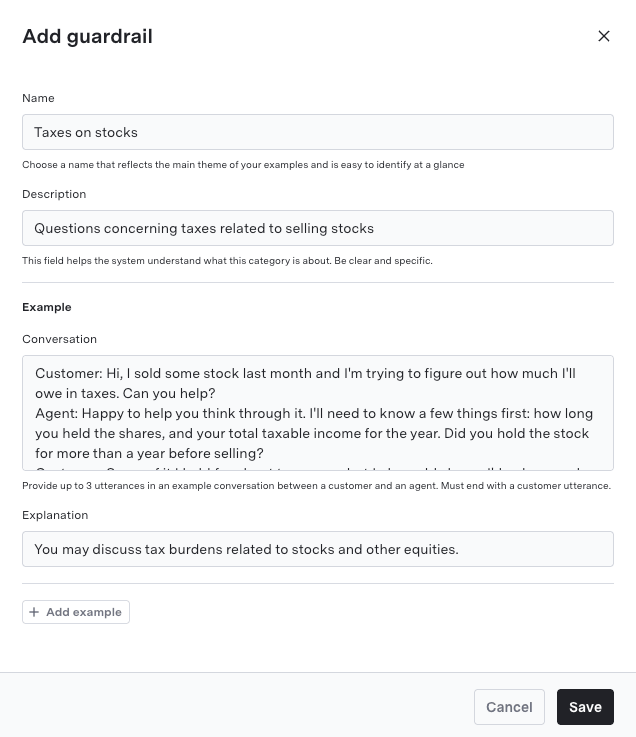
The Safety section allows you to add Input Guardrails, which are topics or content that the agent is allowed to discuss or respond to during interactions with customers. This helps ensure that the agent maintains appropriate and safe communication at all times. To add an Input Guardrail, click on the Add button and specify:- Name: A unique name that should reflect the main theme of the content (e.g., “Stocks”, “Cancellations”, etc).
- Description: A brief description that will help the agent understand the context and limitations of the content.
- Example Conversation: An example dialogue that illustrates how the agent should handle the topic or content within the guardrail. (e.g., “Customer: I want to cancel my subscription. Agent: Sure, I can help you with that.”)
- Example Explanation: An explanation of why the example conversation is appropriate and how it aligns with the input guardrail.
Safety and Scope
Learn how to customize GenerativeAgent’s scope and safety guardrails.
Voice Configuration
The Voice Configuration section allows you to set up the agent’s voice and the Agent Version.Agent Version
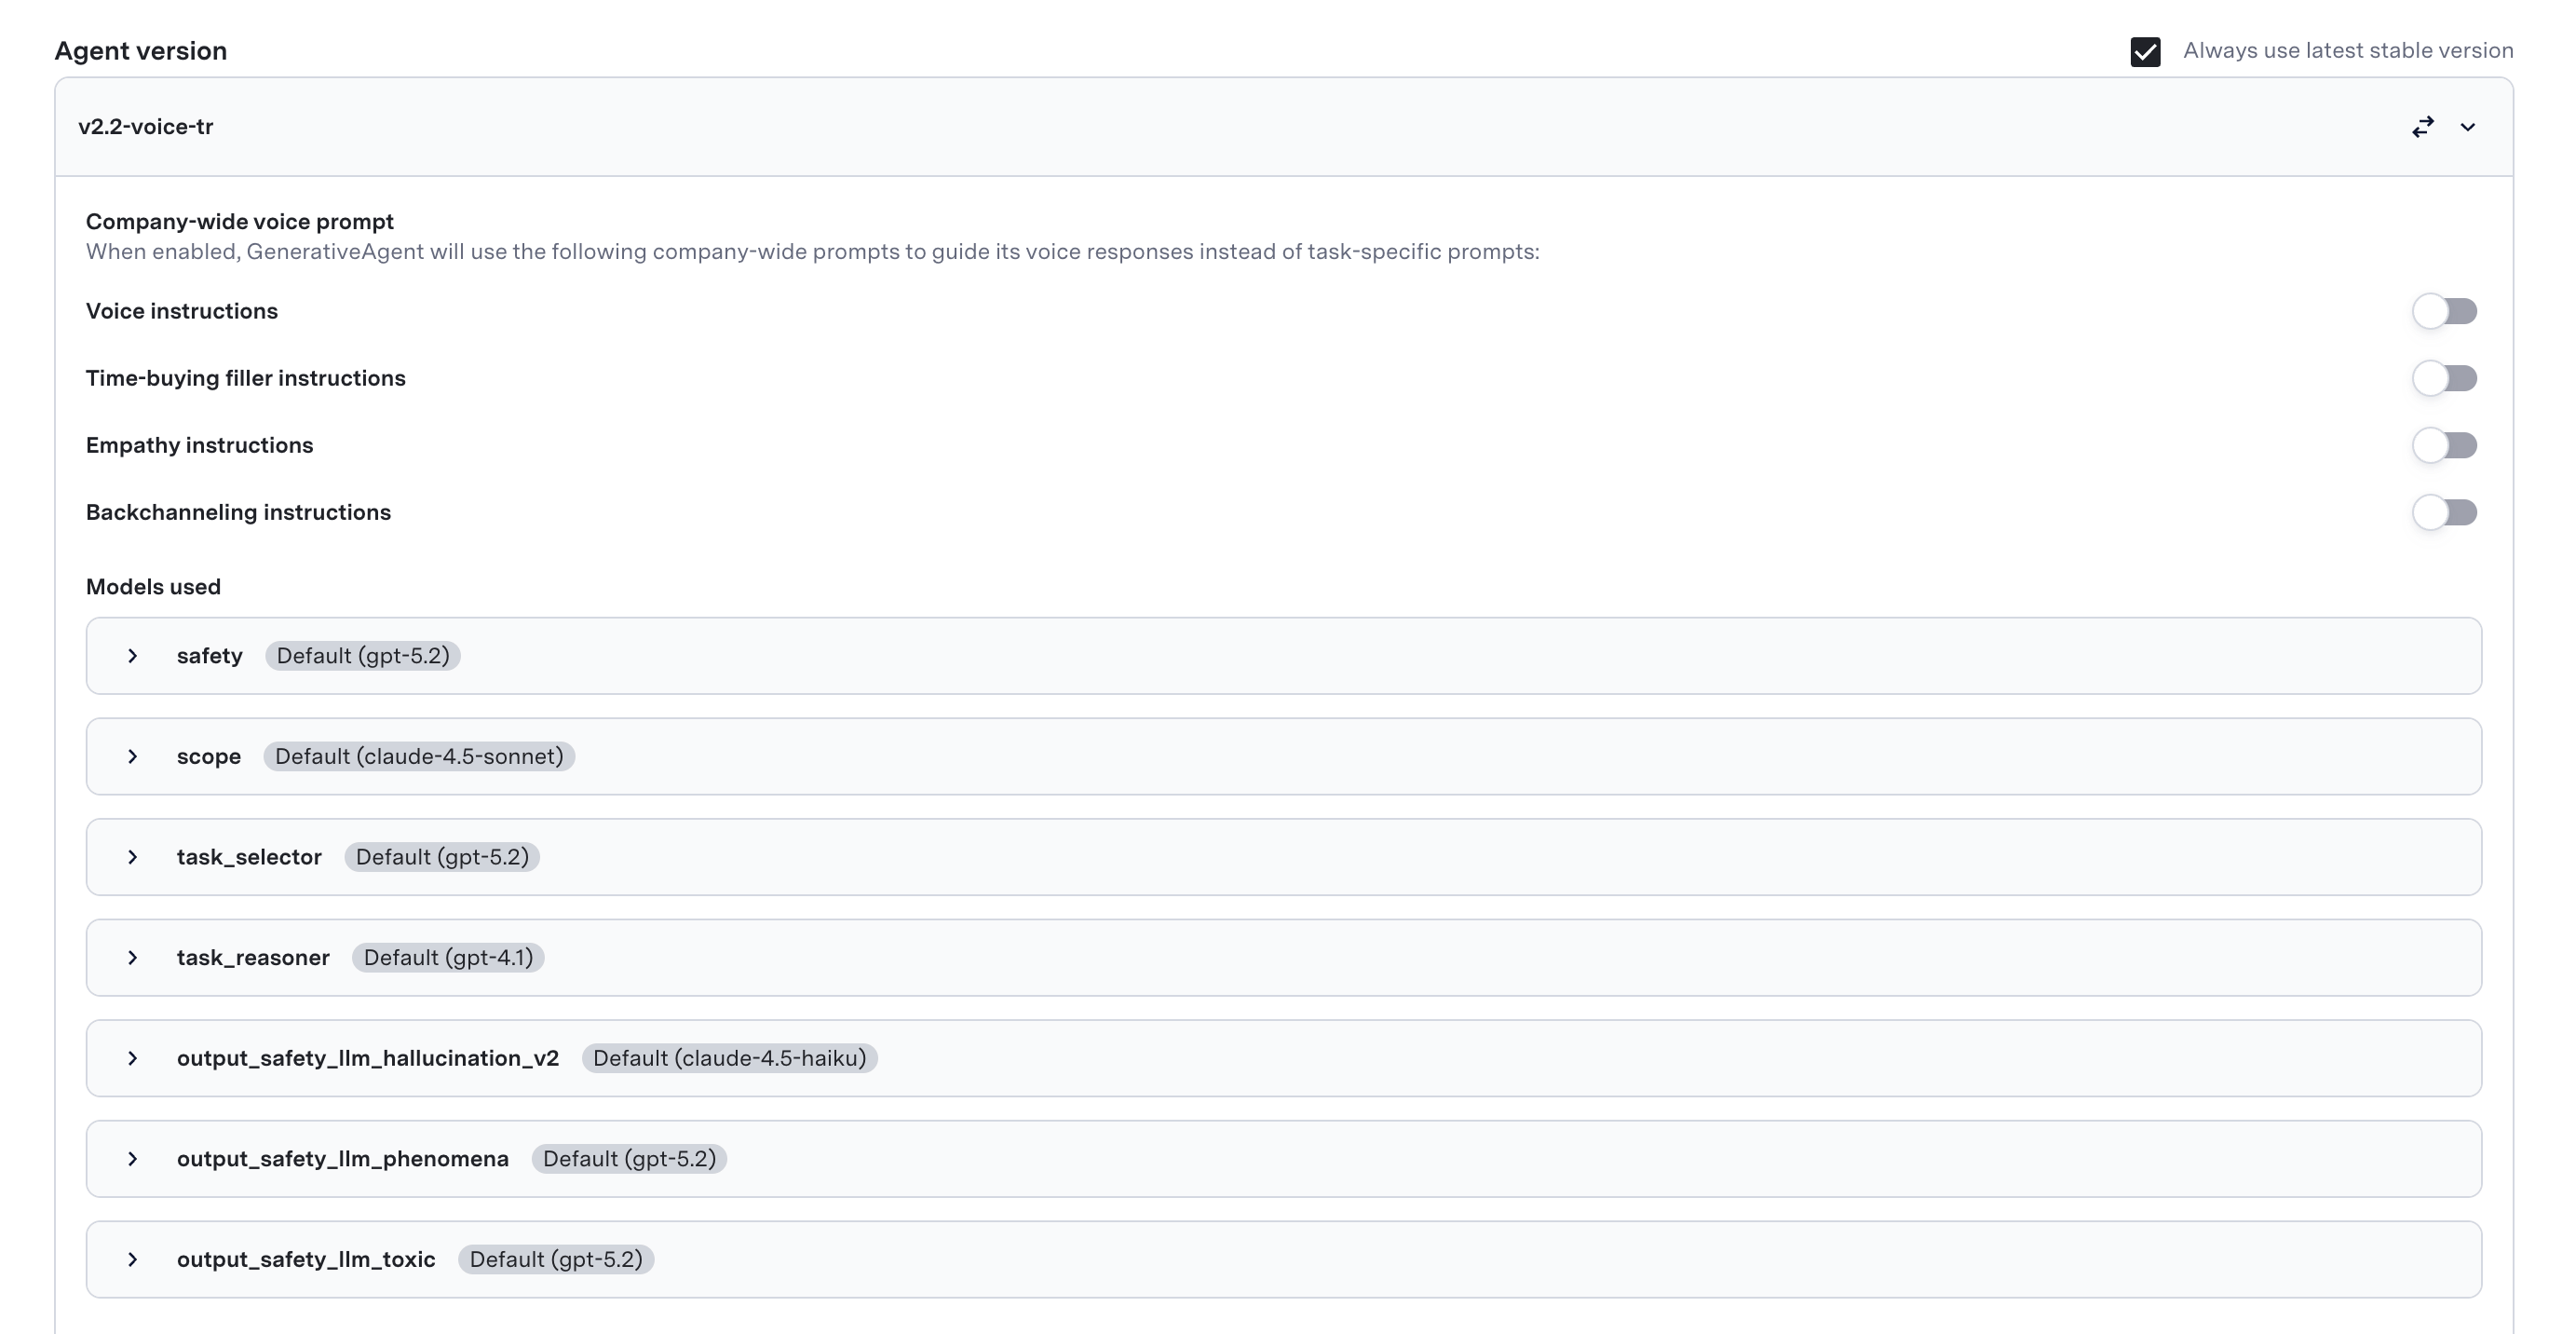
This setting allows you to specify Company-wide voice prompts and the version of the models that will be used during interactions with customers. You can swap between the different versions as needed. You can also enable “Always use latest stable version” if you want the agent to automatically use the most recent stable version of the model. Expand the Agent Version setting to configure:Company-wide voice prompt
Company-wide voice prompt
When enabled, GenerativeAgent uses the following company-wide prompts to guide its voice responses instead of task-specific prompts.
- Voice instructions: Instruct the agent on how to use its voice during interactions with customers (e.g., tone, pitch, speed).
- Time-buying filler instructions: Instruct the agent on how to use filler phrases to buy time during conversations (e.g., “Let me check that for you”, “One moment please”).
- Empathy instructions: Instruct the agent on how to express empathy during interactions with customers.
- Backchanneling instructions: Instruct the agent on how to use backchanneling cues (e.g., “I see”, “Uh-huh”) to show active listening.
Configure Models used
Configure Models used
Configure the models used for the following functions:
- safety
- scope
- task_selector
- task_reasoner
- output_safety_llm_hallucination
- output_safety_llm_phenomena
- output_safety_llm_toxic
- Provider: The provider of the model (e.g., OpenAI, Anthropic).
- Model: The model used (e.g., GPT-4, Claude v1).
- LLM arguments: The arguments passed to the model.
- Retry model settings: The arguments passed to the model to handle retries.
- Maximum retry attempts: The maximum number of times the model will retry.
Voice Selection
Select the voice for the agent from the available options. You can preview each voice before making a selection.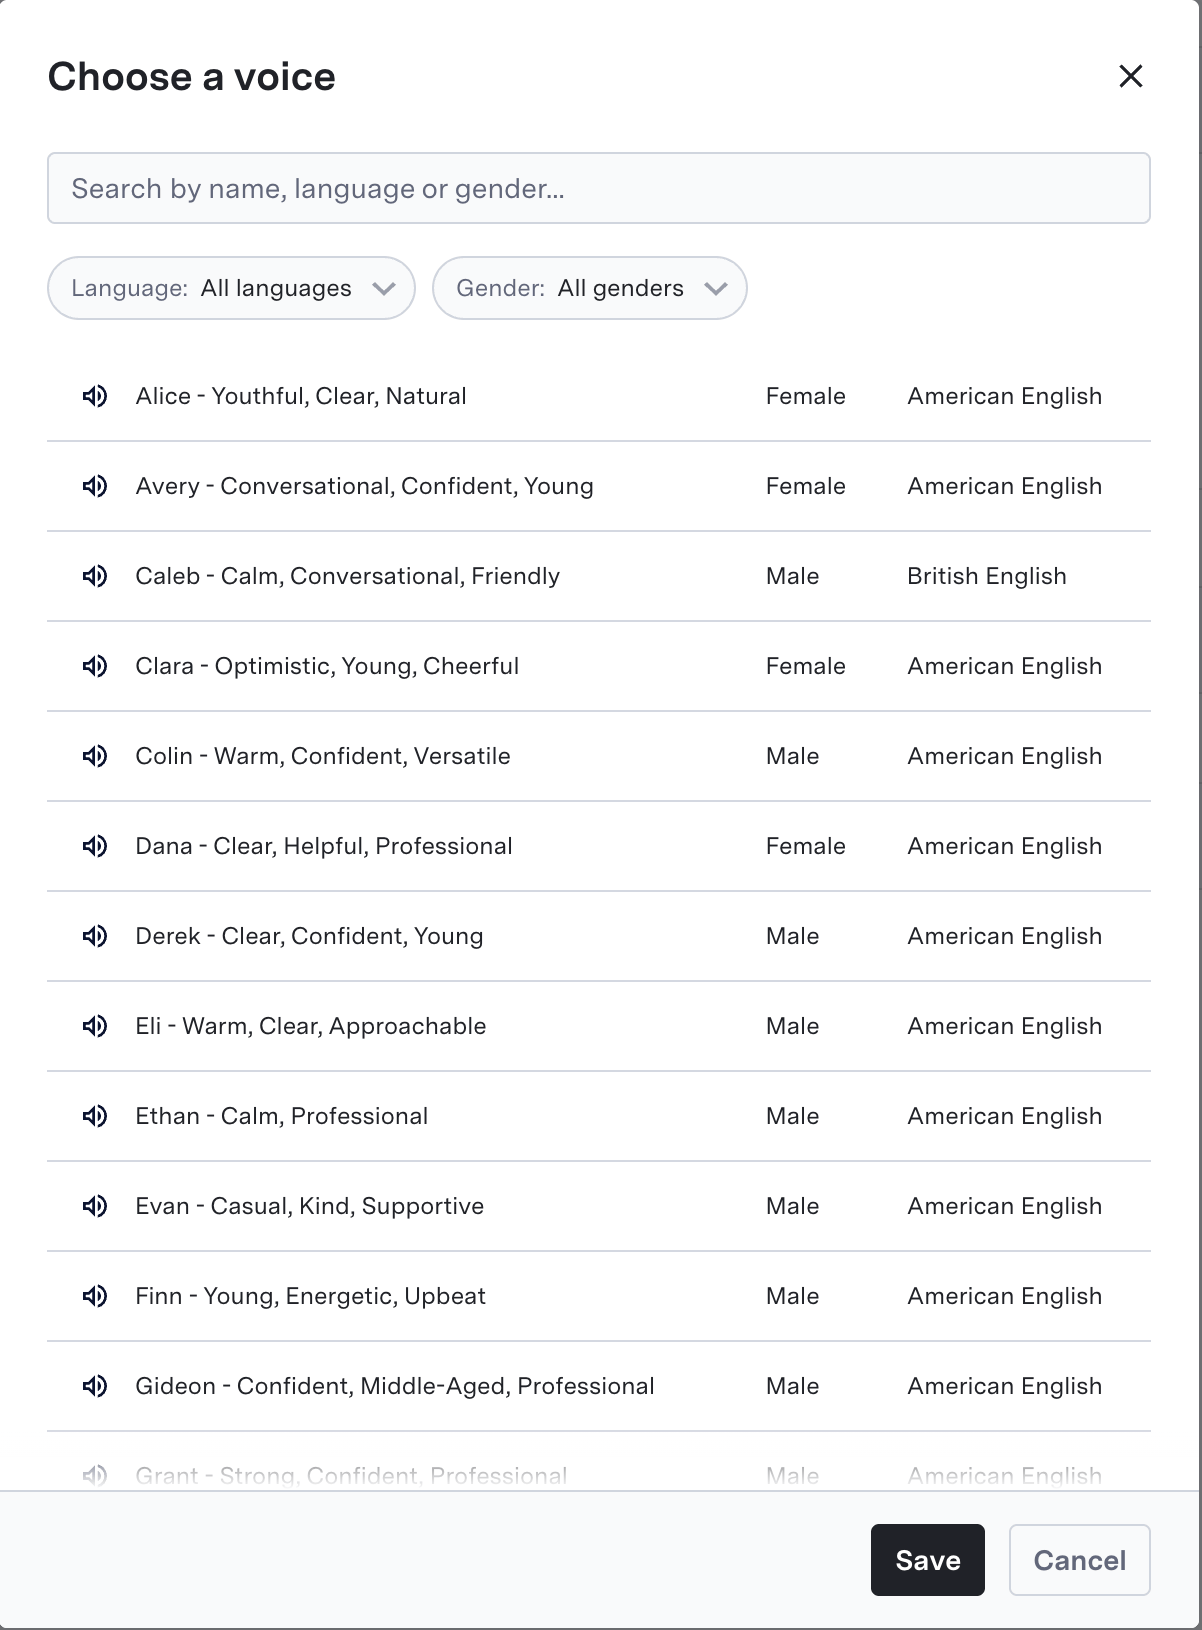
Chat Configuration
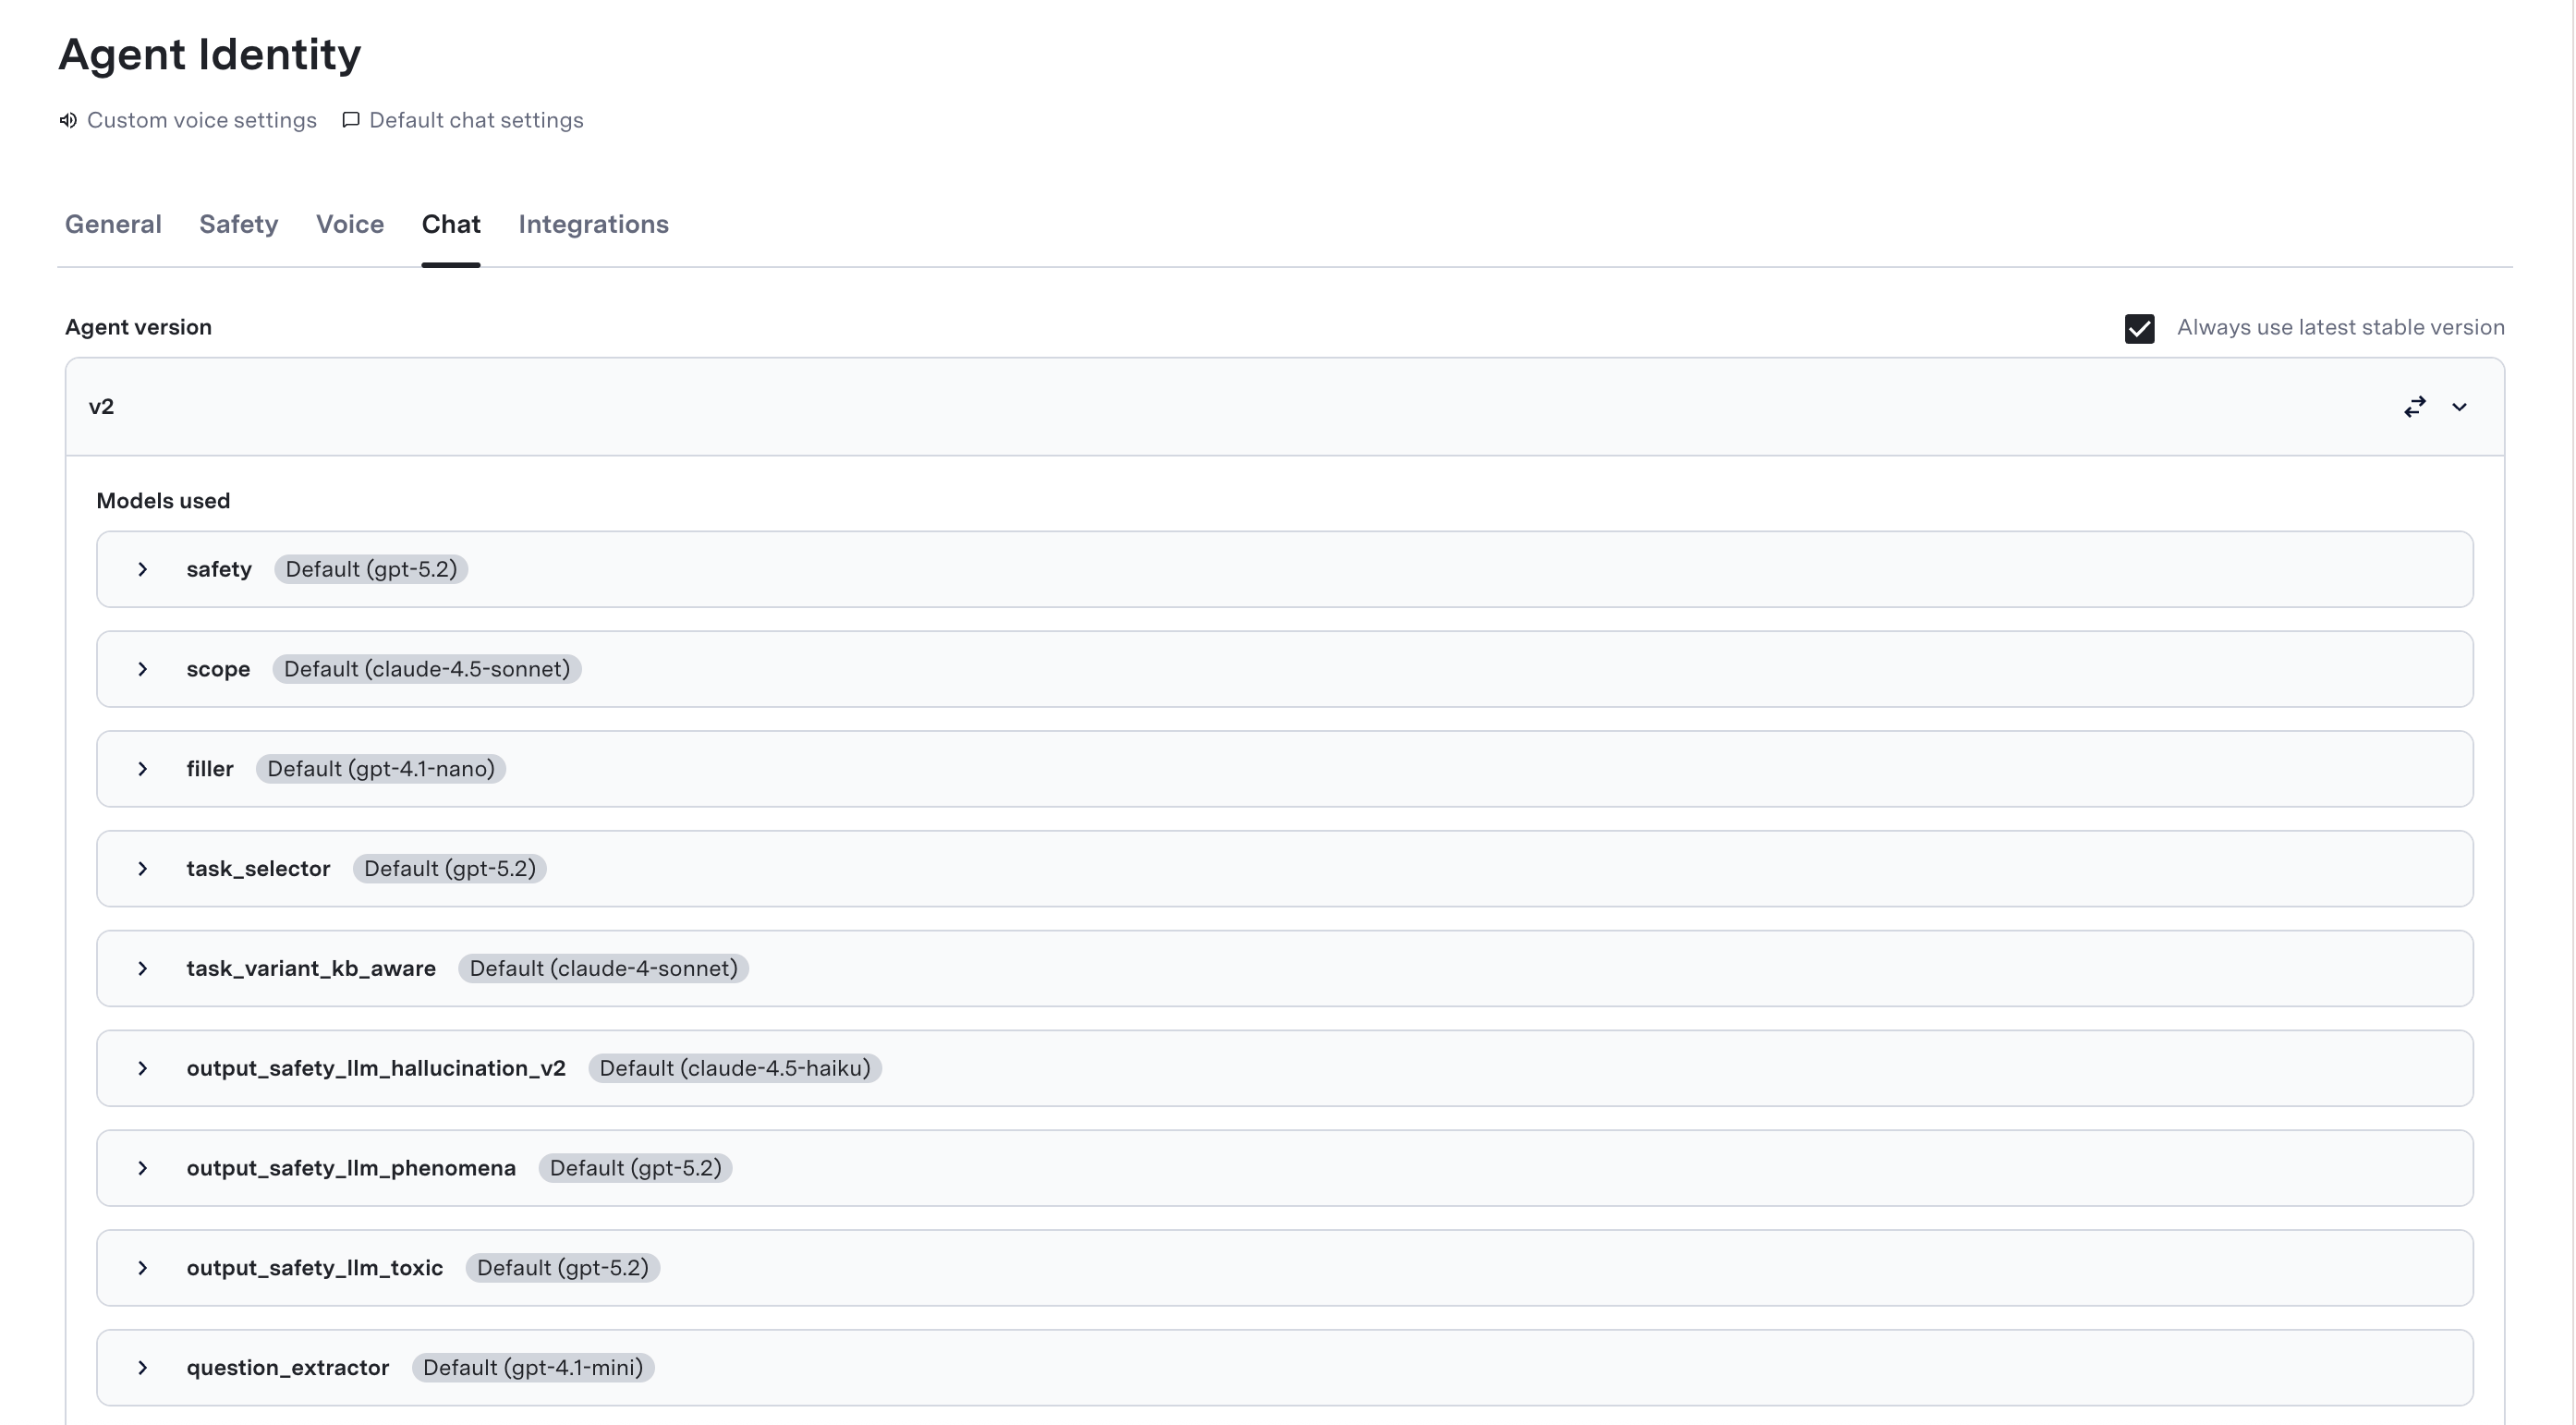
Configure the models used for the following functions during a chat interaction:- safety
- scope
- filler
- task_selector
- task_variant_kb_aware
- output_safety_llm_hallucination
- output_safety_llm_phenomena
- output_safety_llm_toxic
- question_extractor
- Provider: The provider of the model (e.g., OpenAI, Anthropic).
- Model: The model used (e.g., GPT-4, Claude v1).
- LLM arguments: The arguments passed to the model.
- Retry model settings: The arguments passed to the model to handle retries.
- Maximum retry attempts: The maximum number of times the model will retry.
Integration-settings
Configure HILA integration and other third-party integrations with sensitive API keys.Sensitive API Keys
Add the names of of any API fields that contain sensitive customer data. Once added, the Sensitive data protection toggle in Safety controls whether filtering is active. To add a sensitive API key, click the “Add” button, enter the name of the API field, and click “Add” again.HILA Configuration
HILA (Human-in-the-Loop AI) allows you to integrate human oversight into the agent’s decision-making process. You can configure HILA settings to manage the following aspects of contact center interactions:Timeout Settings
Timeout Settings
Configure the timeout settings for HILA interactions, including: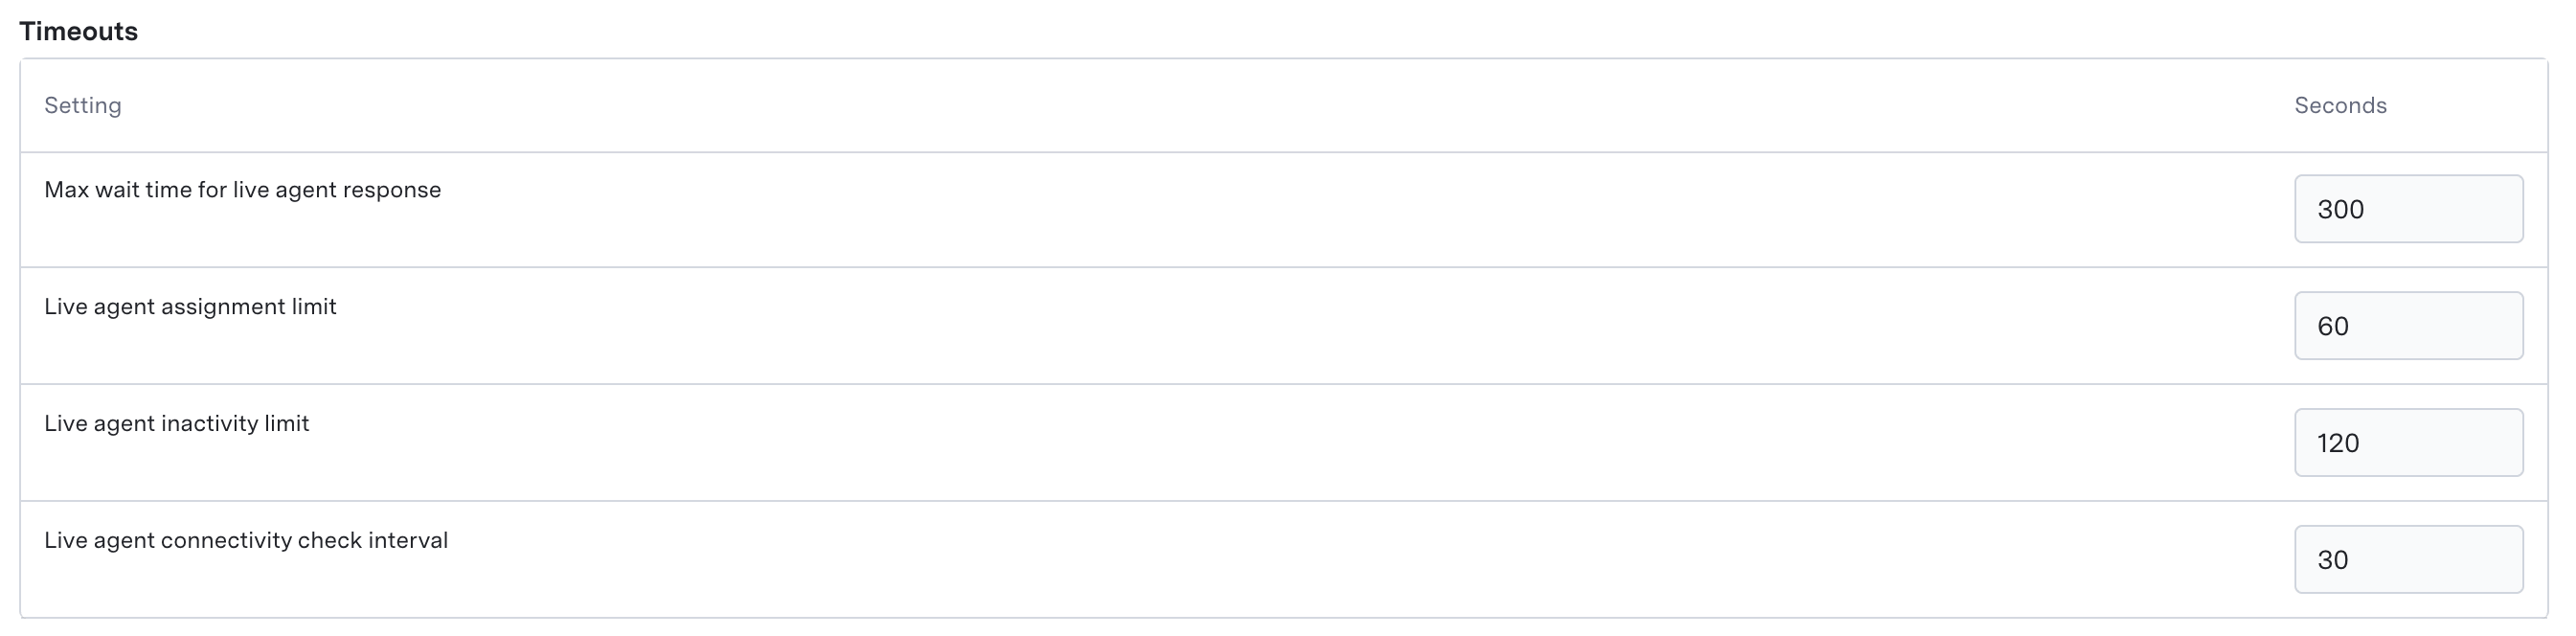
- Maximum wait time for live agent response
- Live agent assignment limit
- Live agent inactivity timeout
- Live agent connectivity check interval
HILA Routing Rules
HILA Routing Rules
Define the routing rules for routing config entry used for CCaaS routing attributes, including: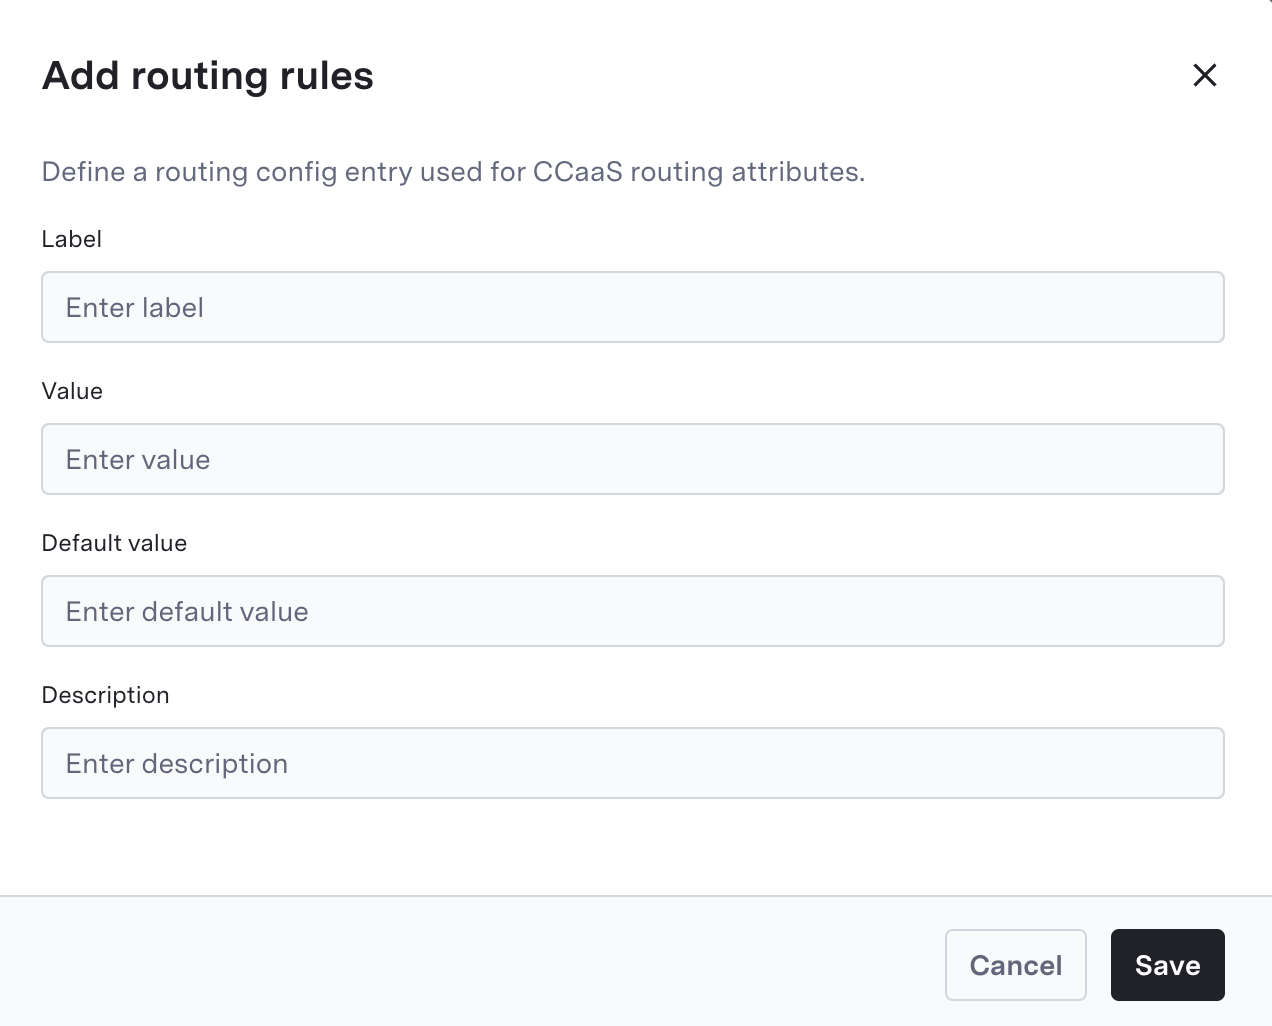
- Label: The label for the routing rule. (e.g., hila_agent)
- Value: The value associated with the routing rule. (e.g., hila_agent_value)
- Default Value: The default value for the routing rule if no specific value is set.
- Description: A brief description of the routing rule and its purpose.
Cutomer Info Attribute Allowlist
Cutomer Info Attribute Allowlist
Define the customer information attributes that will be passed to the agent during interactions. Click on the “Add” button to add a new attribute, and specify the attribute name.
Secure Forms
Secure Forms
Enable Secure Forms to ensure that sensitive customer information are collected and transmitted securely during interactions. You can enable or disable Secure Forms to be used in voice and chat interactions.
Business Hours
Business Hours
Configure the business hours for the agent, including: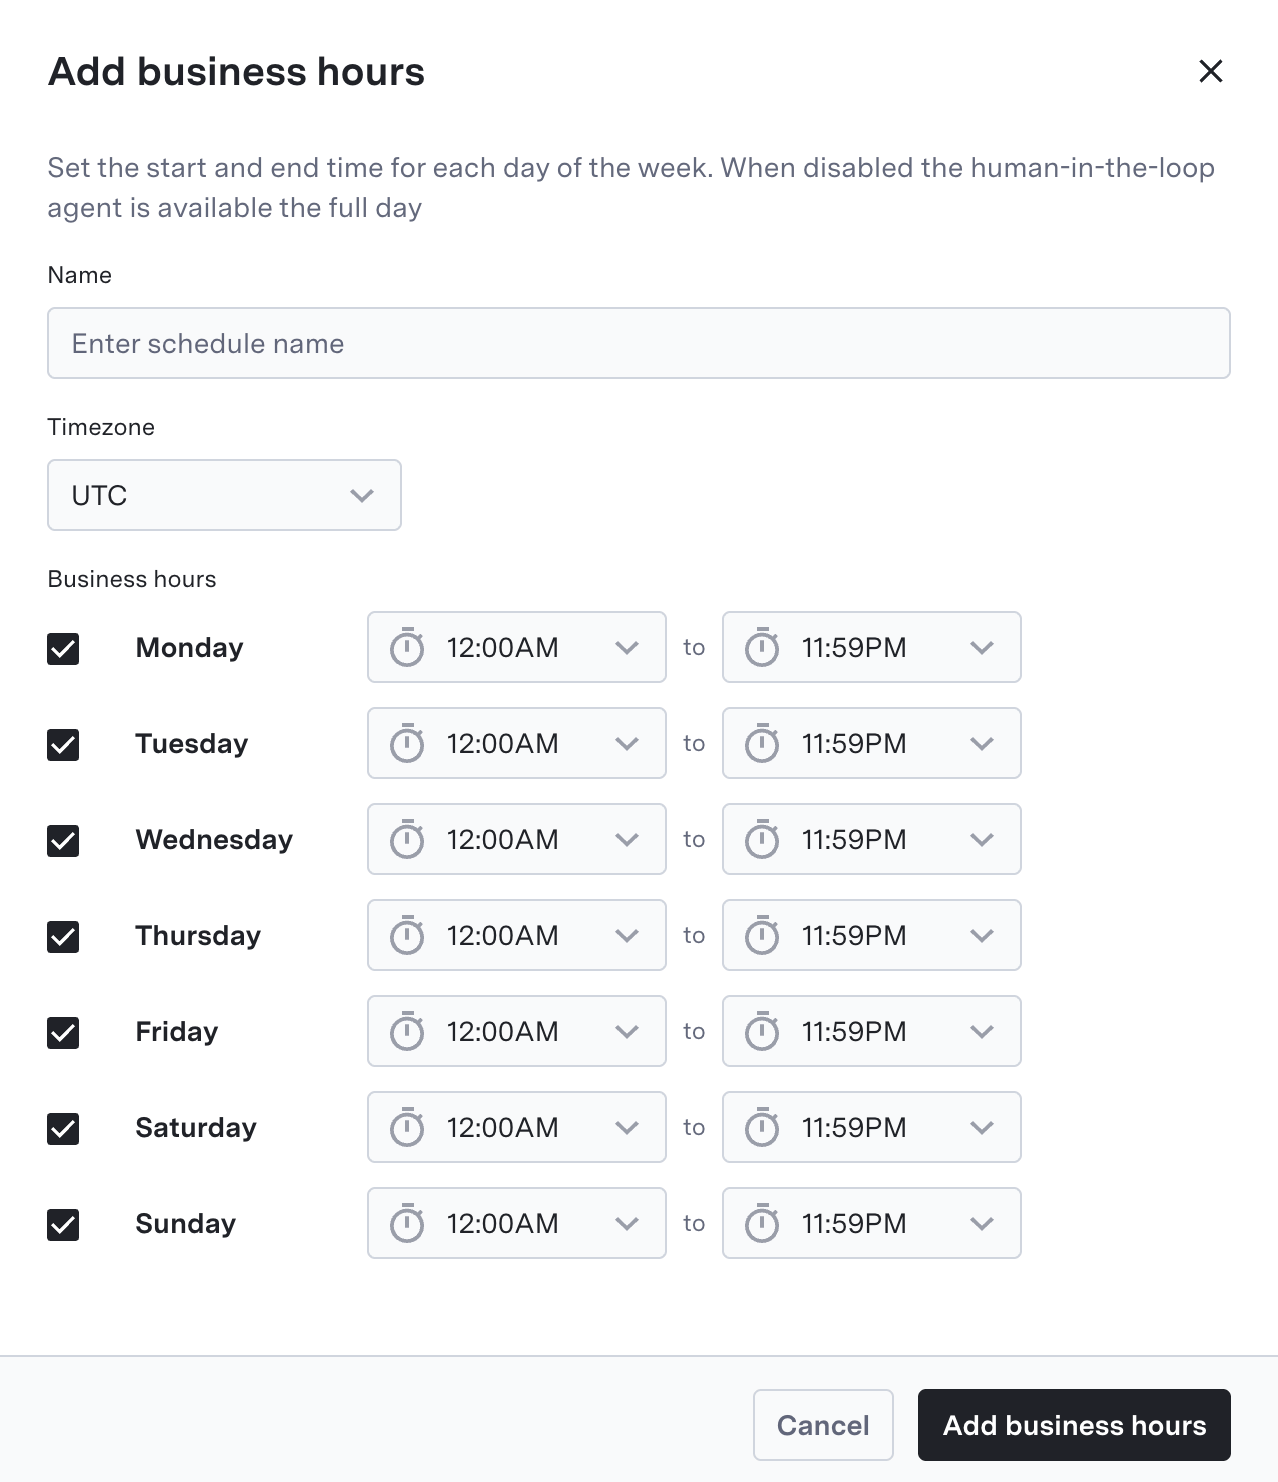
- Time zone: The time zone in which the business hours are defined.
- Business hours: The specific hours during which the agent is available to interact with customers. You can set different hours for each day of the week.
Ccaas Configuration
Ccaas Configuration
Select the type of CCaaS configuration you want to use for the agent. You can choose the configuration for sandbox or production environments.
Deployment
Once you have configured the agent’s identity, you can deploy the agent to your desired environment. To deploy the agent:- Click on the Deploy button in the top right corner of the CXP.
- Select the environments where you want to “Deploy from” and “Deploy to” (e.g., Sandbox, Production).
- In the Release Notes section, provide a brief description of the changes made to the agent’s identity.
- In the Resources section, select Agent Identity under General Configuration to include the agent’s identity configuration in the deployment.
- Click on the Deploy button to initiate the deployment process.
Next Steps
Add a use case
Learn how to add a use case for your agent, defining the specific scenarios and interactions it will handle.
Connect your Knowledge base
Learn how to configure the knowledge base for your agent, including adding, updating, and managing knowledge articles.
Configure your Conversations
Learn how to configure conversations for your agent, including setting up conversation flows and managing customer interactions.
Enable HILA Secure Forms
Learn how to enable HILA Secure Forms to collect sensitive customer information securely during interactions.